
Reviewing and Finishing a Consultation
Reviewing and Finishing a Consultation
What: The final Review tab step: checking the invoice, choosing whether to send it to admin, and closing out the consultation.
Why: Finishing correctly saves the encounter to the patient's timeline and routes the invoice to the right place for billing.
When: At the end of every consultation, once notes, diagnosis, and plan are complete.
Steps
1. Review the invoice, send to admin, and click Finish
Location: Consultation › Review tab
Click the 'Review' tab (last tab in the consultation navigation). Verify the invoice line items, invoice type, and place of service. Expand 'Additional Claim Information' if you need to capture Time of Service, Admission/Discharge dates, an Authorisation number, or a Referring/Assisting provider. Then choose how to finalise:
- Tick 'Send to admin' if you want your practice's admin and billing team to complete the invoice on their side. Leave it unticked if you'd rather submit it directly to the medical aid yourself.
- Click the orange 'Finish' button to close the consultation. The notes are locked and the full encounter is saved to the patient's timeline.
- Click 'Save' (or close the file) if you want to pause and continue later, the consultation remains open and can be resumed by opening the patient file and clicking 'Continue consult'.
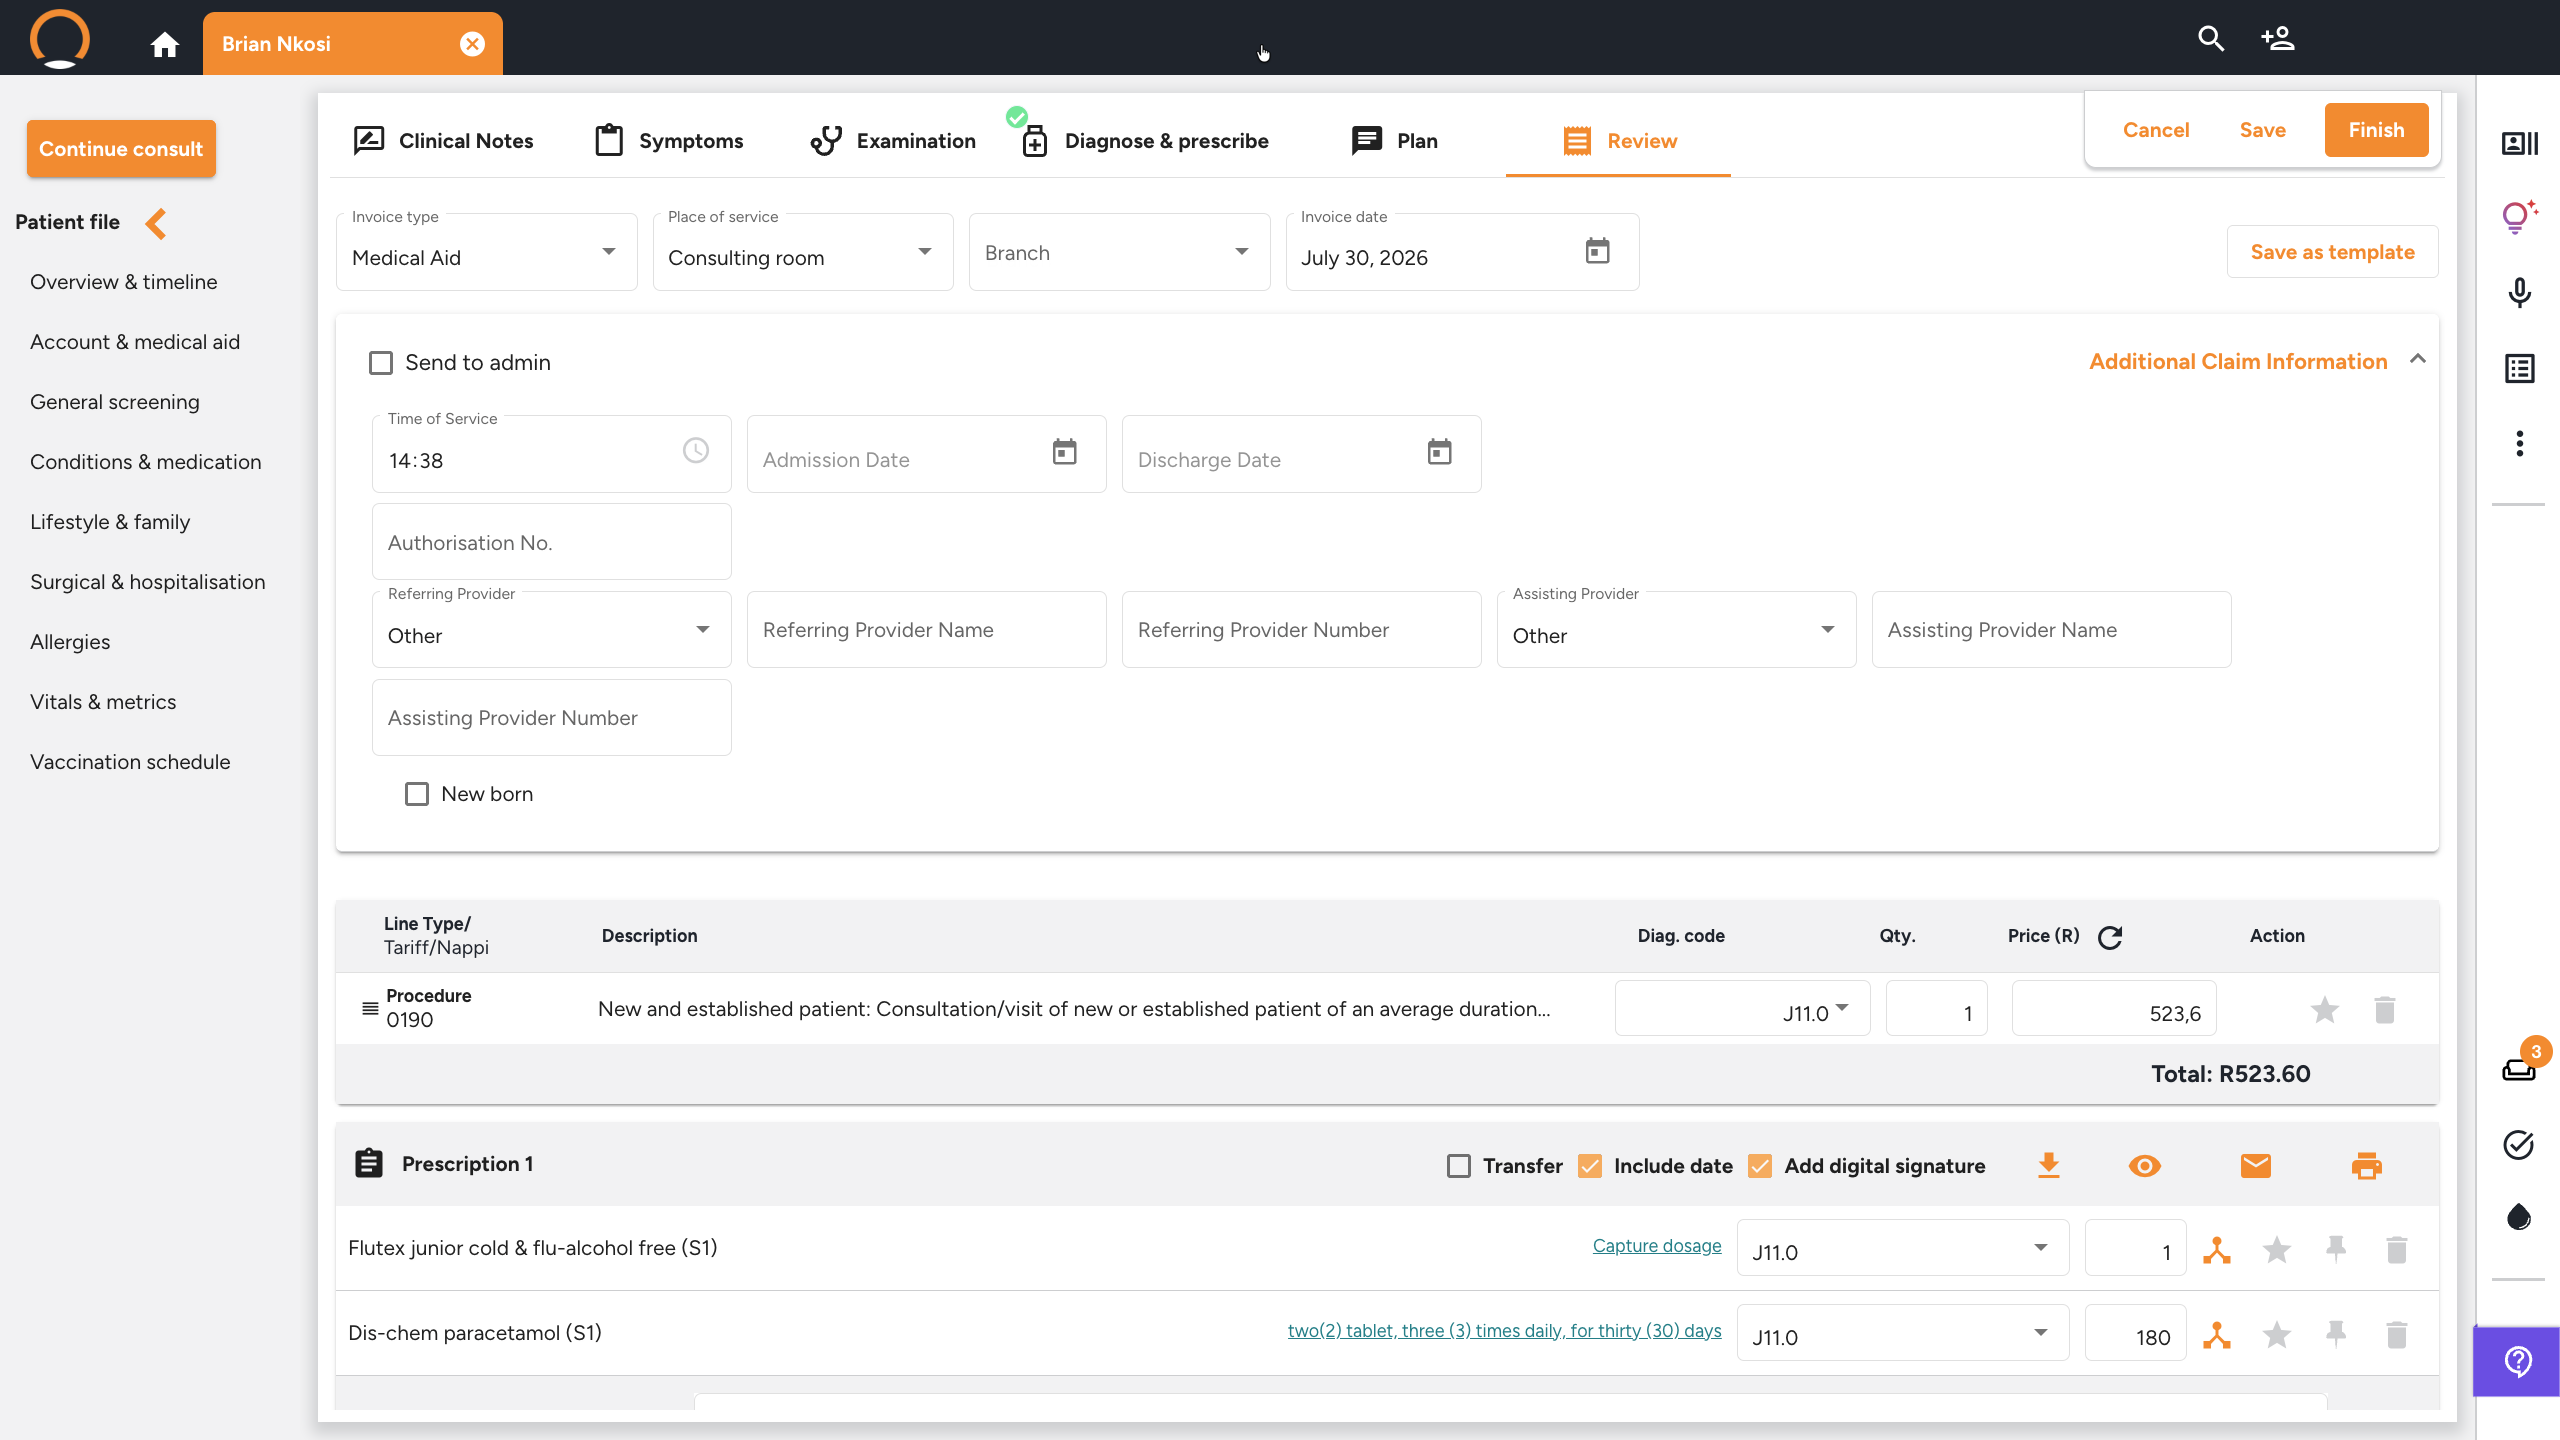
You should see: clicking Finish closes the consultation and saves the encounter. The invoice moves to the admin inbox if Send to admin was ticked, or goes directly to the medical aid if not.