
Ampath Historic Result Retrieval
Prerequisites Before Launching a Request
Before starting, ensure you have completed the following verification parameters:
- Patient Consent: Valid clinical consent for historical pathology data retrieval must be explicitly discussed and obtained from the patient.
- Identity Verification: Ensure the patient's file has an accurate legal South African ID or Passport number that perfectly matches Ampath's records.
- Clinician Mnemonic Code: Have your active practice-specific mnemonic code ready for the initial setup. Once successfully entered, it permanently caches so you do not need to retype it during subsequent lookups.
Step-by-Step Retrieval Workflow
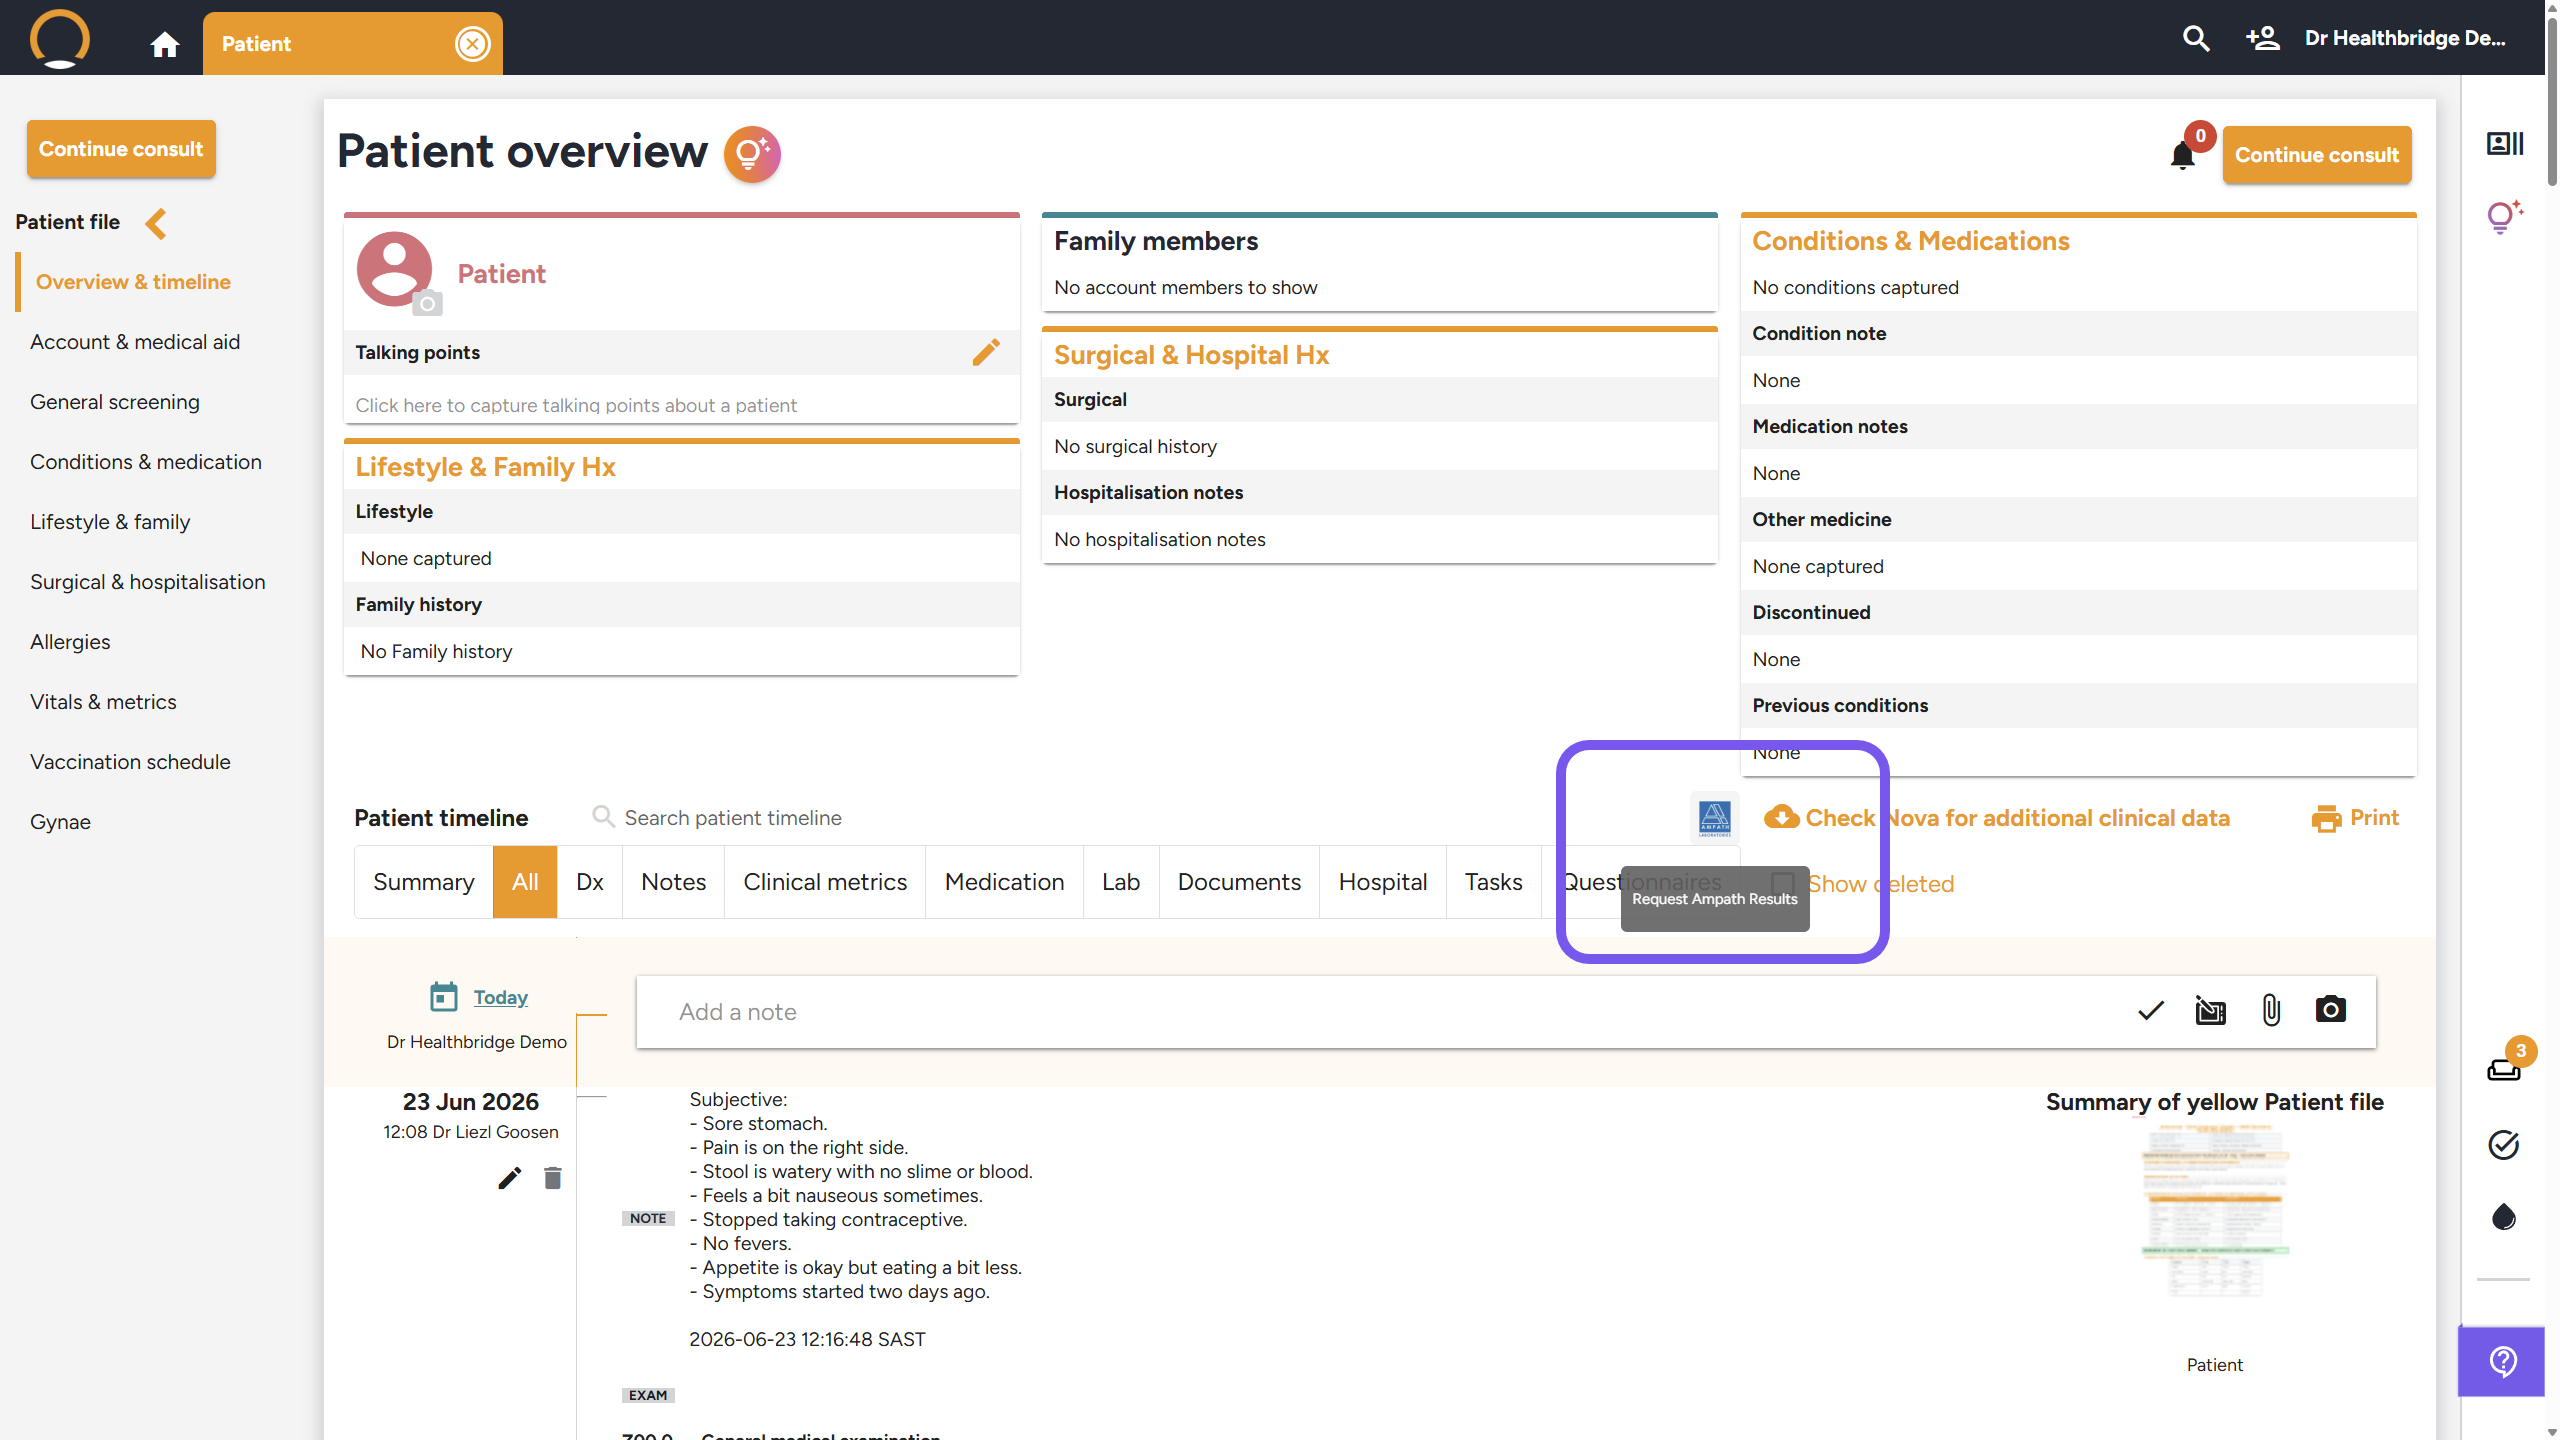
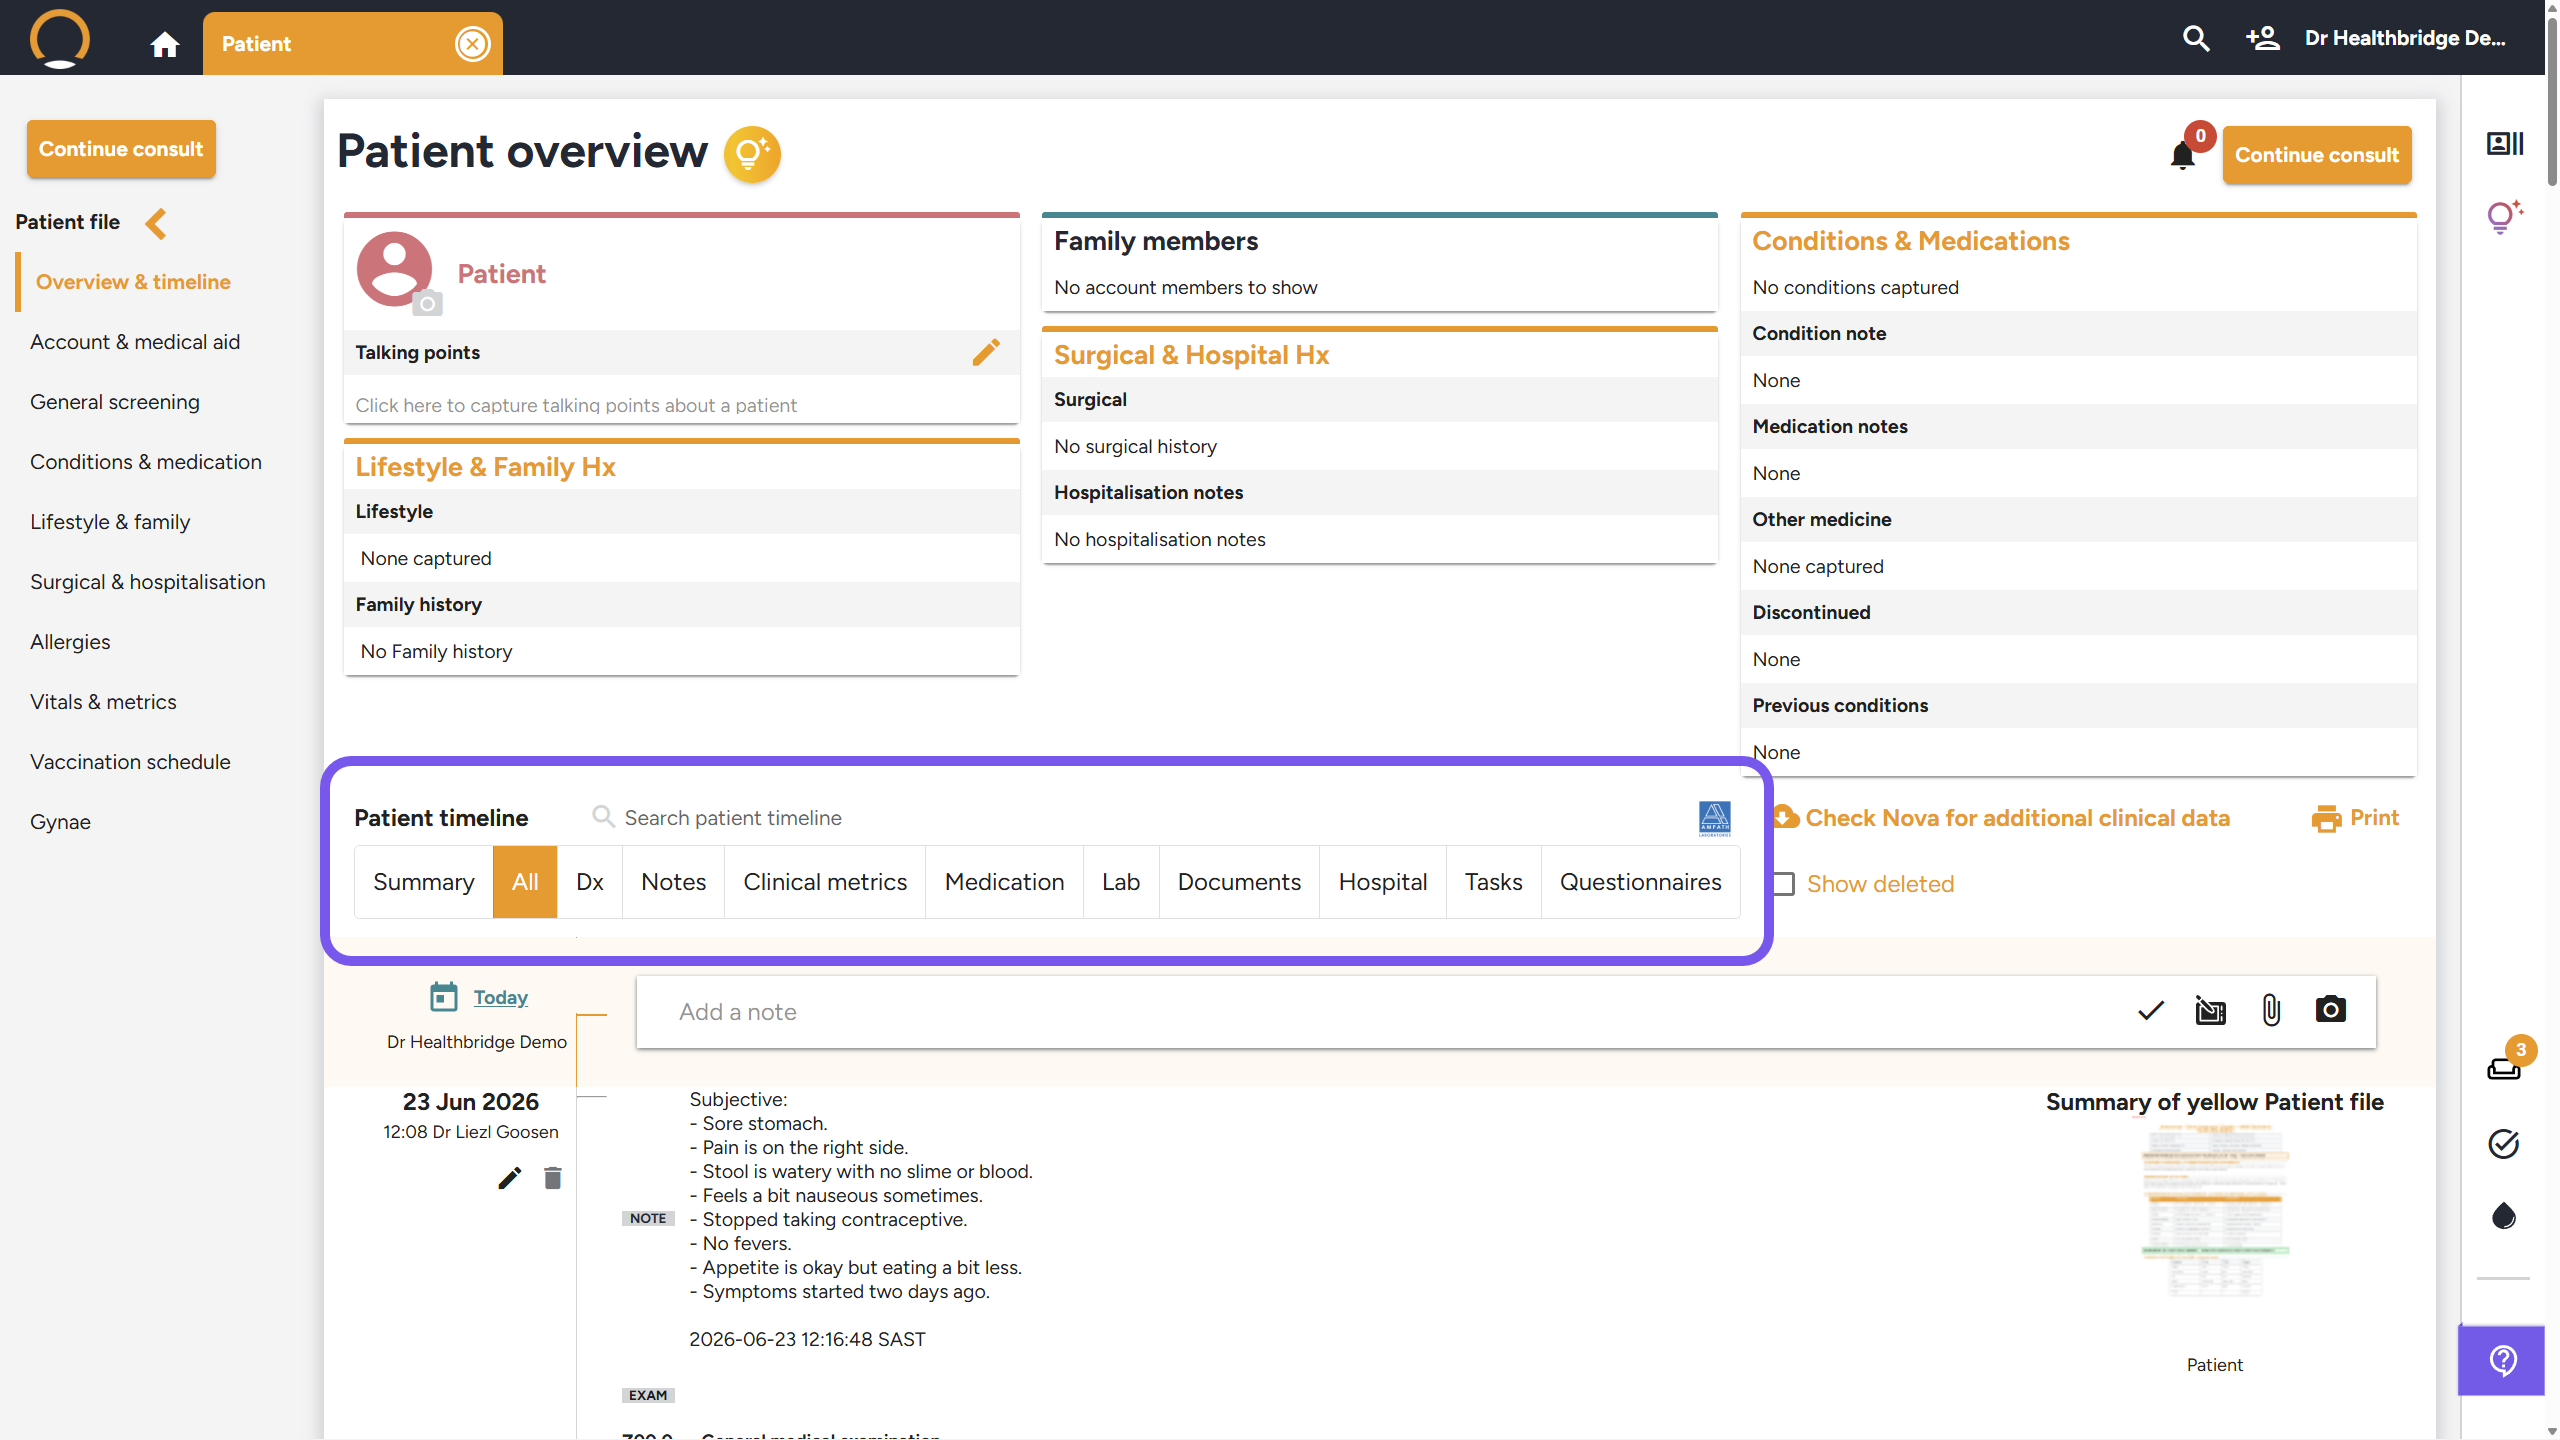
Step 1: Open the Patient File & Locate the Action Button
Access the correct patient file via your schedule, search bar, or waiting room to land on the core Overview & timeline screen.
Step 2: Trigger the Request Modal
Hover your mouse over the blue icon to reveal the "Request Ampath Results" tooltip. Click the blue Ampath icon to launch the Confirm Retrieval Details pop-up window.
Step 3: Complete the Retrieval Parameters
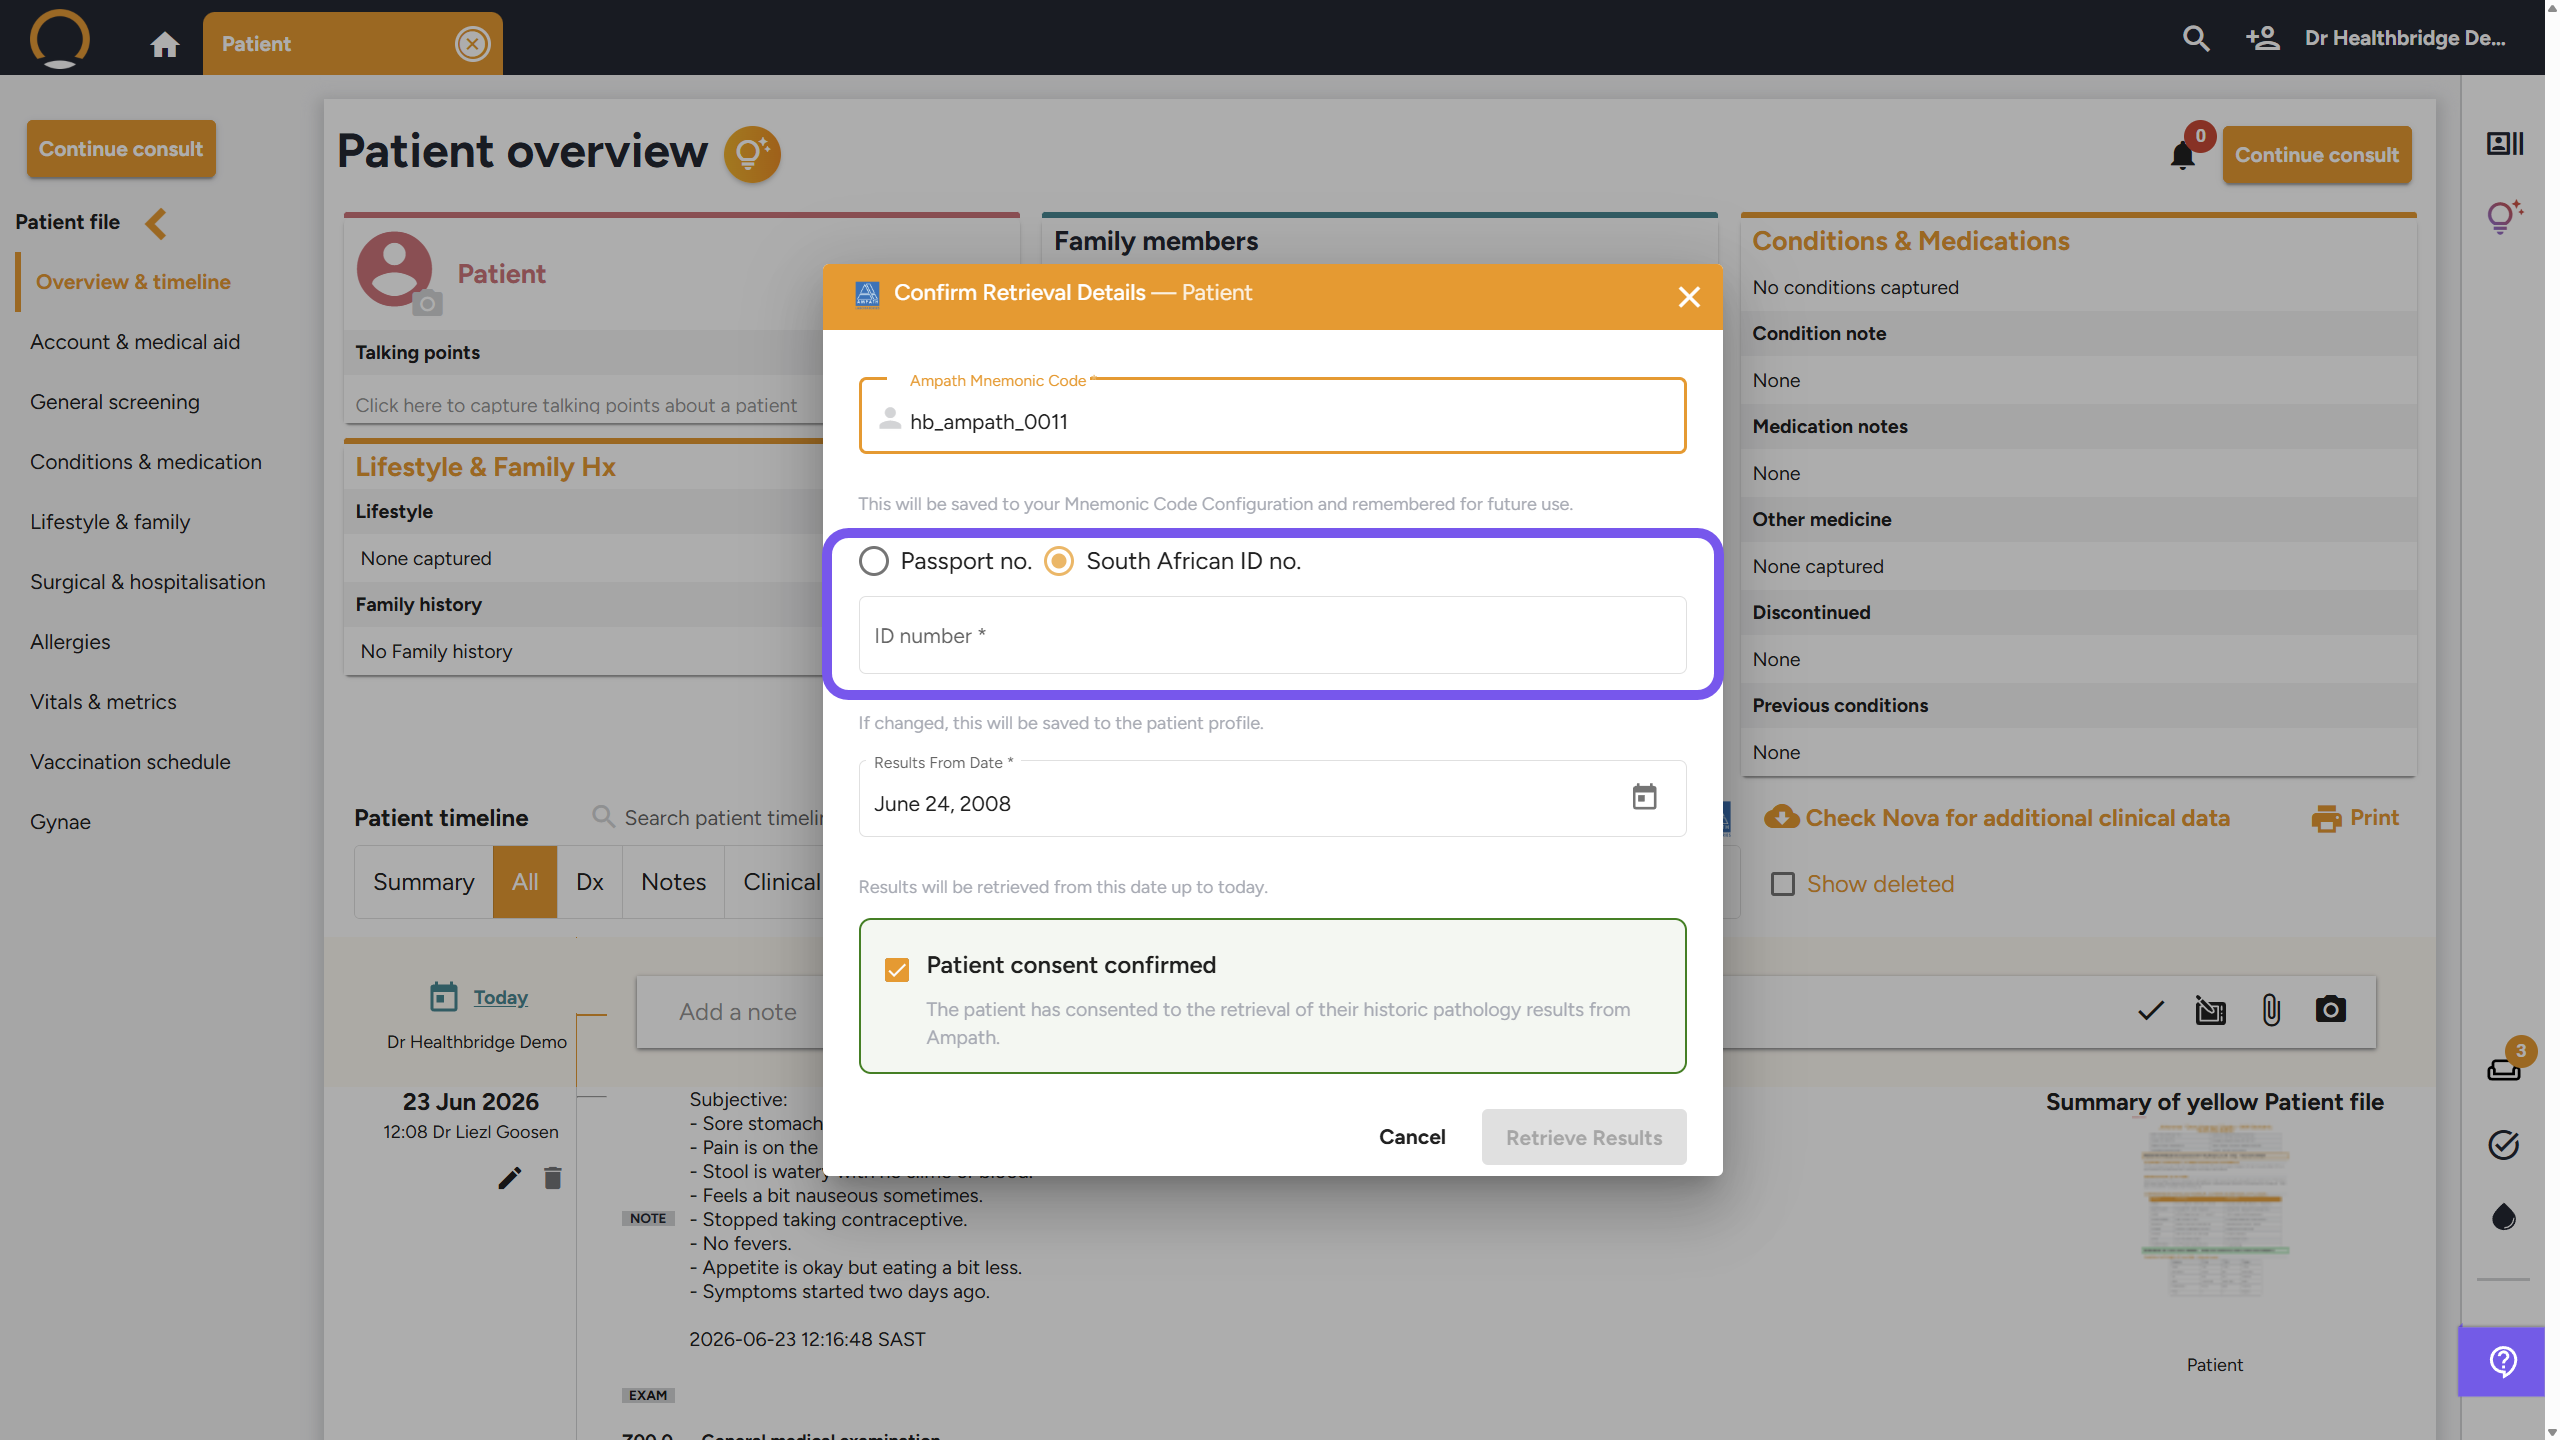
When the modal opens, verify that your pre-populated Ampath Mnemonic Code is correct. Next, choose the appropriate identity document type by clicking the radio button for either South African ID no. or Passport no.
Step 4: Set Your Custom Historical Date Range
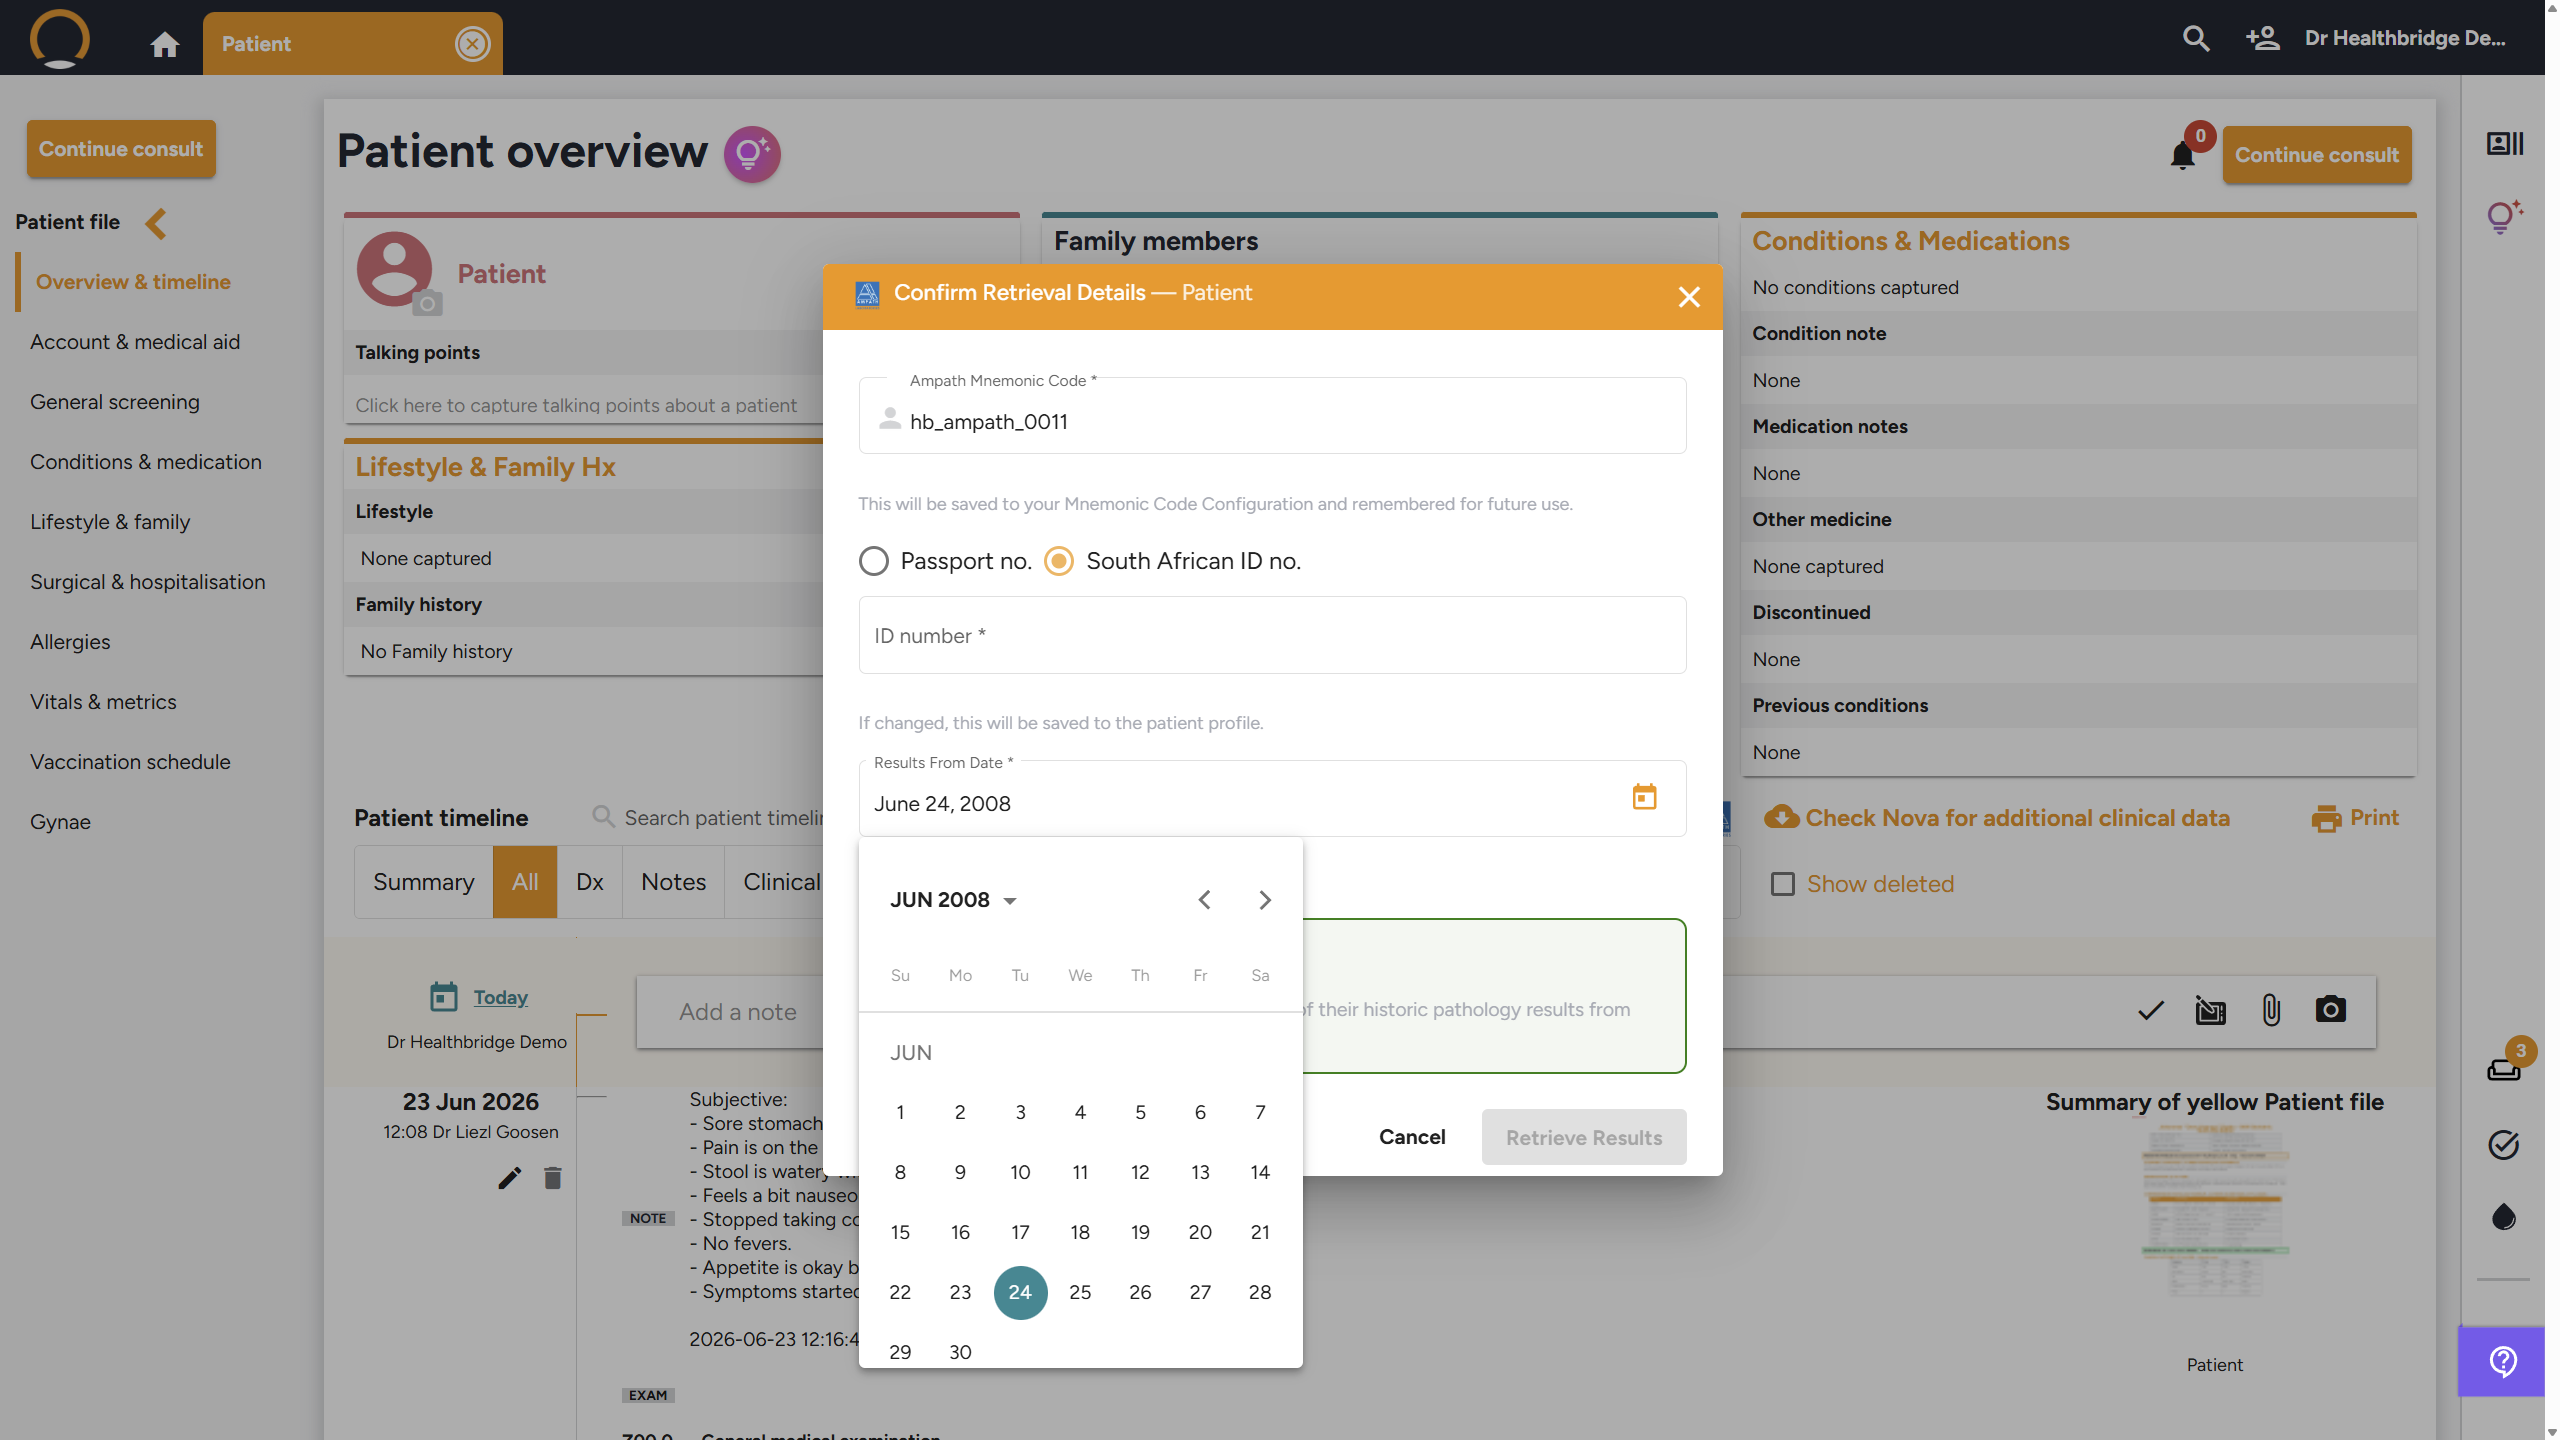
Click on the calendar picker icon next to the Results From Date field. Select the historical date from which the system should begin querying the Ampath databases.
Step 5: Confirm Consent & Execute Retrieval
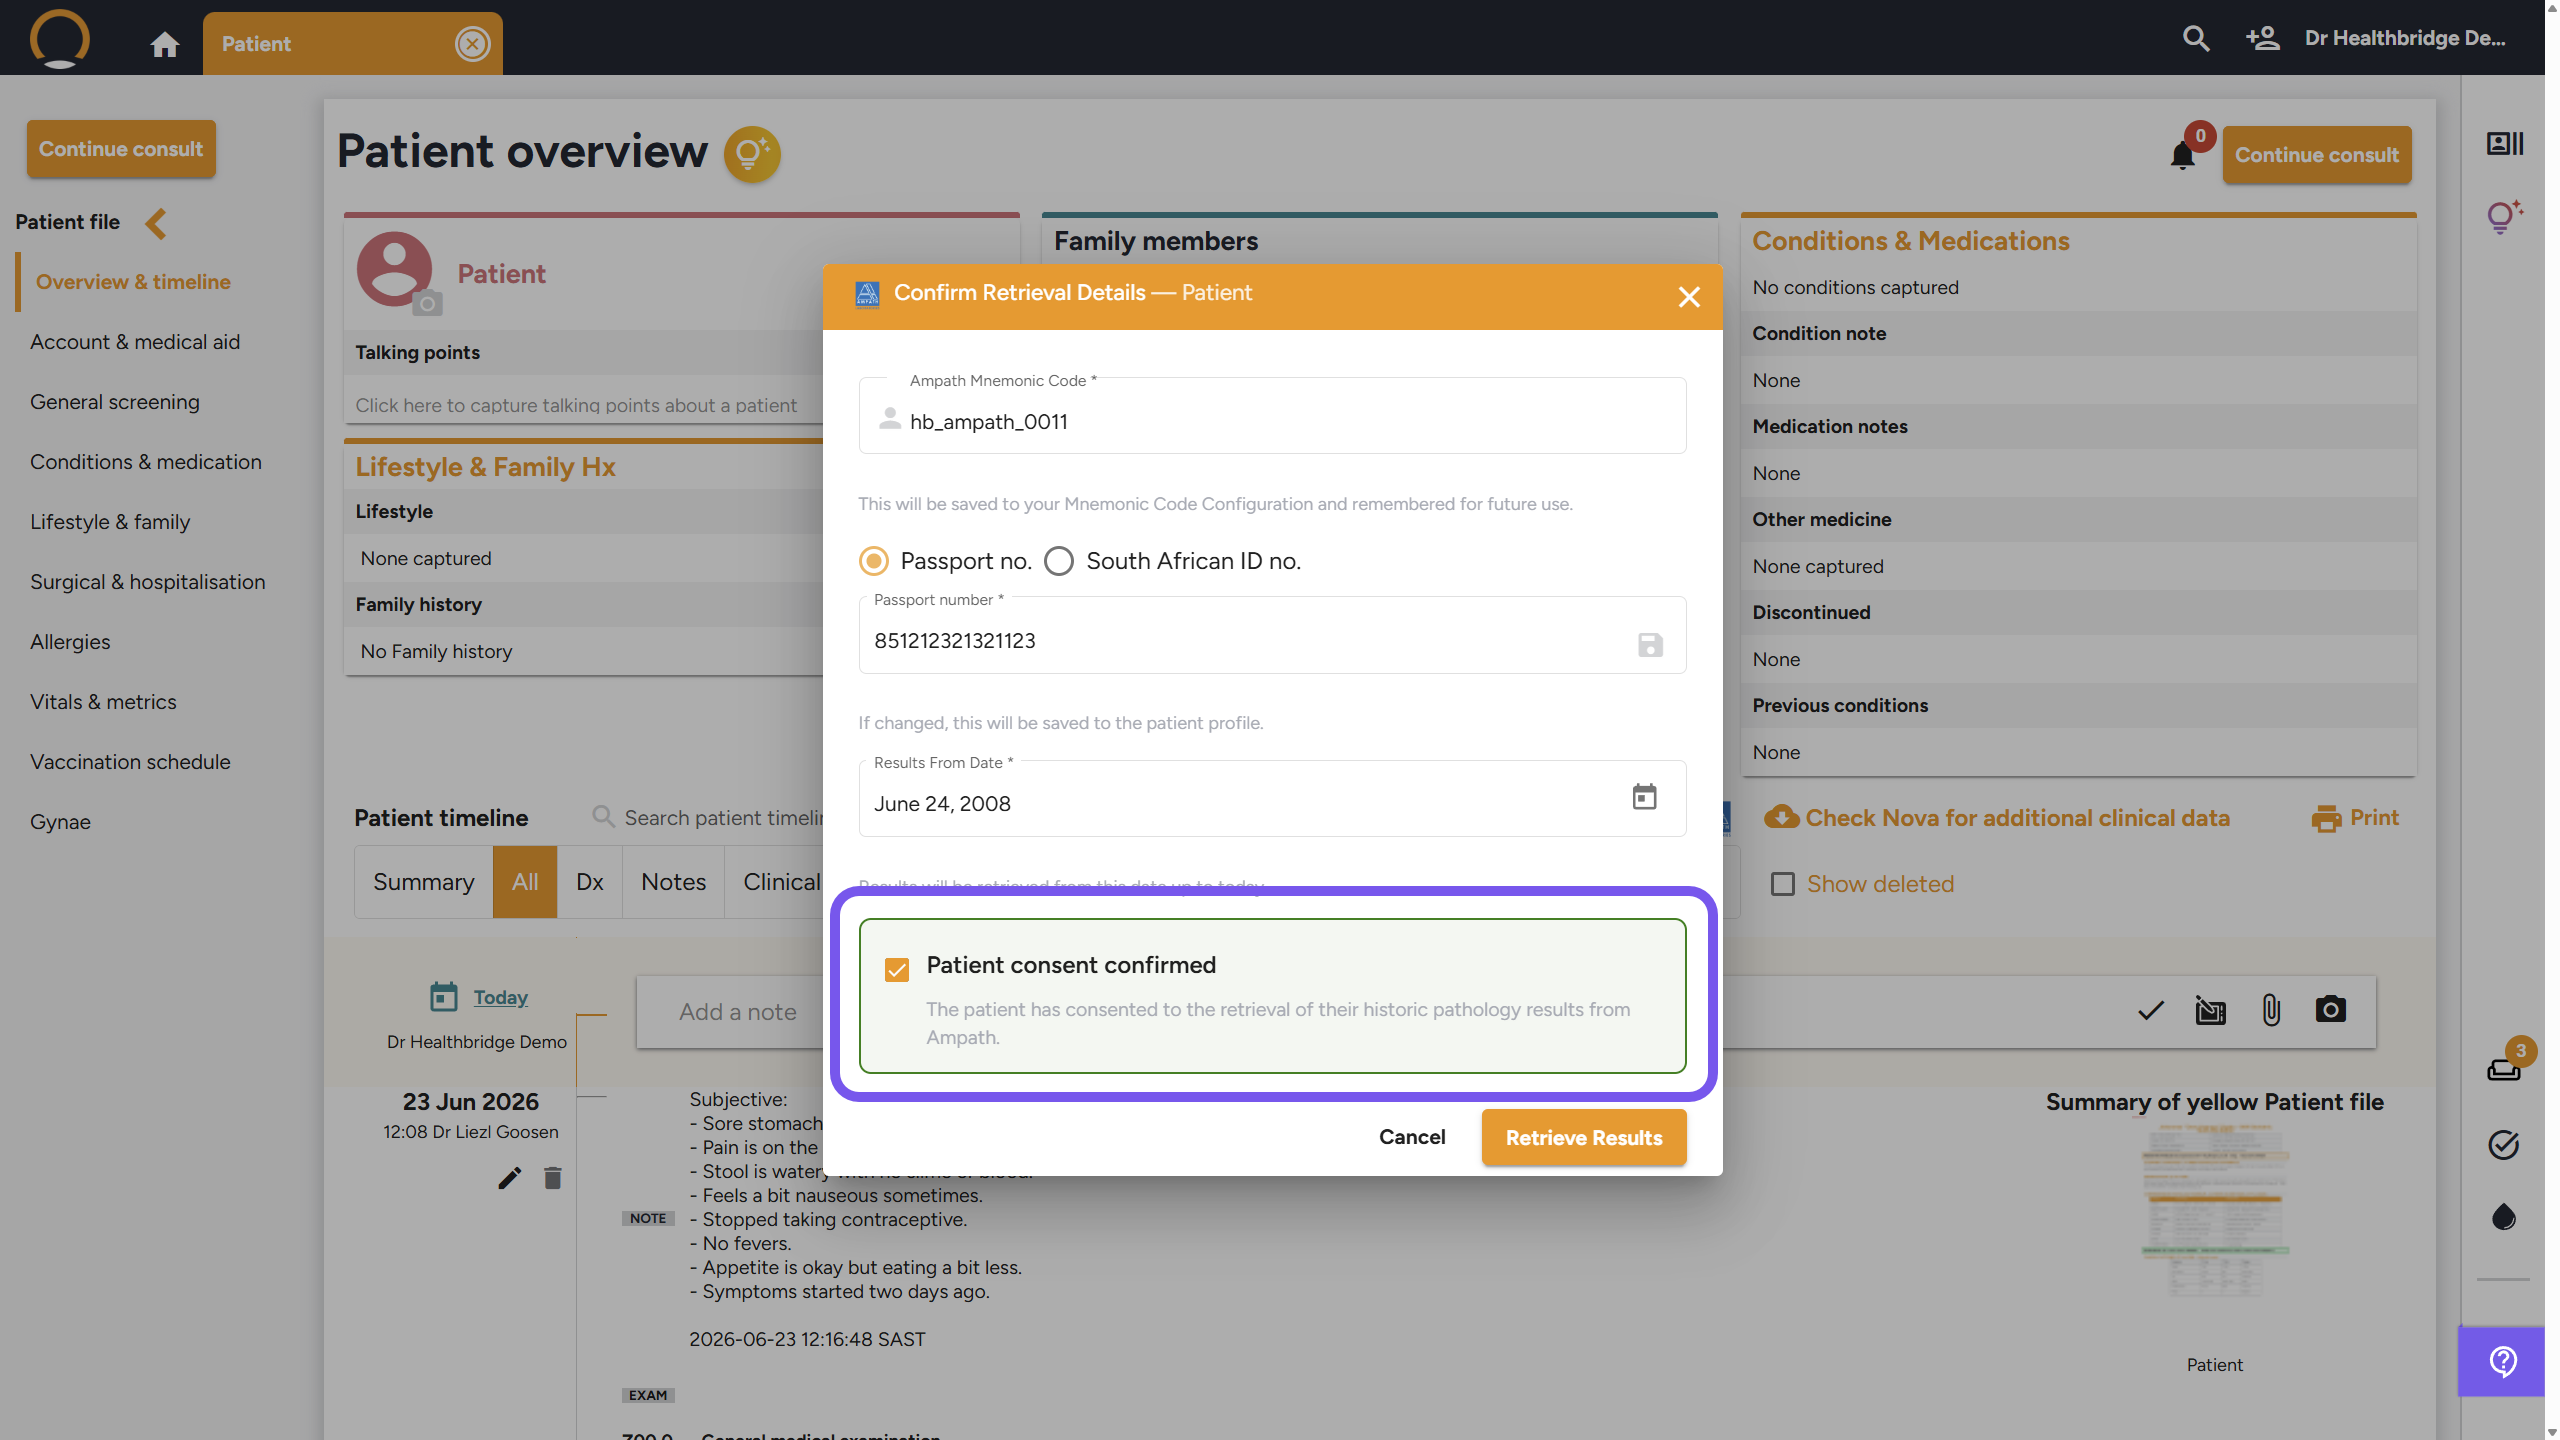
Type the patient's corresponding identity number into the active field. Click the mandatory checkbox for Patient consent confirmed to legally verify compliance.
Once all parameters are filled, the system guardrail will activate the orange Retrieve Results button in the bottom right corner. Click it to execute the query.
Step 6: Review the Imported Pathology Records
Once the import processes, the system's built-in deduplication automatically filters out duplicate files. To isolate and view the newly added, beautifully structured laboratory reports, simply click on the Lab filter tab directly on the chronological patient timeline.
Frequently Asked Questions (FAQ)
Q: Why can't I see results ordered by other doctors or specialists for this patient?
A: This tool is strictly clinician-scoped. Ampath will only return historical records that are legally authorized for your unique doctor/mnemonic code and reflect your direct historical care of that patient. Tests ordered by external providers, specialists, or colleagues down the hall will not appear.
Q: Do I need to enter my Ampath Mnemonic Code every time I run a retrieval?
A: No. Your mnemonic code is permanently cached after the initial successful entry, meaning you do not need to re-type it during subsequent lookups for any patient record.
Q: Will re-running a query create duplicate reports on the patient timeline?
A: No. The platform features a built-in deduplication safeguard. If the targeted historical results have already been imported during a prior query, the system automatically skips them to protect your timeline from duplicate clutter. It is completely safe to re-run queries if you change the date parameters.
Q: Is this feature a replacement for the main Pathology Centre dashboard?
A: No. The Pathology Centre acts as your primary practice inbox for managing automated, incoming daily result forward-flow. This retrieval tool functions strictly as an on-demand historical backfill to populate legacy data records.
Q: What should I do if the Ampath action button is completely missing from my screen view?
A: The button is hidden on compact mobile timeline interface layouts. Simply switch your mobile device browser to the standard desktop/web layout view to reveal the action row panel.