
Pathology Centre
How to Access the Pathology Centre
You can access the General Pathology Centre through two primary methods:
- From the Dashboard Navigation: Click the Pathology Centre button located in the navigation bar directly above the main calendar.
- From the Right-Hand Panel: Click the Blood Drop Icon (Pathology icon) on the right-hand side of your screen to open a quick-access list, or click "View all path results" within that panel to open the full centre.Type your content here.
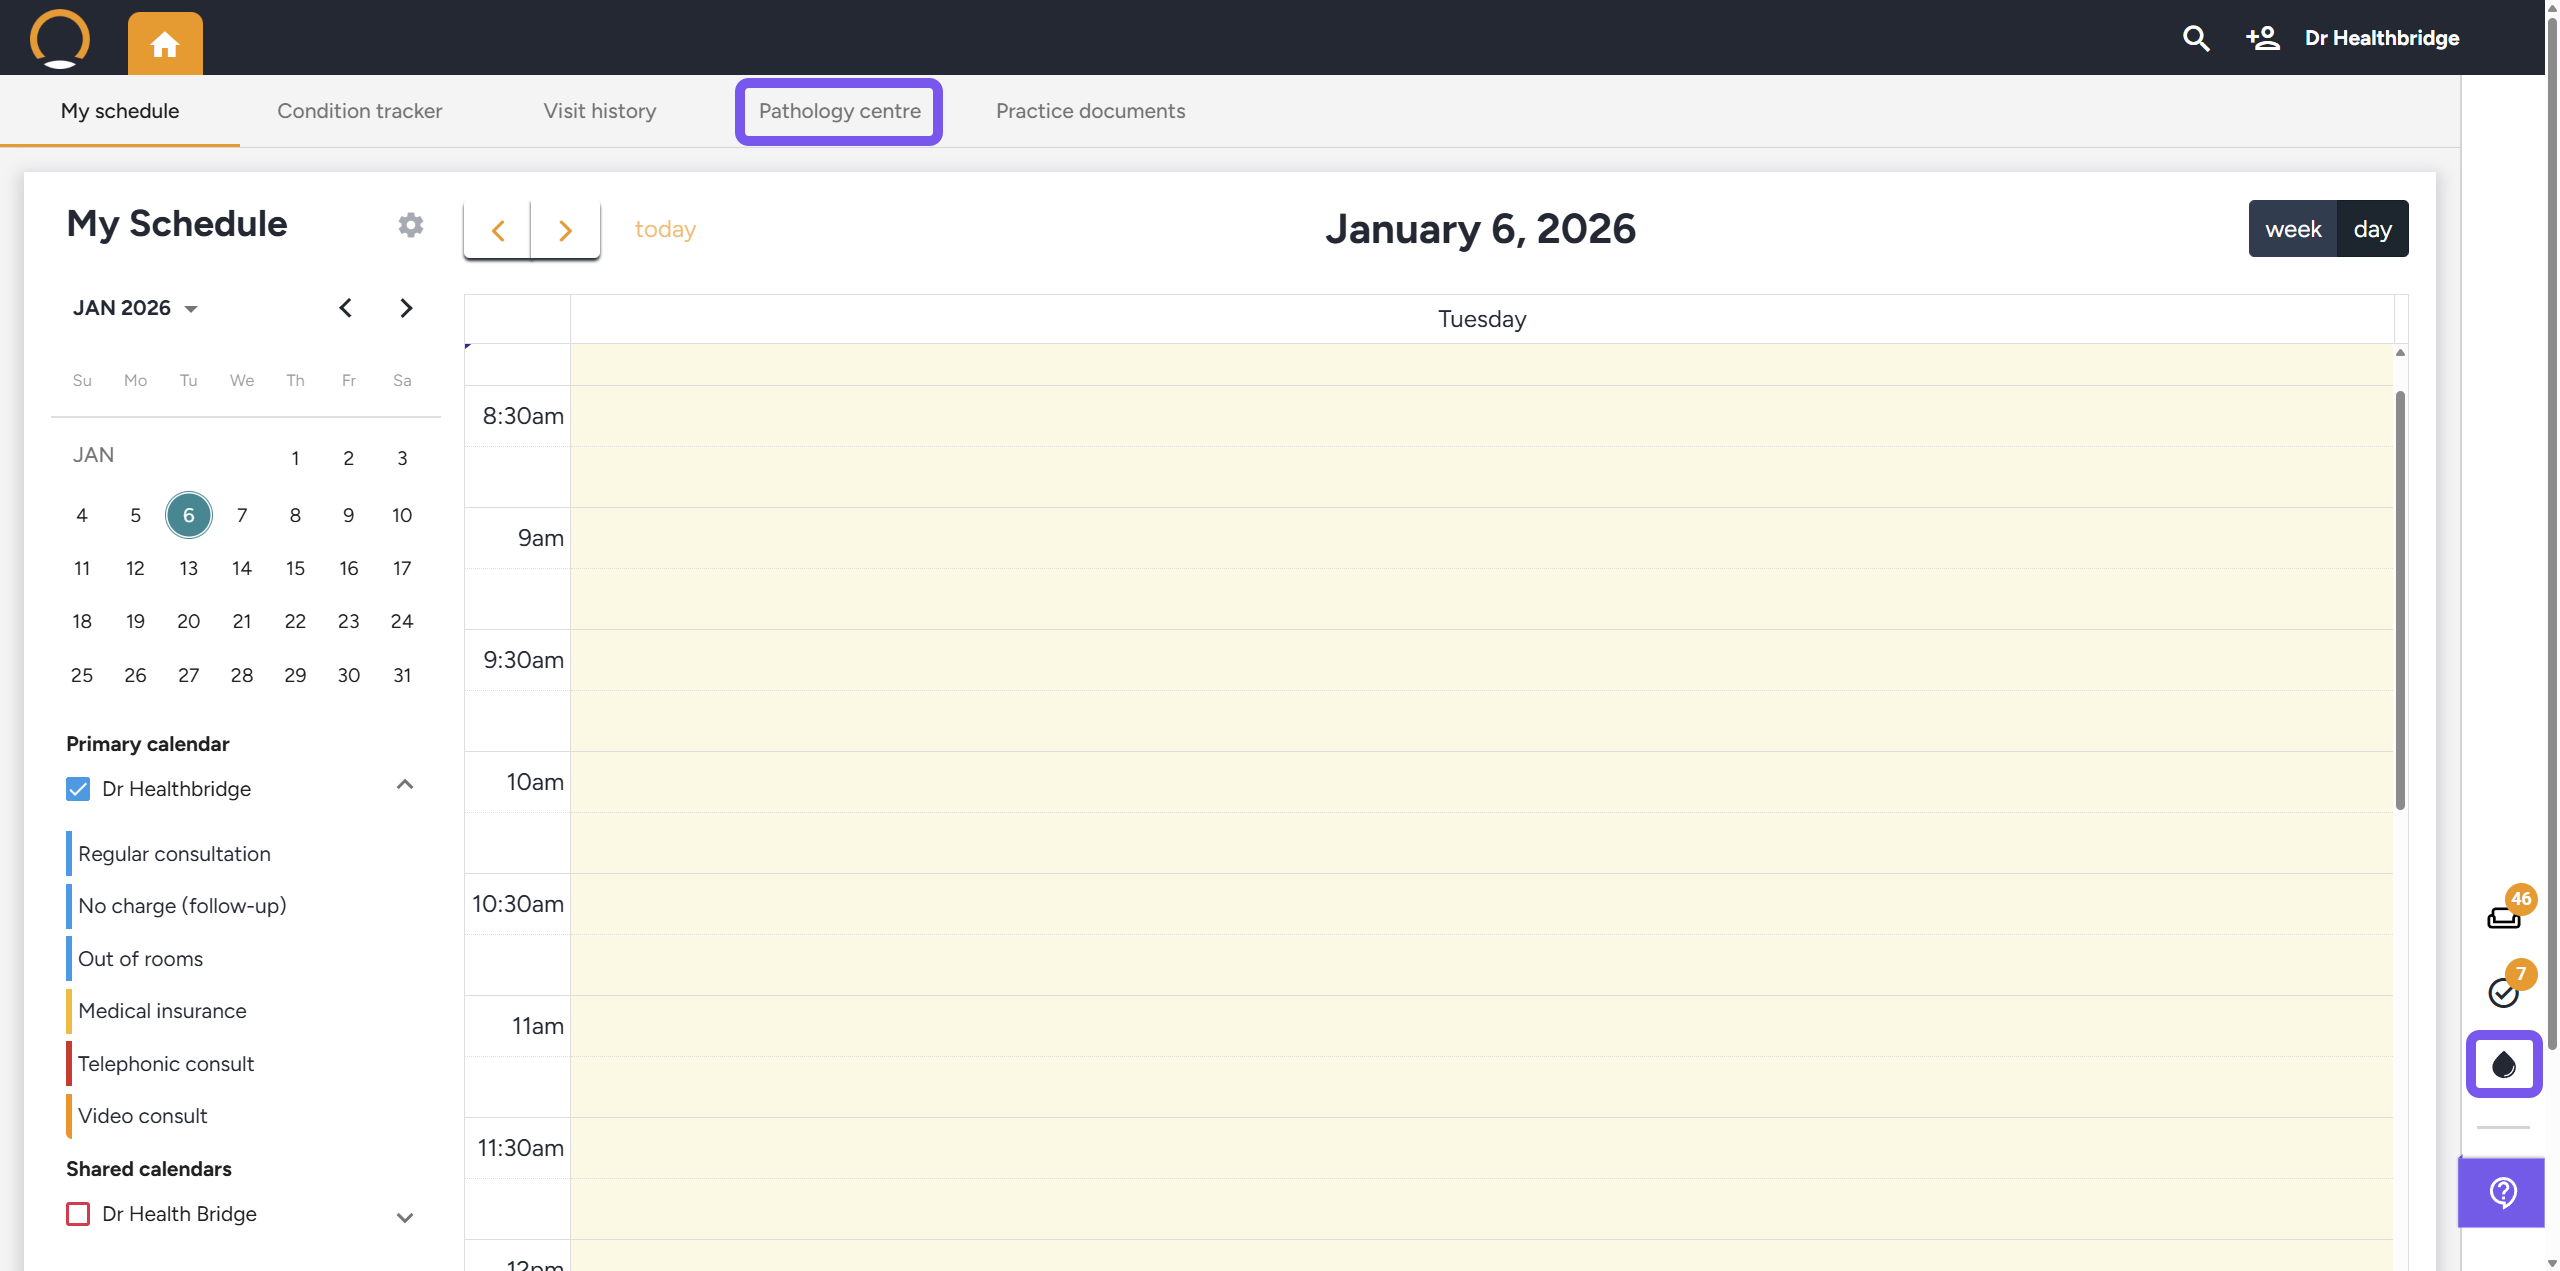
Navigating the Dashboard Tabs
The Pathology Centre is organized into three main tabs to help you prioritize your workload:
- All Pathology Reports: Displays every result received for the entire practice, including those belonging to other providers.
- My Patients: A filtered view showing only results for patients under your specific care (this tab is hidden in single-provider practices).
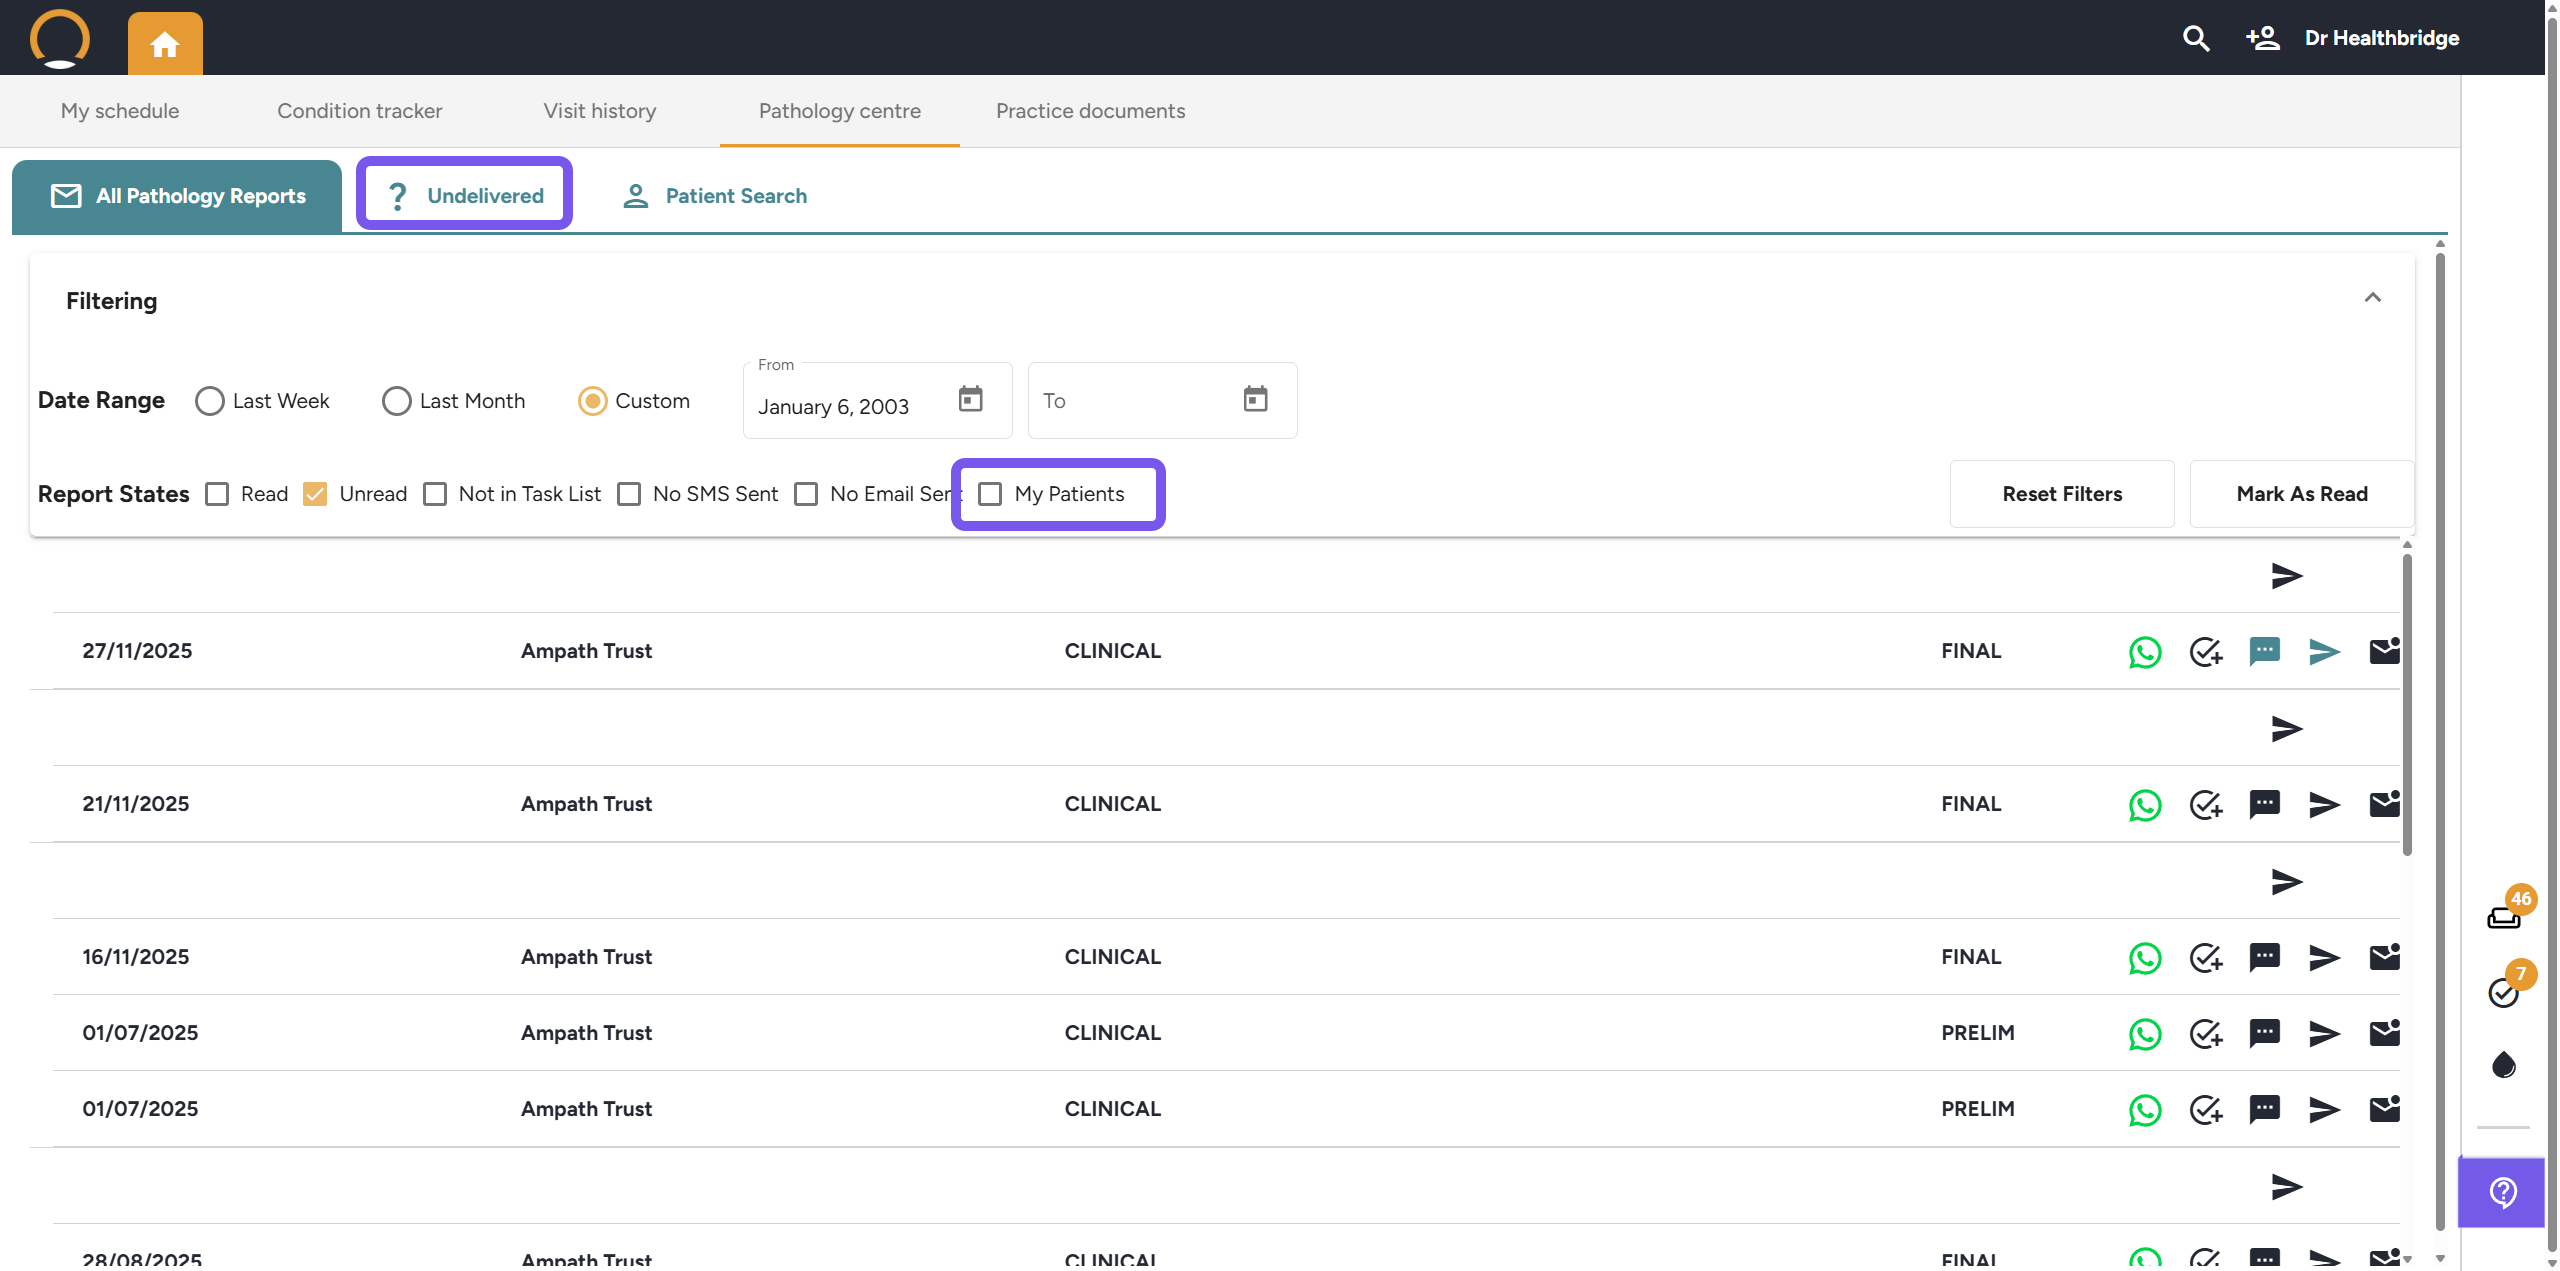
- Undelivered: Highlights results that couldn't be automatically matched to an existing patient file, allowing you to manually link them or create a new record.
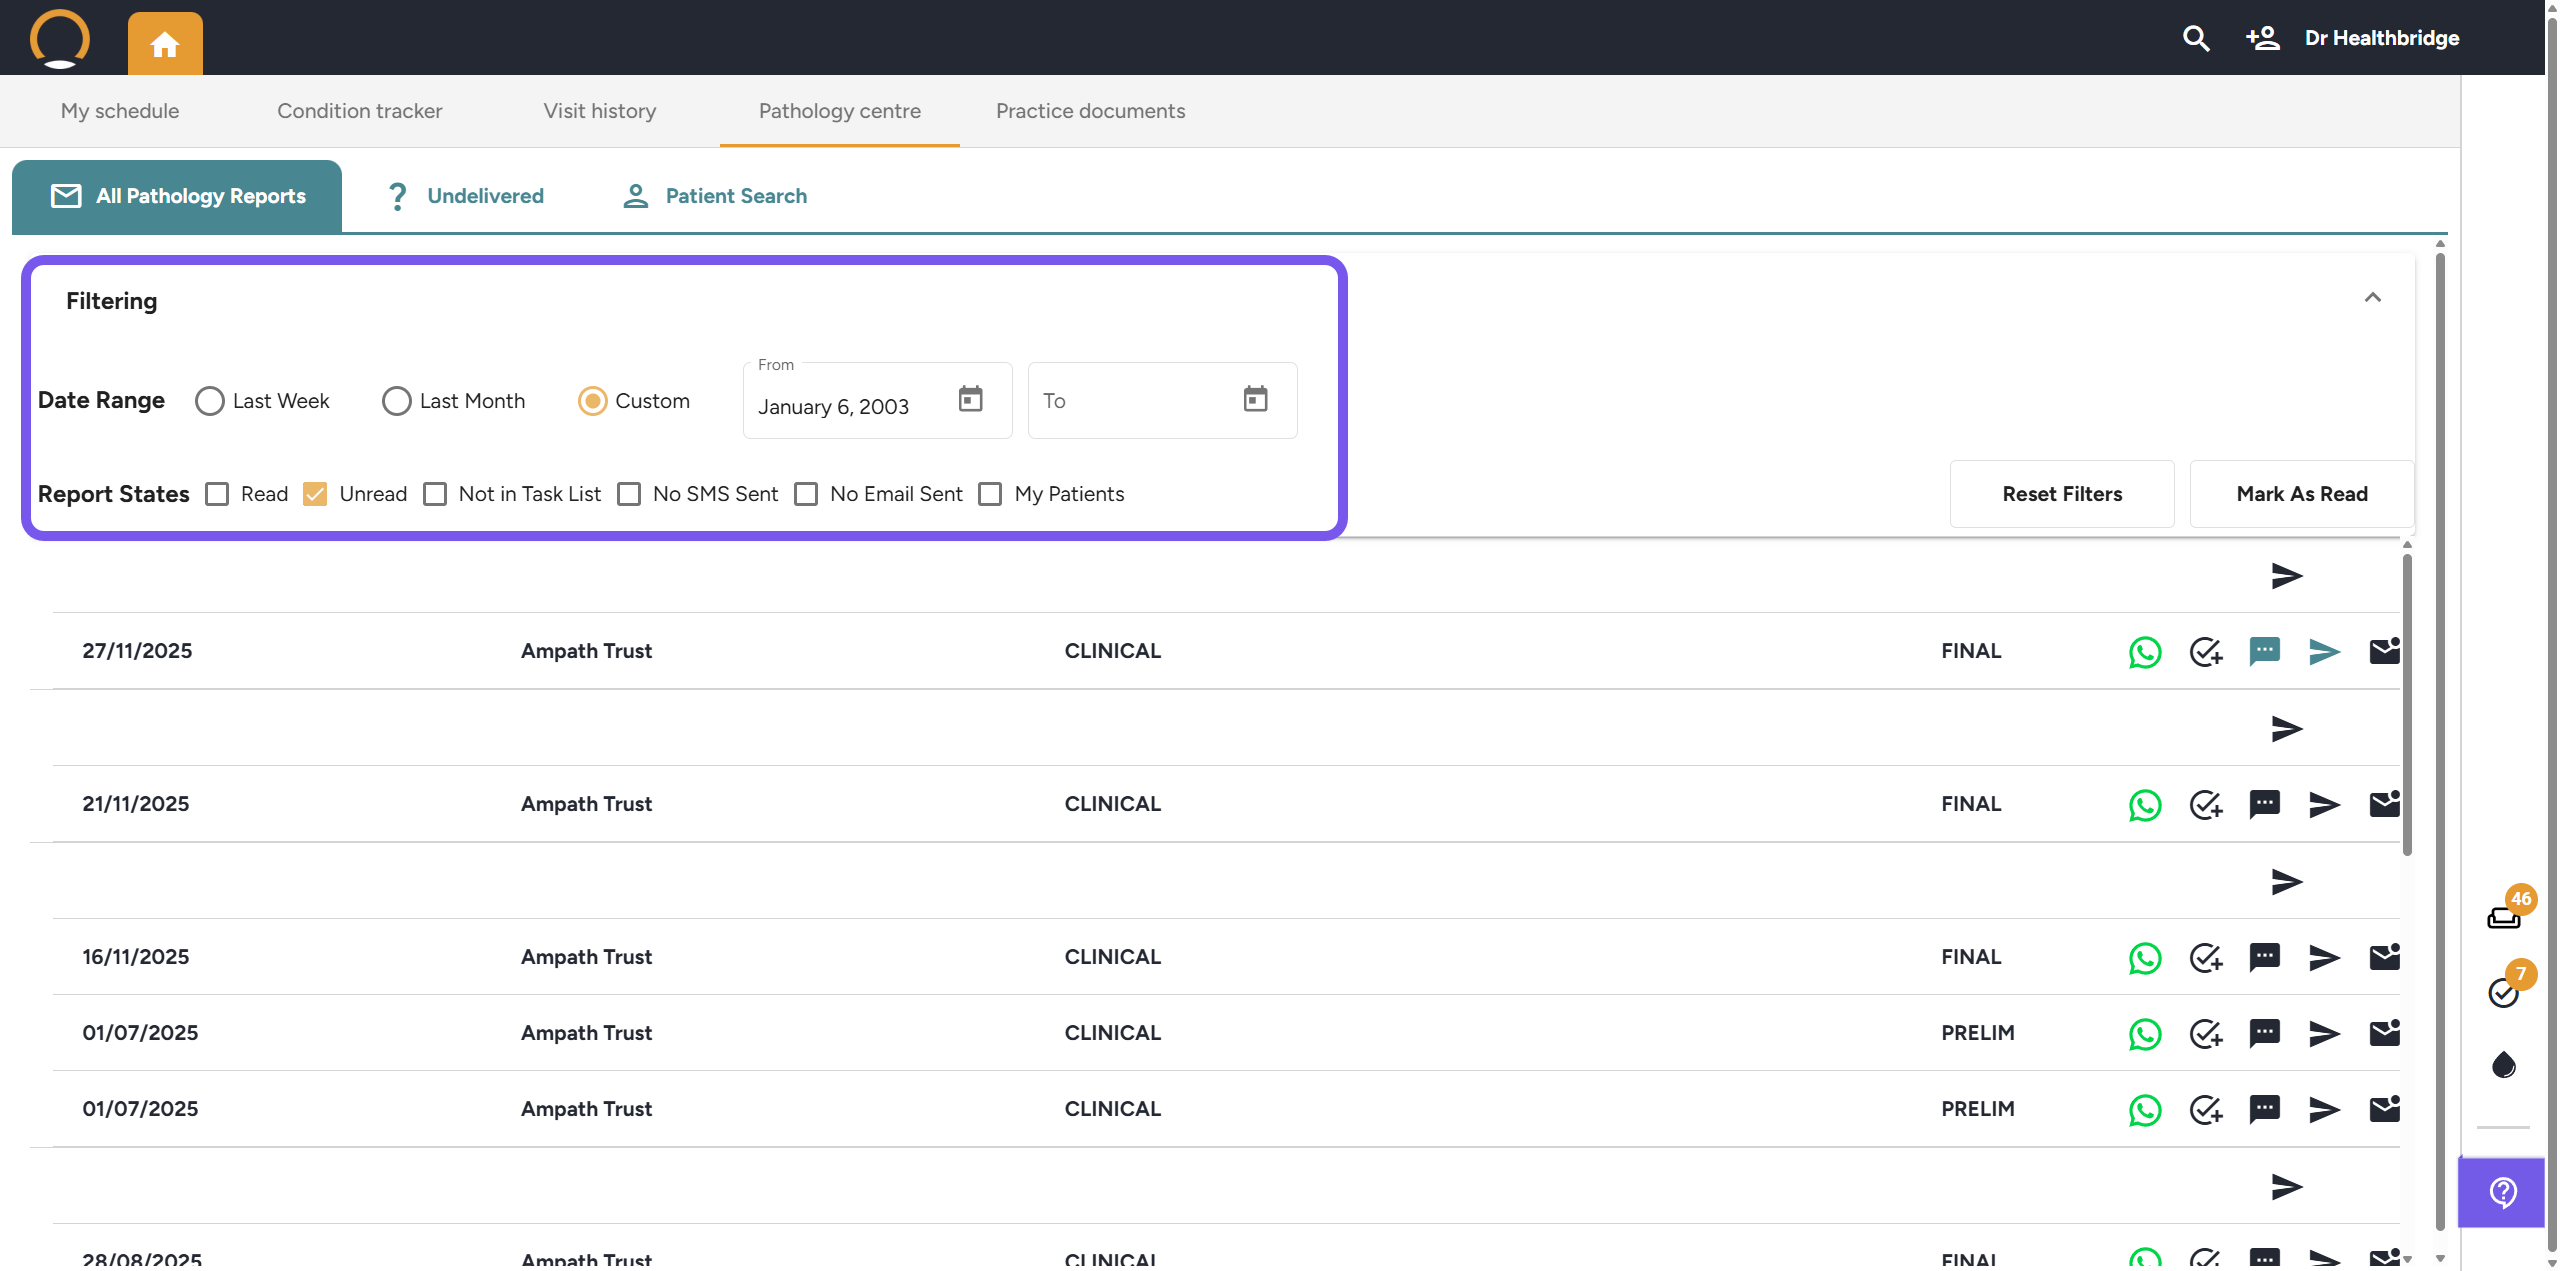
Using Filters and Search
To manage high volumes of data, use the Filtering section at the top of the screen:
- Date Range: Quickly filter by Last Week, Last Month, or a Custom Range.
- Report States: Filter results based on their current status: Read, Unread, In Task List, SMS Sent, or Email Sent.
- Search Bar: Type a patient's name, ID, or lab reference number to find a specific result instantly.

Quick Action Icons Guide
Without opening a report, you can perform essential tasks directly from the main list using the action icons on the right:
Below is a short description of each numbered action:
- Launch Pathology Messenger (WhatsApp Icon): Instantly turns complex lab reports into clear, doctor-approved WhatsApp messages for patients by analyzing results against their medical history.
- Add to Tasks (Clipboard Icon): Links the report to a specific follow-up task. A grey icon indicates it is not in the task list, while a teal icon indicates an existing task.
- Send SMS (Message Bubble Icon): Notifies the patient of their results via SMS. Teal indicates an SMS has been sent, and hovering reveals the date.
- Send Email (Paper Plane Icon): Emails the laboratory report directly to the patient or a colleague from within the system. Teal indicates the email has already been dispatched.
- Mark as Read/Unread (Envelope Icon): Manages report status in your inbox. A teal, closed envelope is "Unread," while a grey, opened envelope is "Read".

Viewing & Managing Detailed Reports
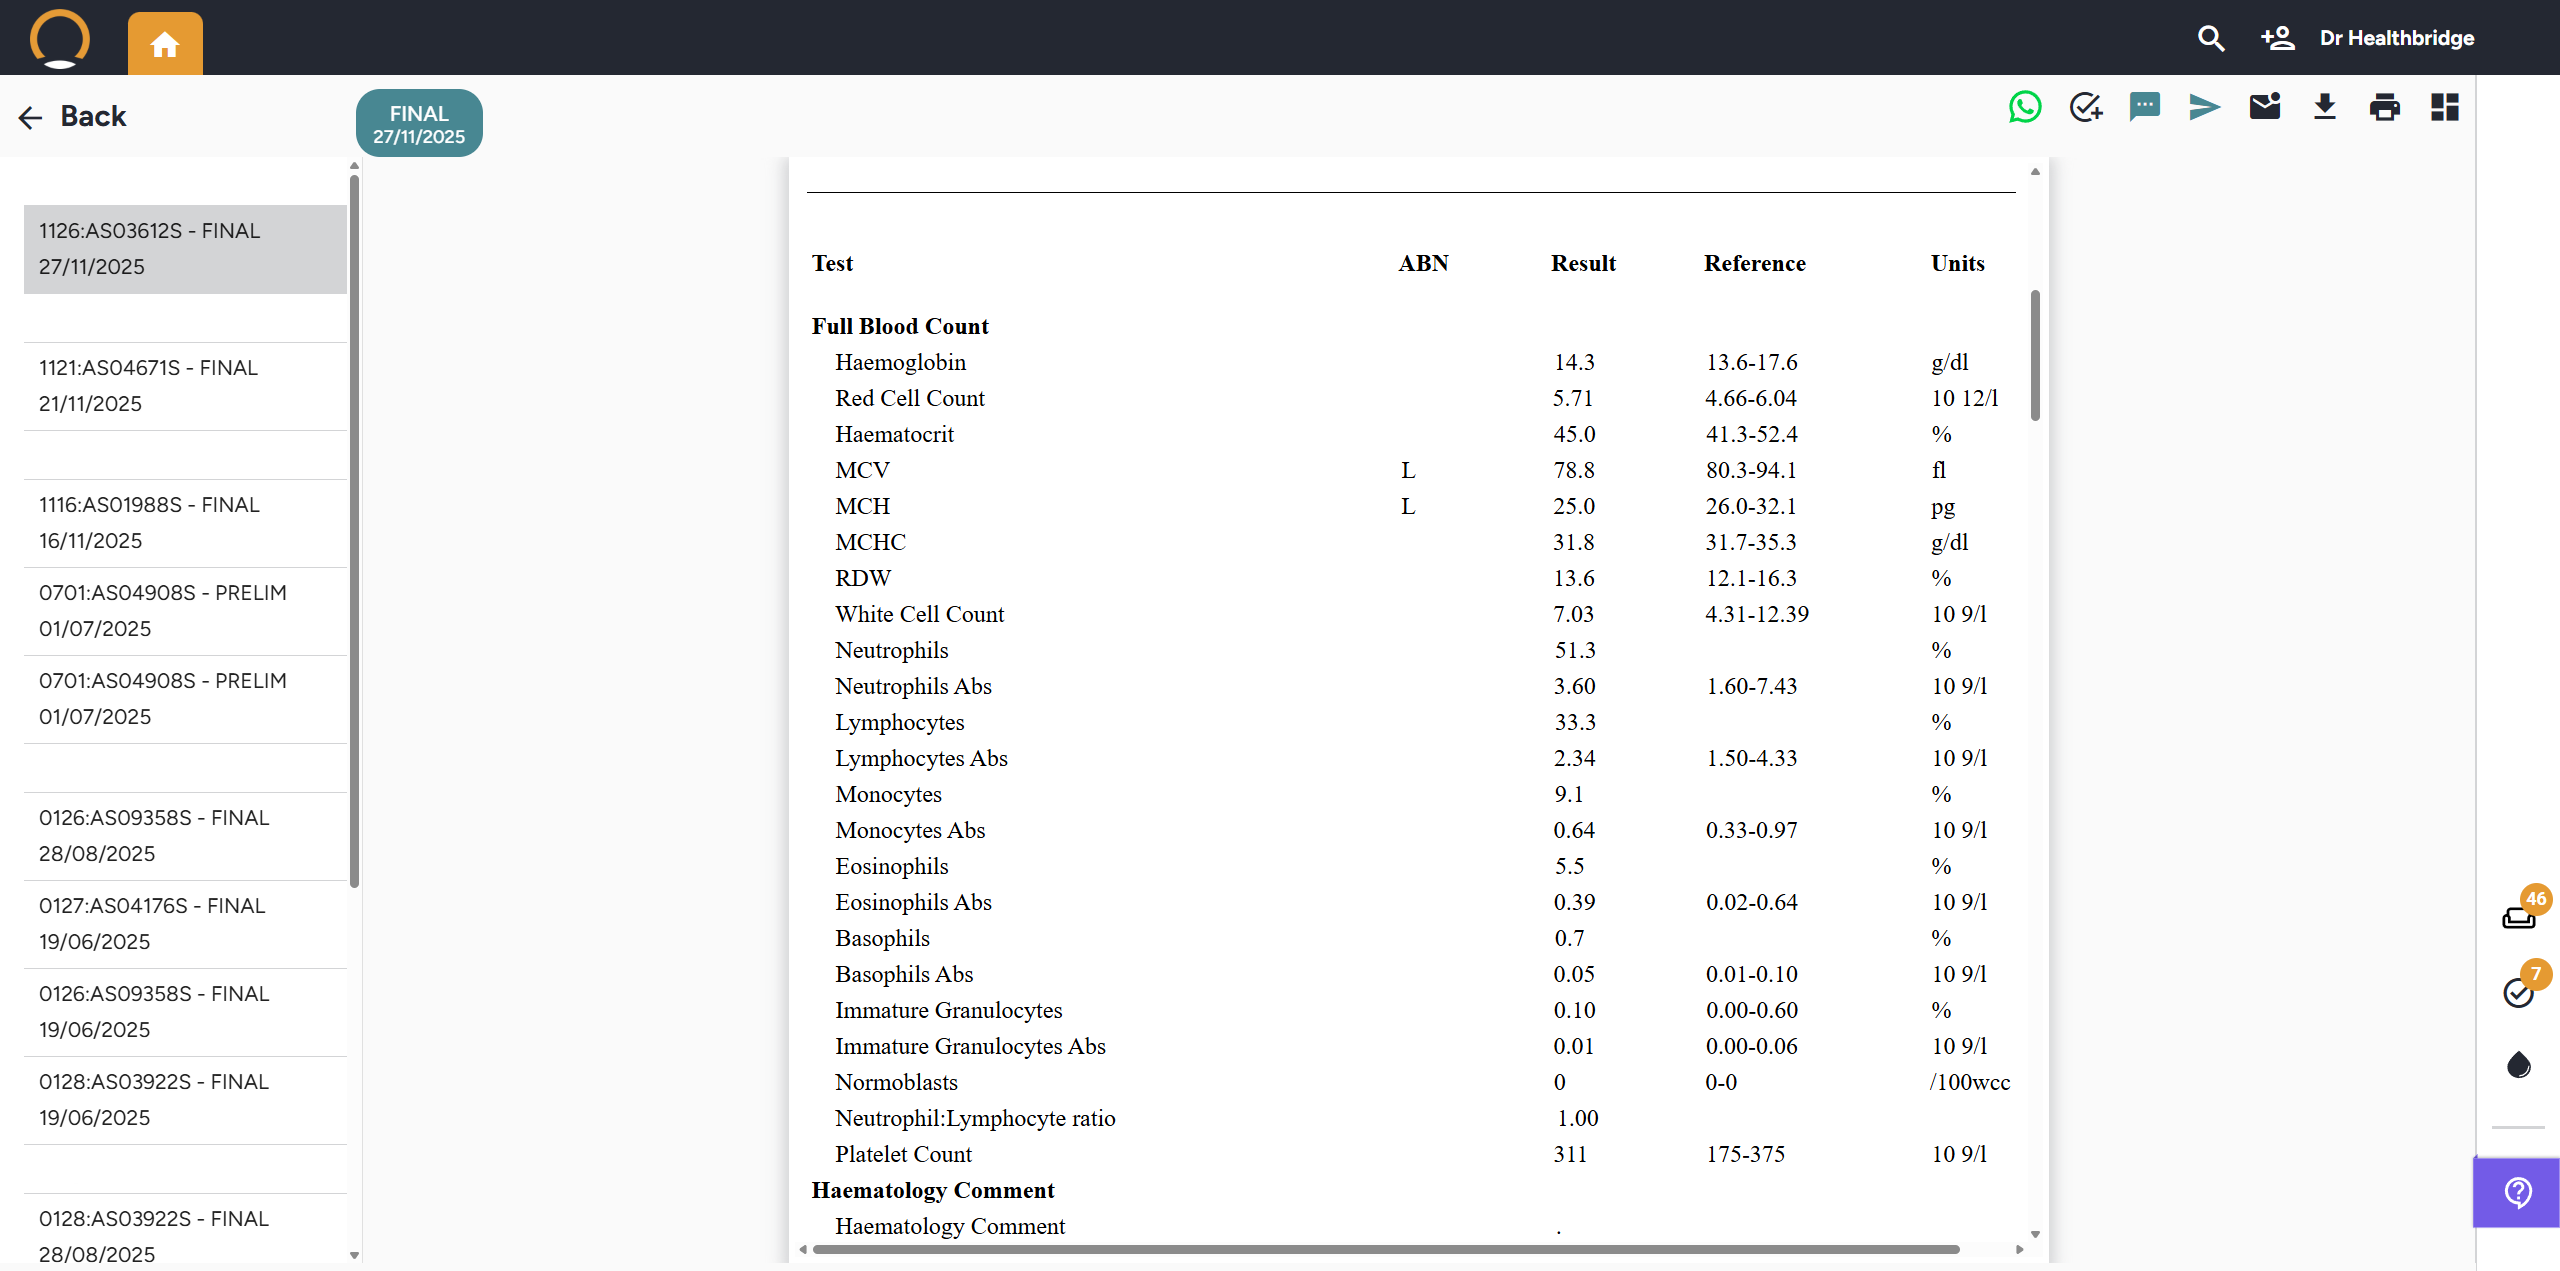
Clicking on any result in the list will open the detailed report view. The system now functions like an email inbox:
- Inbox Pane: A list of other results remains visible on the left, allowing you to switch between reports without going back to the main menu.
- Navigation: Use the Previous/Next Report buttons at the top to cycle through your backlog efficiently.
- Action Bar: All actions (Print, Download, Mark as Read, Send SMS/Email) are accessible at the top of the report screen.
Key Benefits for Your Practice
- Reduced Backlog: Infinite scrolling and "Mark All as Read" options help you clear your inbox faster.
- Centralized Record-Keeping: All actions (SMS sent, read status) are logged to the Patient Timeline automatically.
- No Lost Results: The Undelivered tab ensures that even incorrectly filed lab reports are captured and actioned.
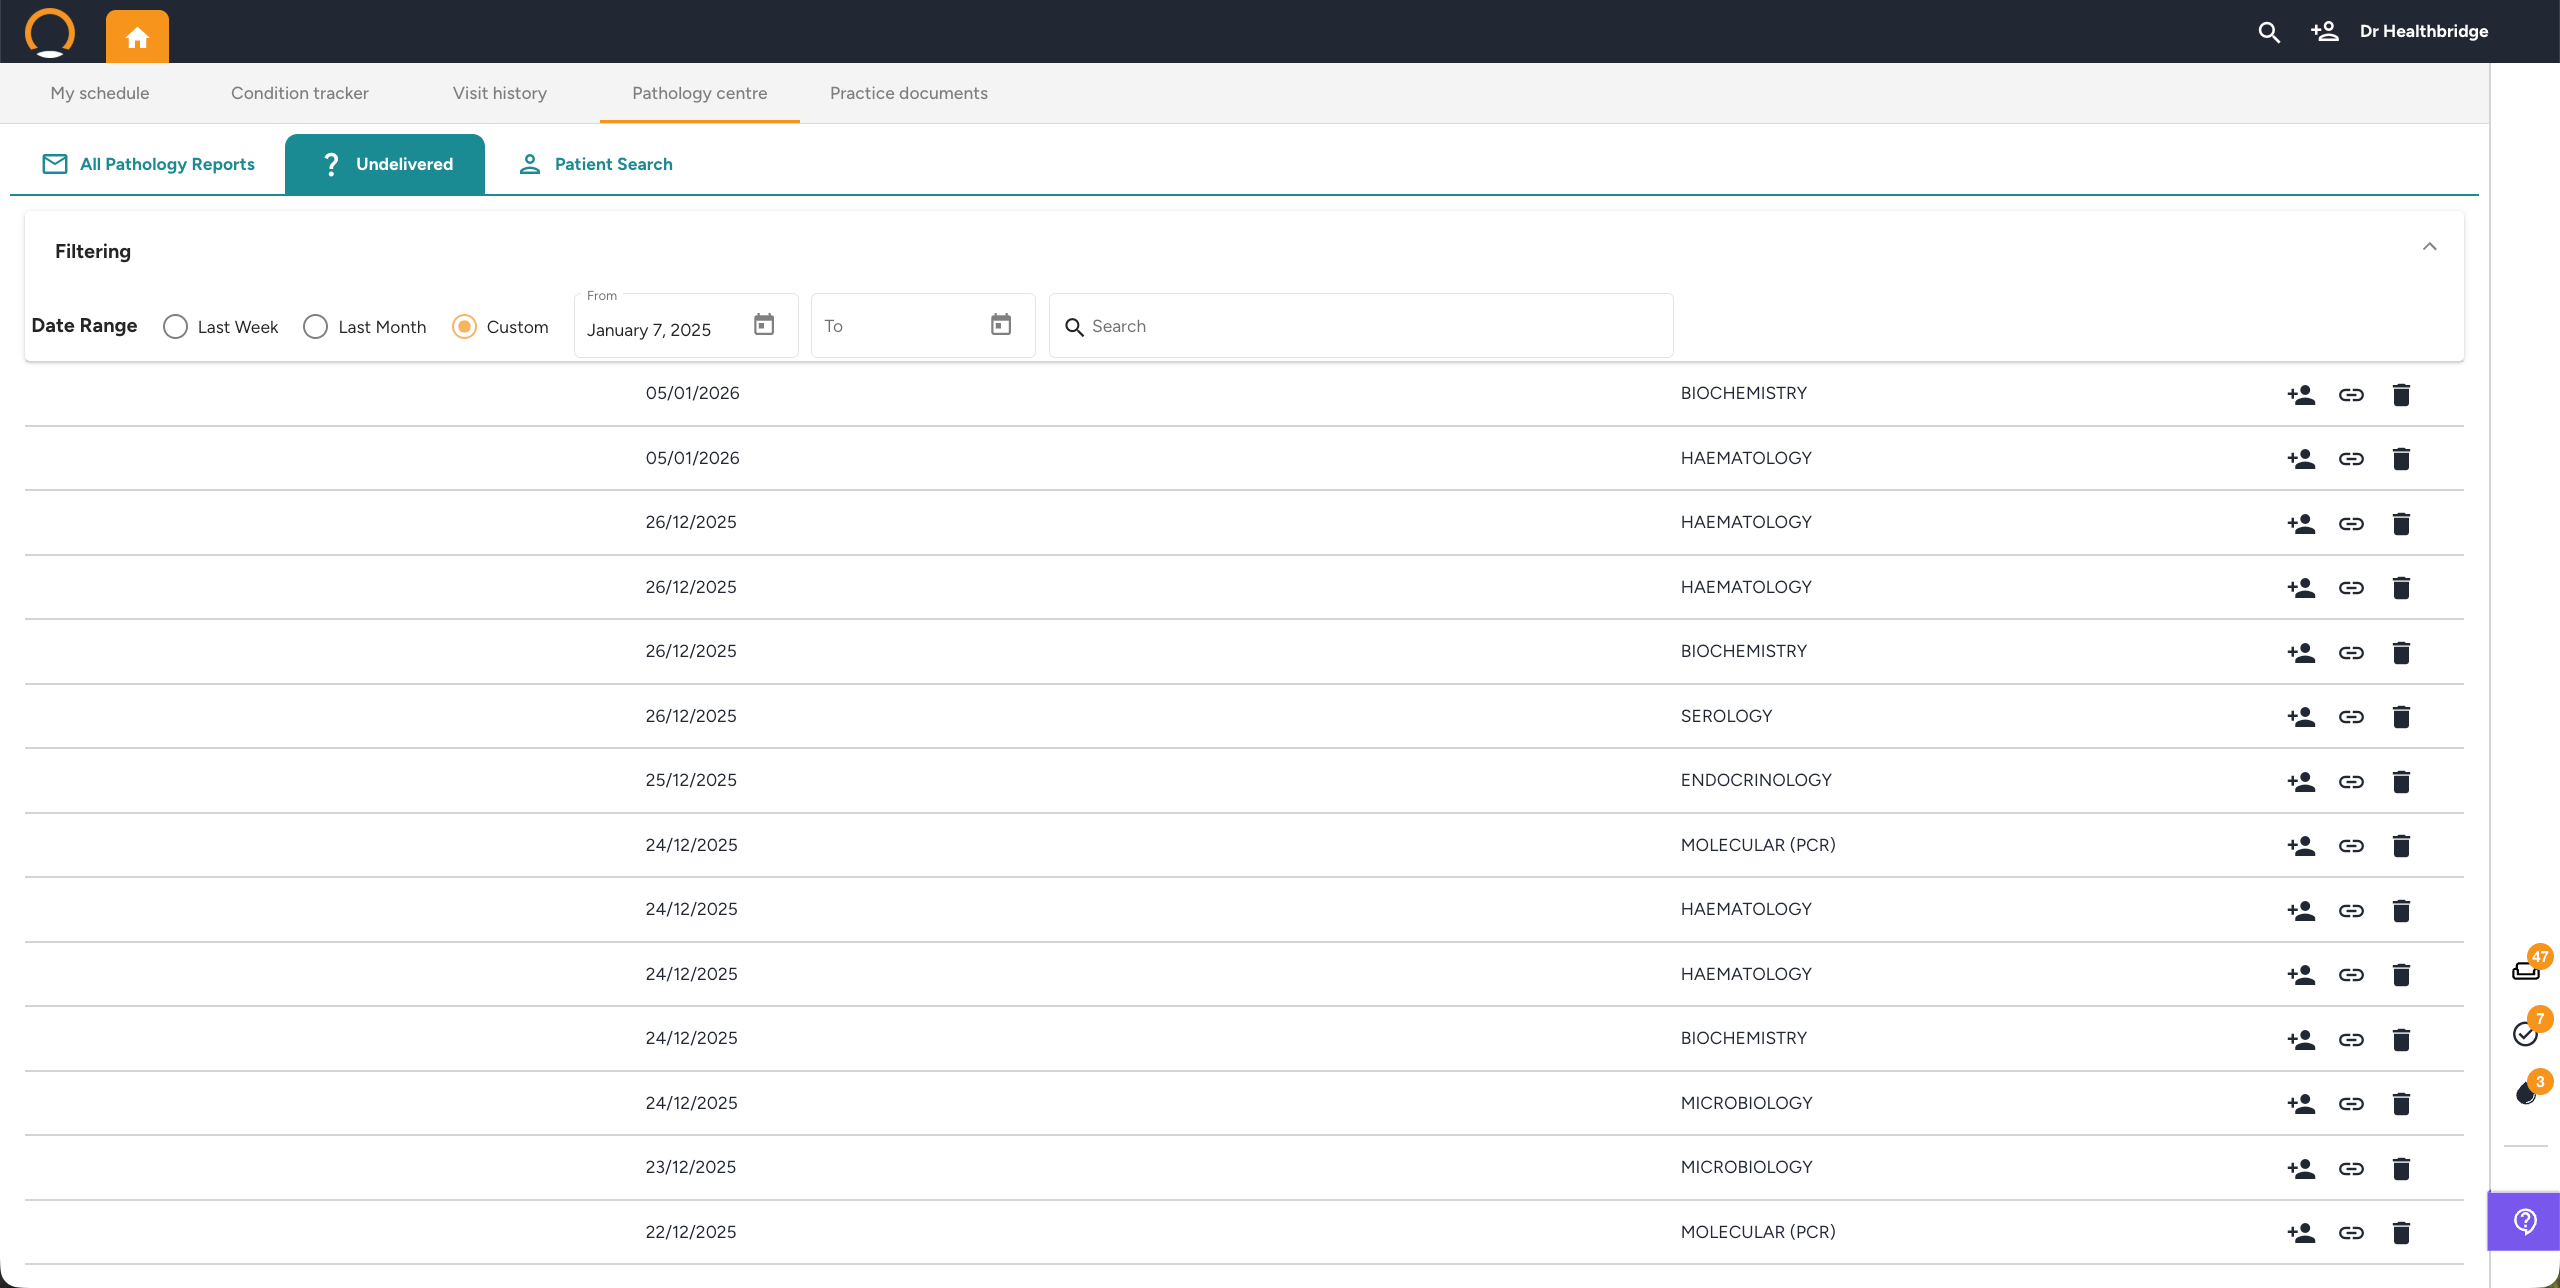
Managing Undelivered Lab Results
In Healthbridge Clinical, the Undelivered tab in the Pathology Centre acts as a safety net for your practice. It ensures that no laboratory report is overlooked, even if the system cannot automatically match it to a specific patient file.
What are "Undelivered" Results?
- A result appears in this tab when the automated matching process fails. This typically occurs if:
- The patient does not yet exist in your Healthbridge database.
- The results did not successfully attach to an existing patient file due to mismatched details (e.g., ID number or name variations).
How to Action Undelivered Results
Navigate to the Pathology Centre from your main dashboard and click on the Undelivered tab. To the right of each unassigned result, you will find three specific action buttons to help you clear your backlog:
Add New Patient (+👤):
- Use this if the patient is new to your practice.
- Clicking this will prompt you to register the patient manually.
- Once the new file is saved, the result will be linked to their timeline.
Link to Existing Patient (🔗):
- Use this if the patient is already in your system but the result failed to attach.
- Search for the correct patient by name, ID, or medical aid number.
- Select the patient to manually link the laboratory report to their medical history.
Delete Result (🗑️):
- Use this to remove results that are duplicates or were sent to your practice in error.
- Confirm the deletion to permanently remove the entry from your undelivered list.
Why Monitor the Undelivered Tab?
- Clinical Traceability: Ensures a reliable audit trail for all immunisations and clinical tests.
- Continuity of Care: Prevents delays in treatment caused by "lost" reports.
- Practice Efficiency: Clears your administrative backlog and ensures your All Pathology Reports view remains accurate and up to date.