
How to send prescriptions to pharmacies
Prescriptions can be transmitted electronically from activated practices directly to a designated pharmacy. The feature expands beyond Dis-Chem to a unified "Send to pharmacy" tool that supports multiple pharmacy networks, including Dis-Chem, ComputAssist, and EasyRx.
Step 1: Create the Prescription
- Start or continue a consultation for the patient from the schedule, waiting room, or search bar.
- Click on the 'Diagnose & prescribe' tab in the main consultation navigation bar.
- Select the 'Medicine' sub-tab.
- Search for the required medication and add it to the prescription list.
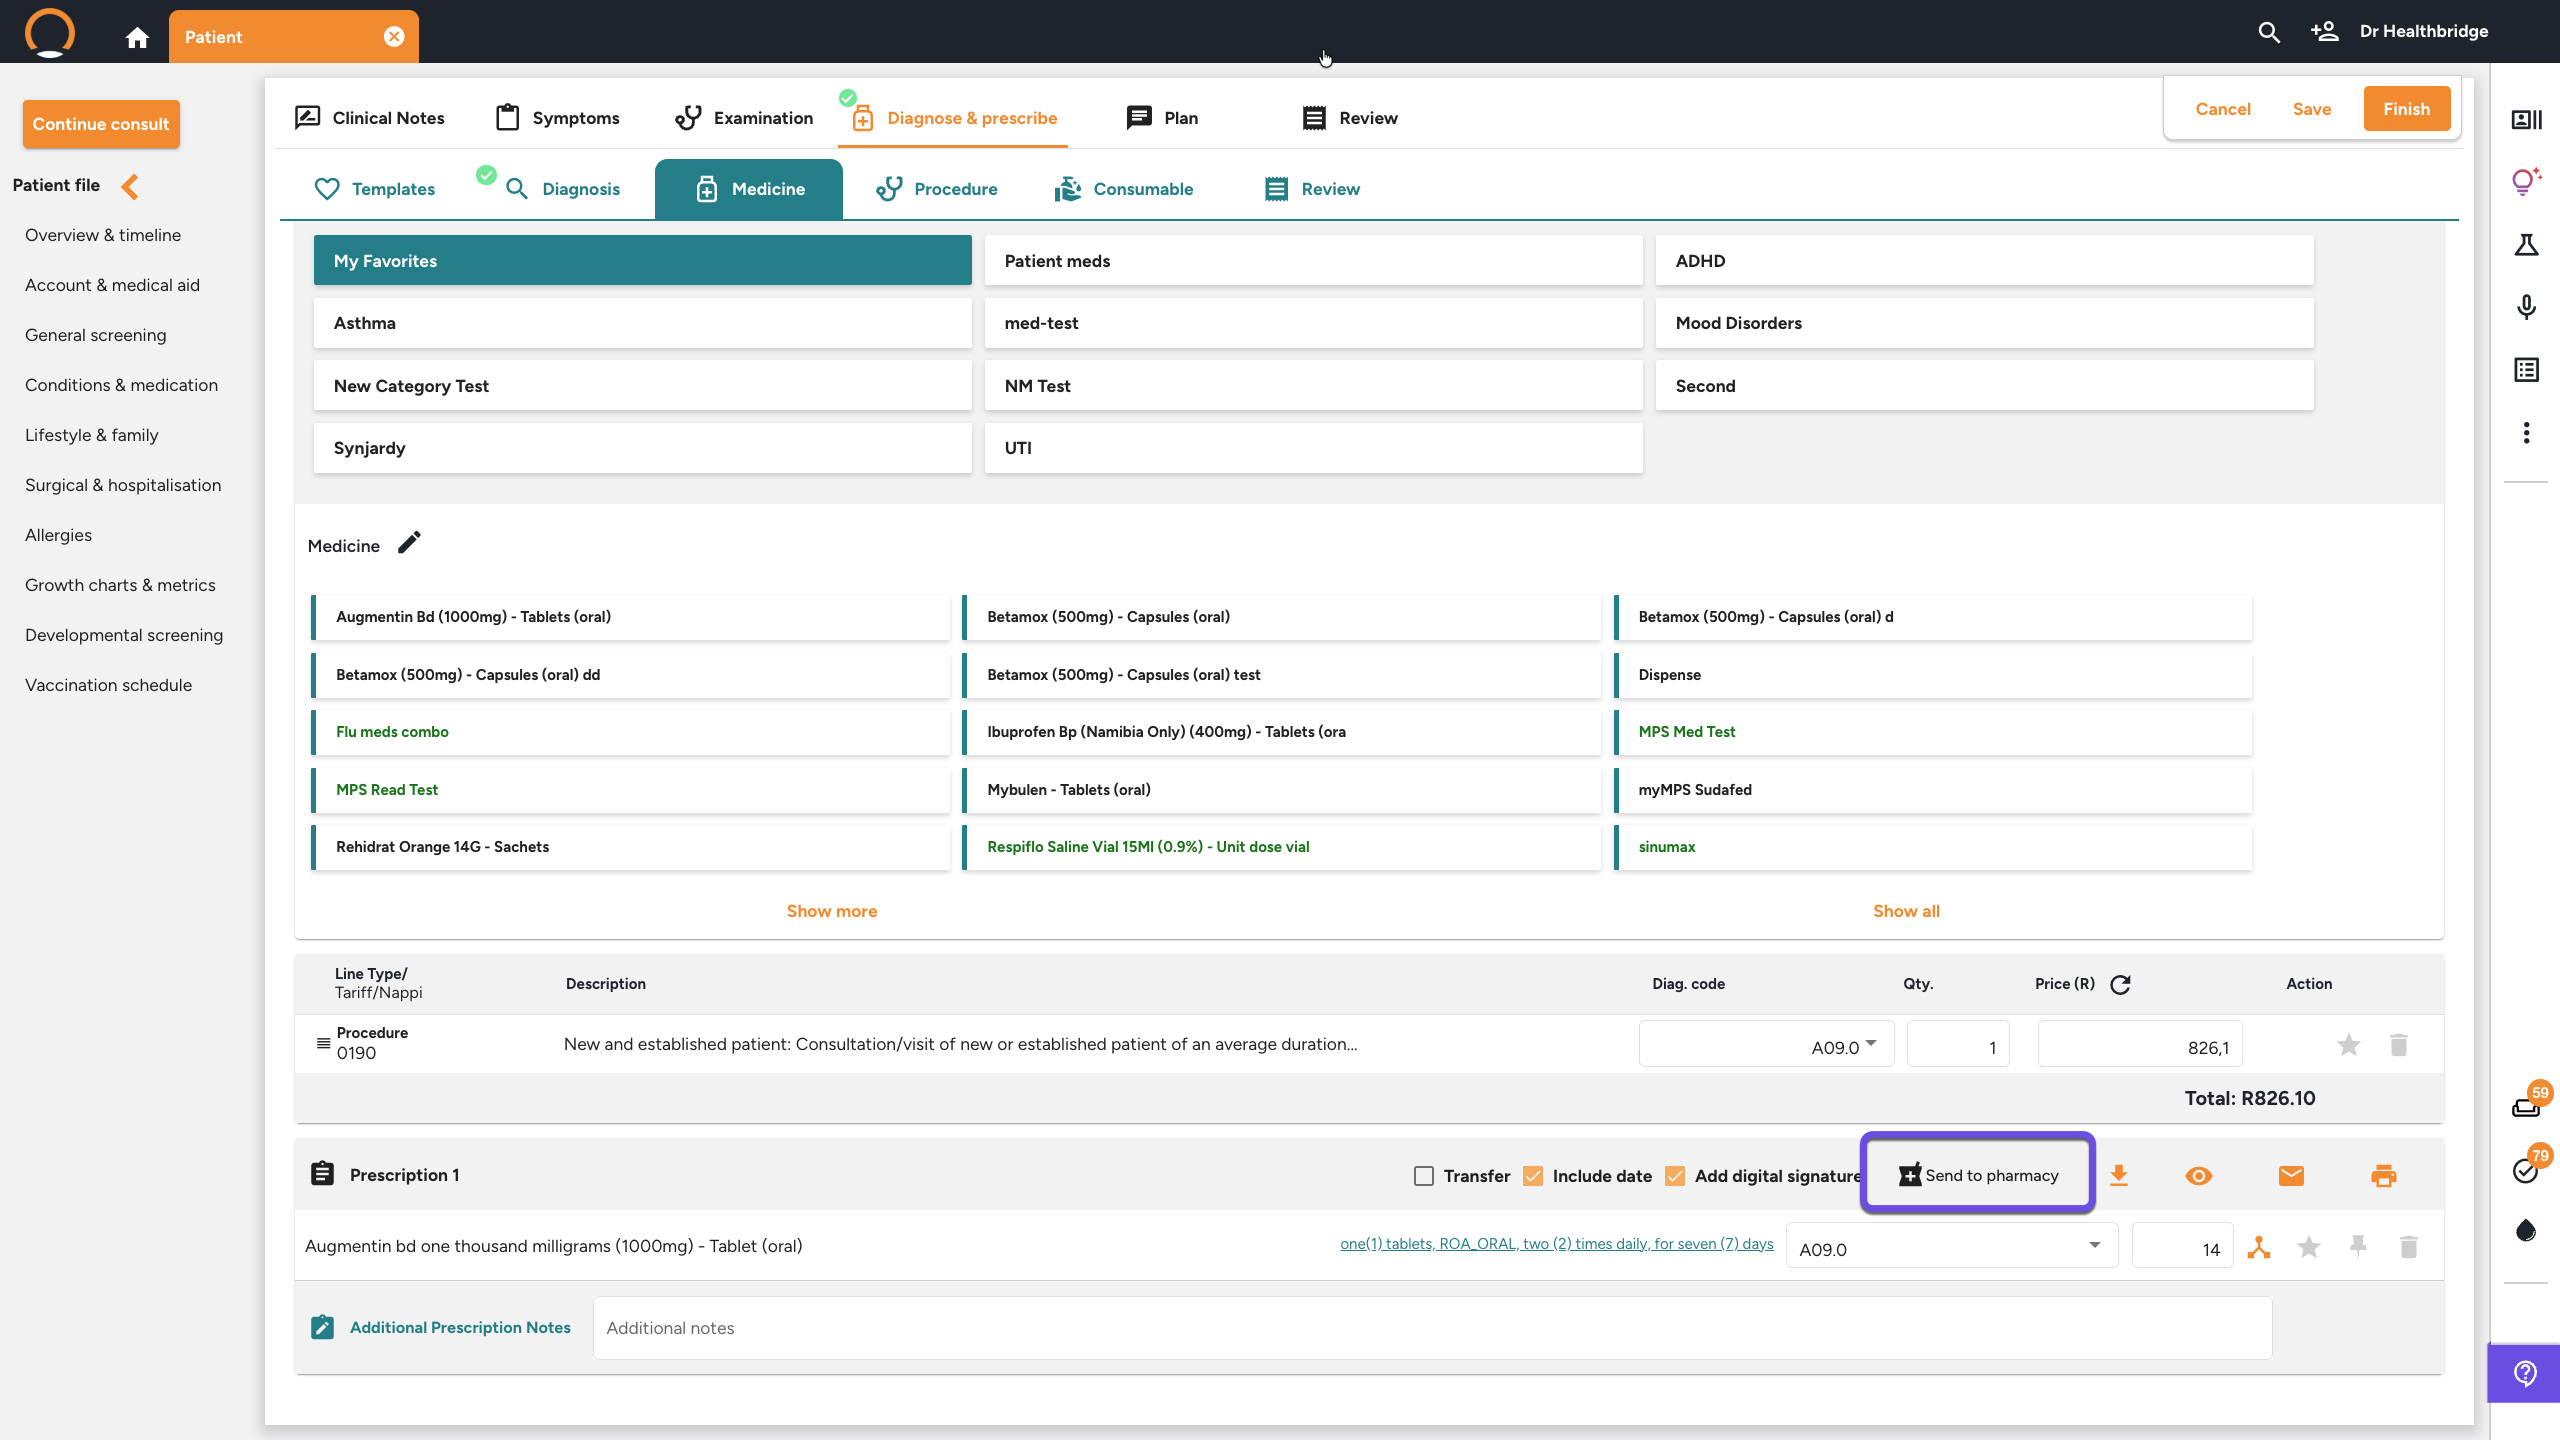
Step 2: Click "Send to pharmacy"
- Locate the created prescription block at the bottom of the consultation screen.
- Click the 'Send to pharmacy' button displayed next to the digital signature and printing options.
Step 3: Select a Pharmacy Store
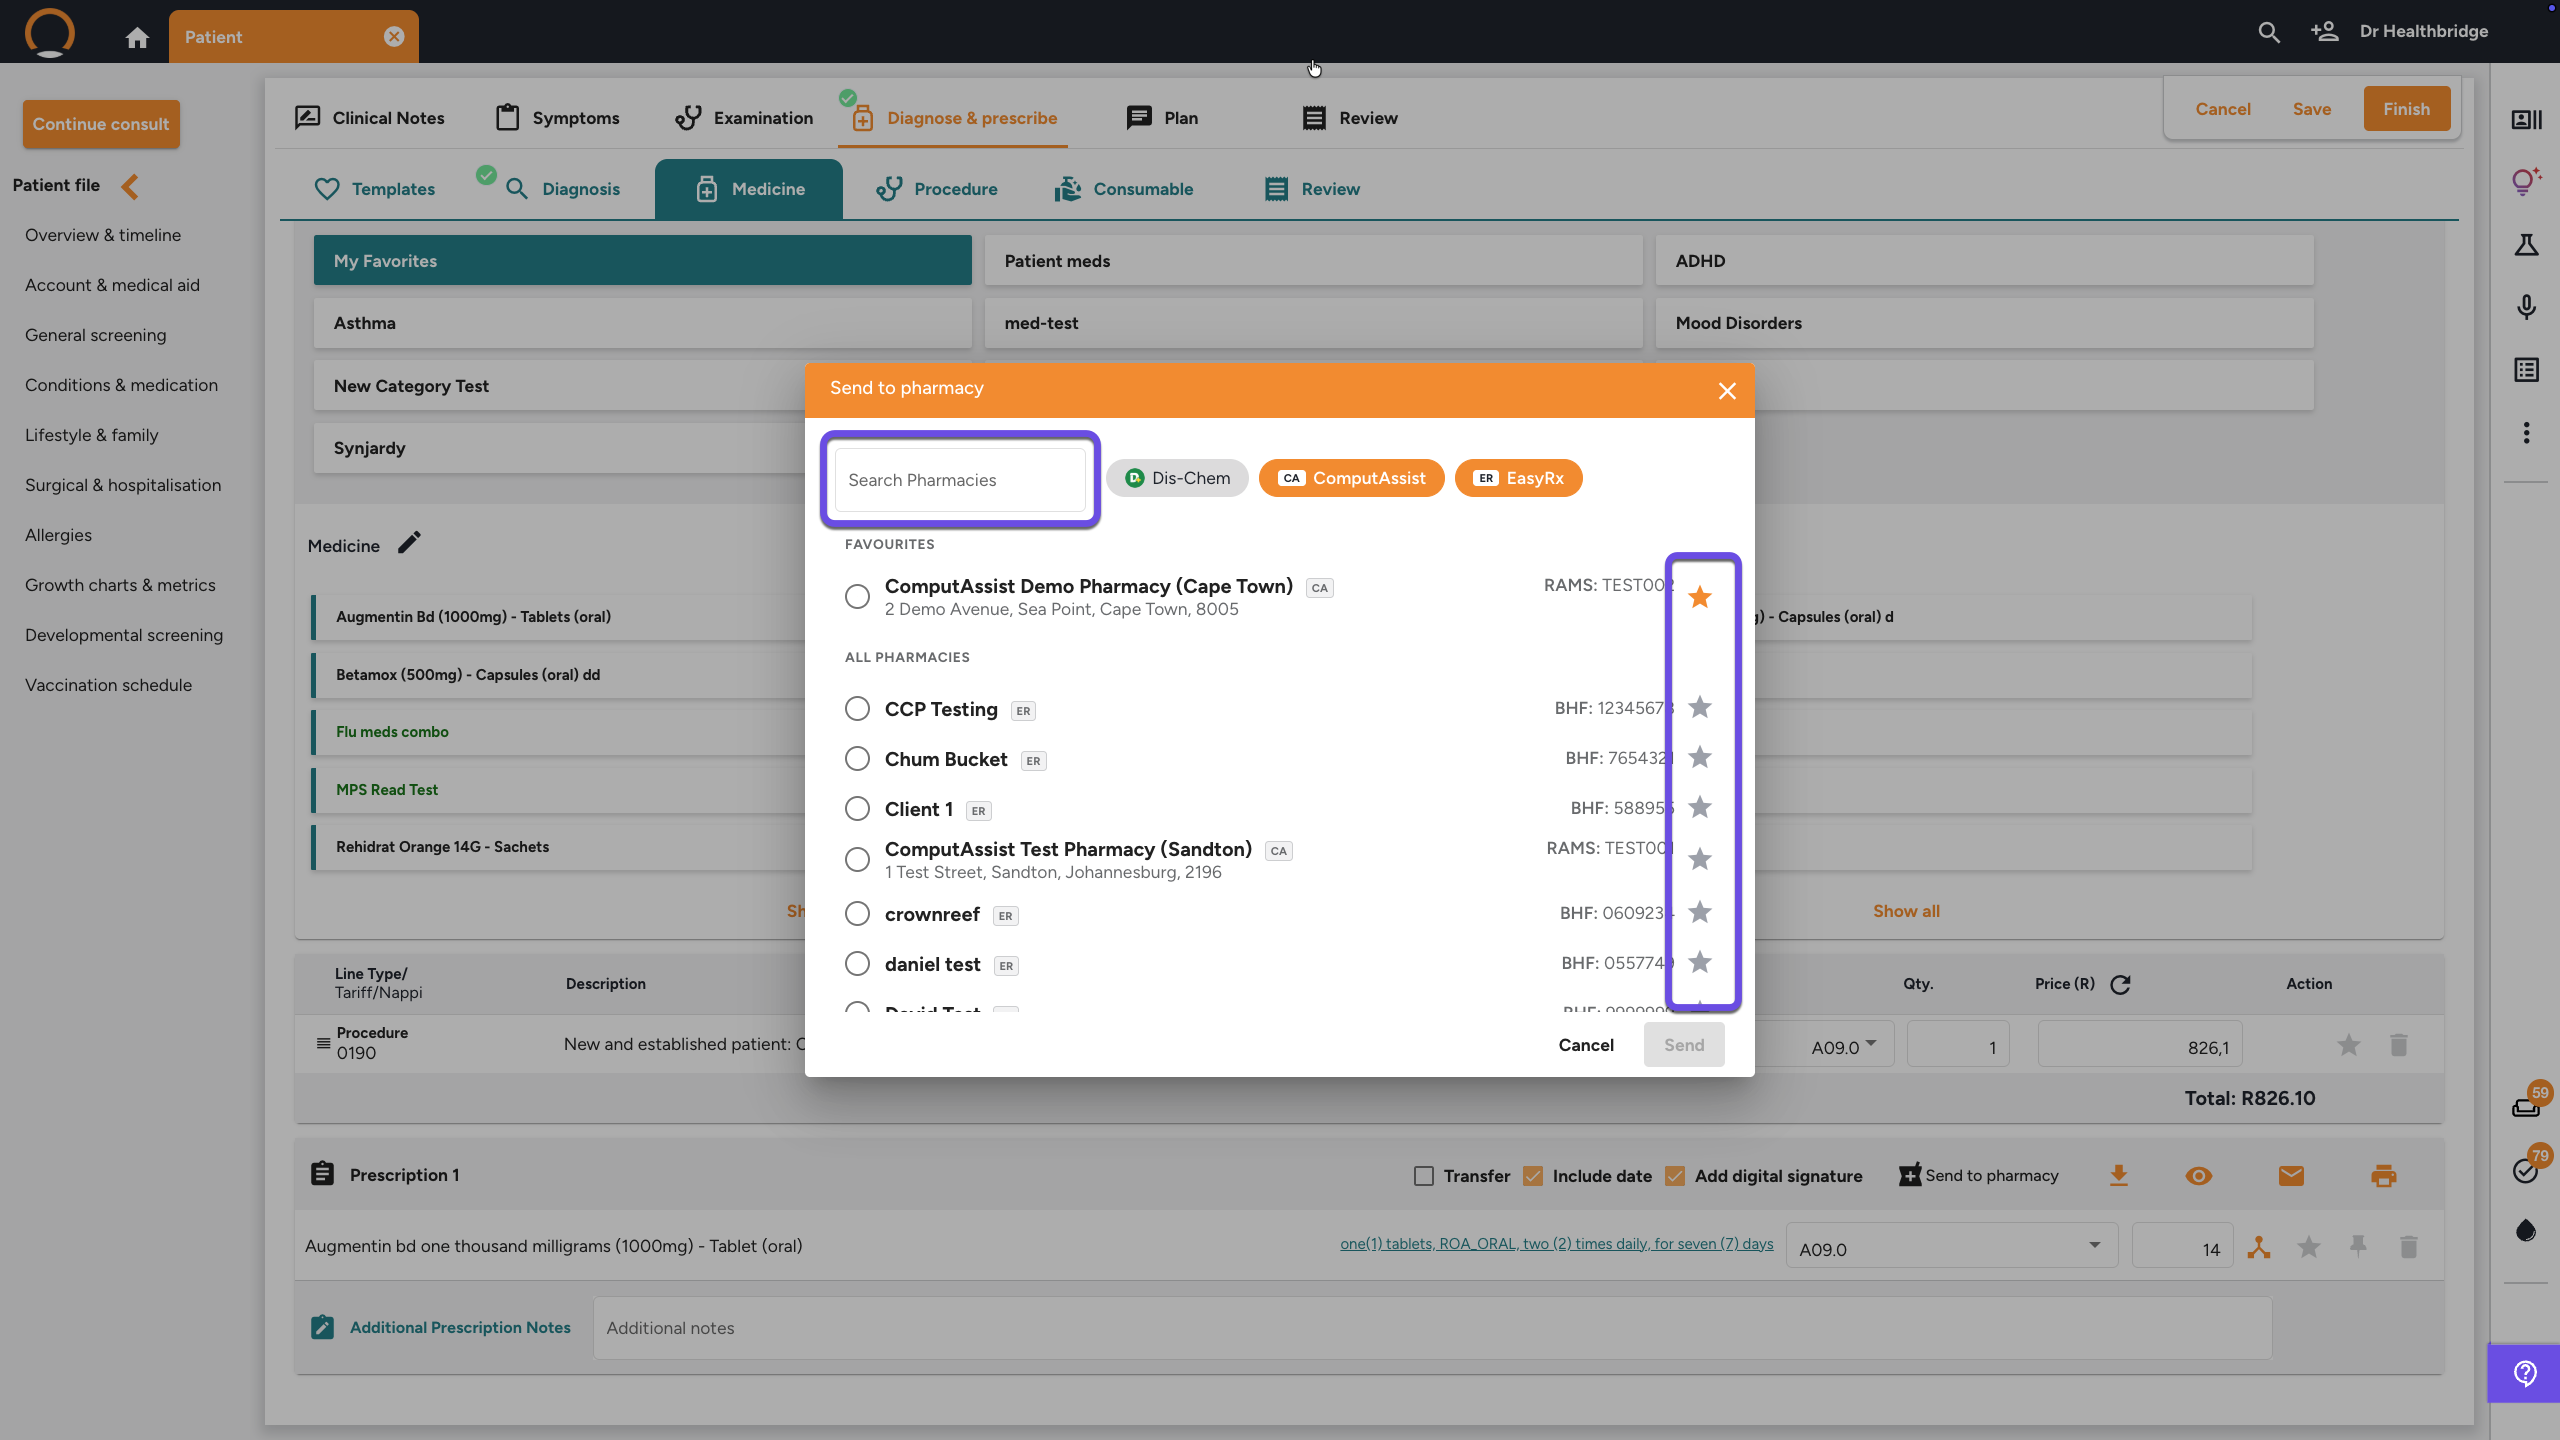
- When the 'Send to pharmacy' pop-up window appears, filter pharmacies using the network buttons at the top (Dis-Chem, ComputAssist, or EasyRx).
- Enter the store name, town, or address in the 'Search Pharmacies' field.
- To save a pharmacy branch for future visits, click the Star icon (★) next to the store name to add it to your 'FAVOURITES' list (favourites will appear at the top of the list).
- Click the radio button next to the desired pharmacy branch, then click the 'Send' button in the bottom-right corner.
Step 4: Confirm Prescription Submission
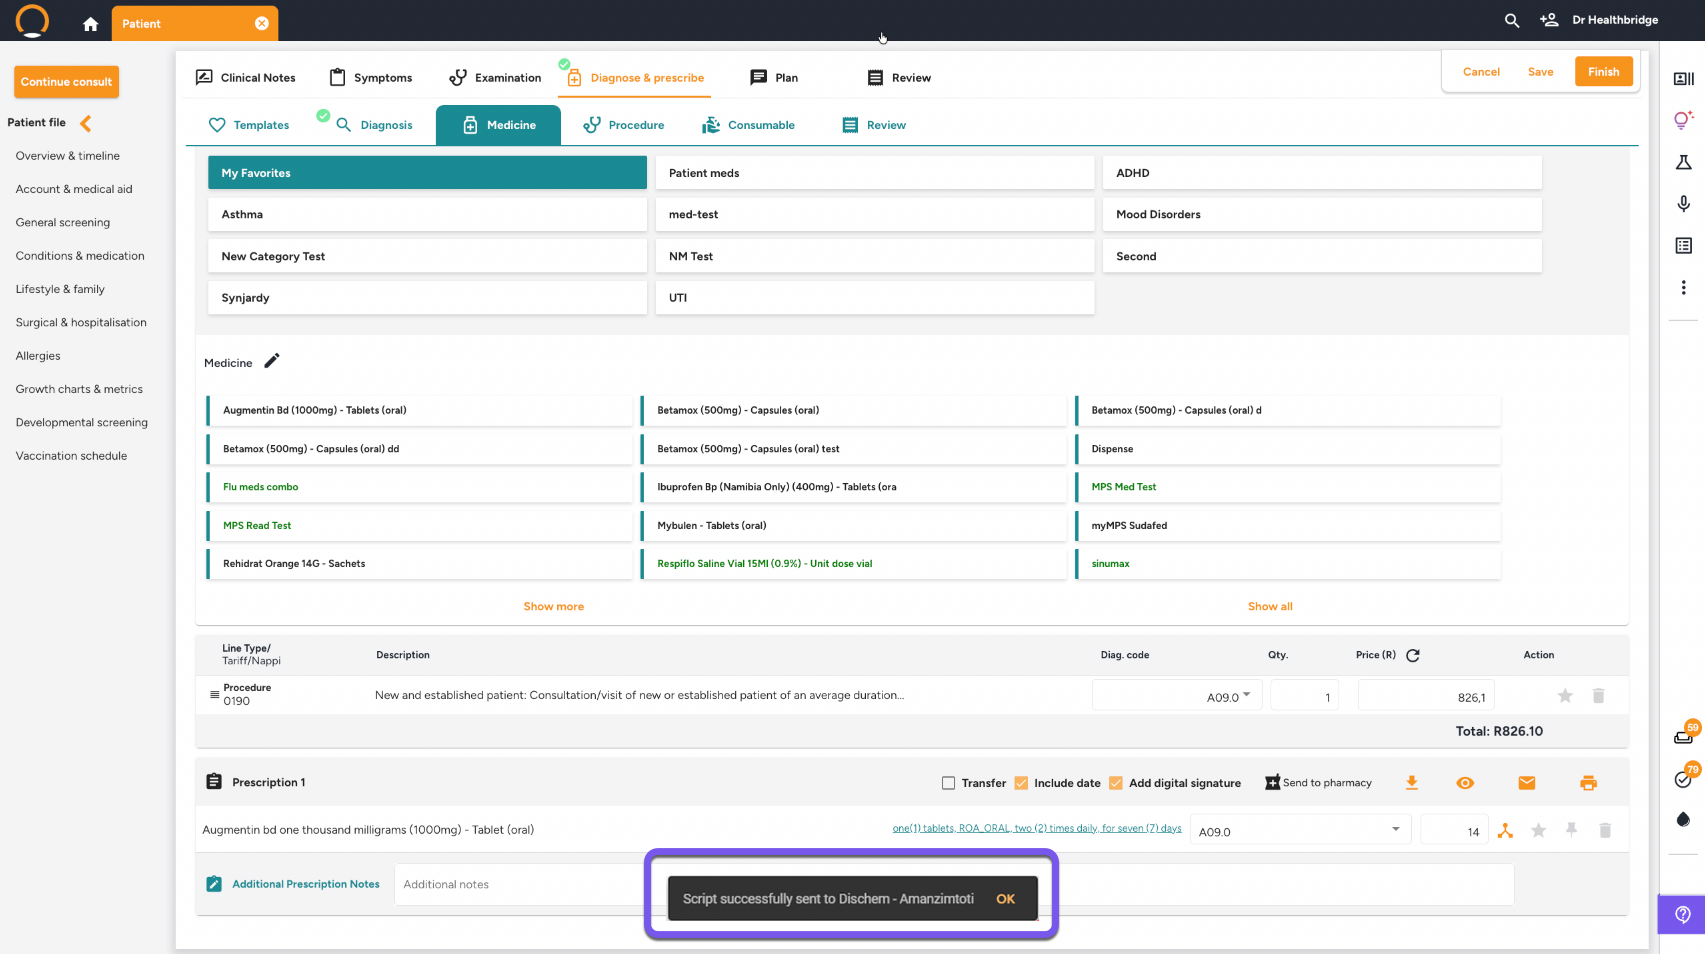
- The system will electronically transmit the prescription directly to the selected pharmacy branch.
- A confirmation notification will appear on screen letting you know the script was successfully sent.
Step 5: View Sent Script in the Patient Timeline
- Open the Patient Timeline under the patient profile.
- Review the prescription entry and its documented transmission status for easy tracking and audit purposes.

Step 6: Cancel or Redirect an Unprocessed Script (If Needed)
If the script has not yet been processed by the pharmacy or if the patient requests a store change, cancel it using one of two methods:
- Method A (Within the Consultation): Go to the 'Medicine' sub-tab under 'Diagnose & prescribe', locate the prescription line item, and click 'Cancel'.
- Method B (From the Patient Timeline): Locate the sent script card on the Patient Timeline, click 'Cancel', and confirm when prompted.
