Conducting a consultation
This structured workflow replaces manual note-writing with an AI-assisted process, guiding you through patient creation, pre-consultation review, and automated documentation. By leveraging these tools, practitioners can reduce administrative burdens and focus entirely on patient care.
Step 1: Create or Locate the Patient
- Navigate to the main dashboard.
- To register a new profile, click the Add new patient button located in the top right menu bar.
- Enter the required demographic information and click Save.
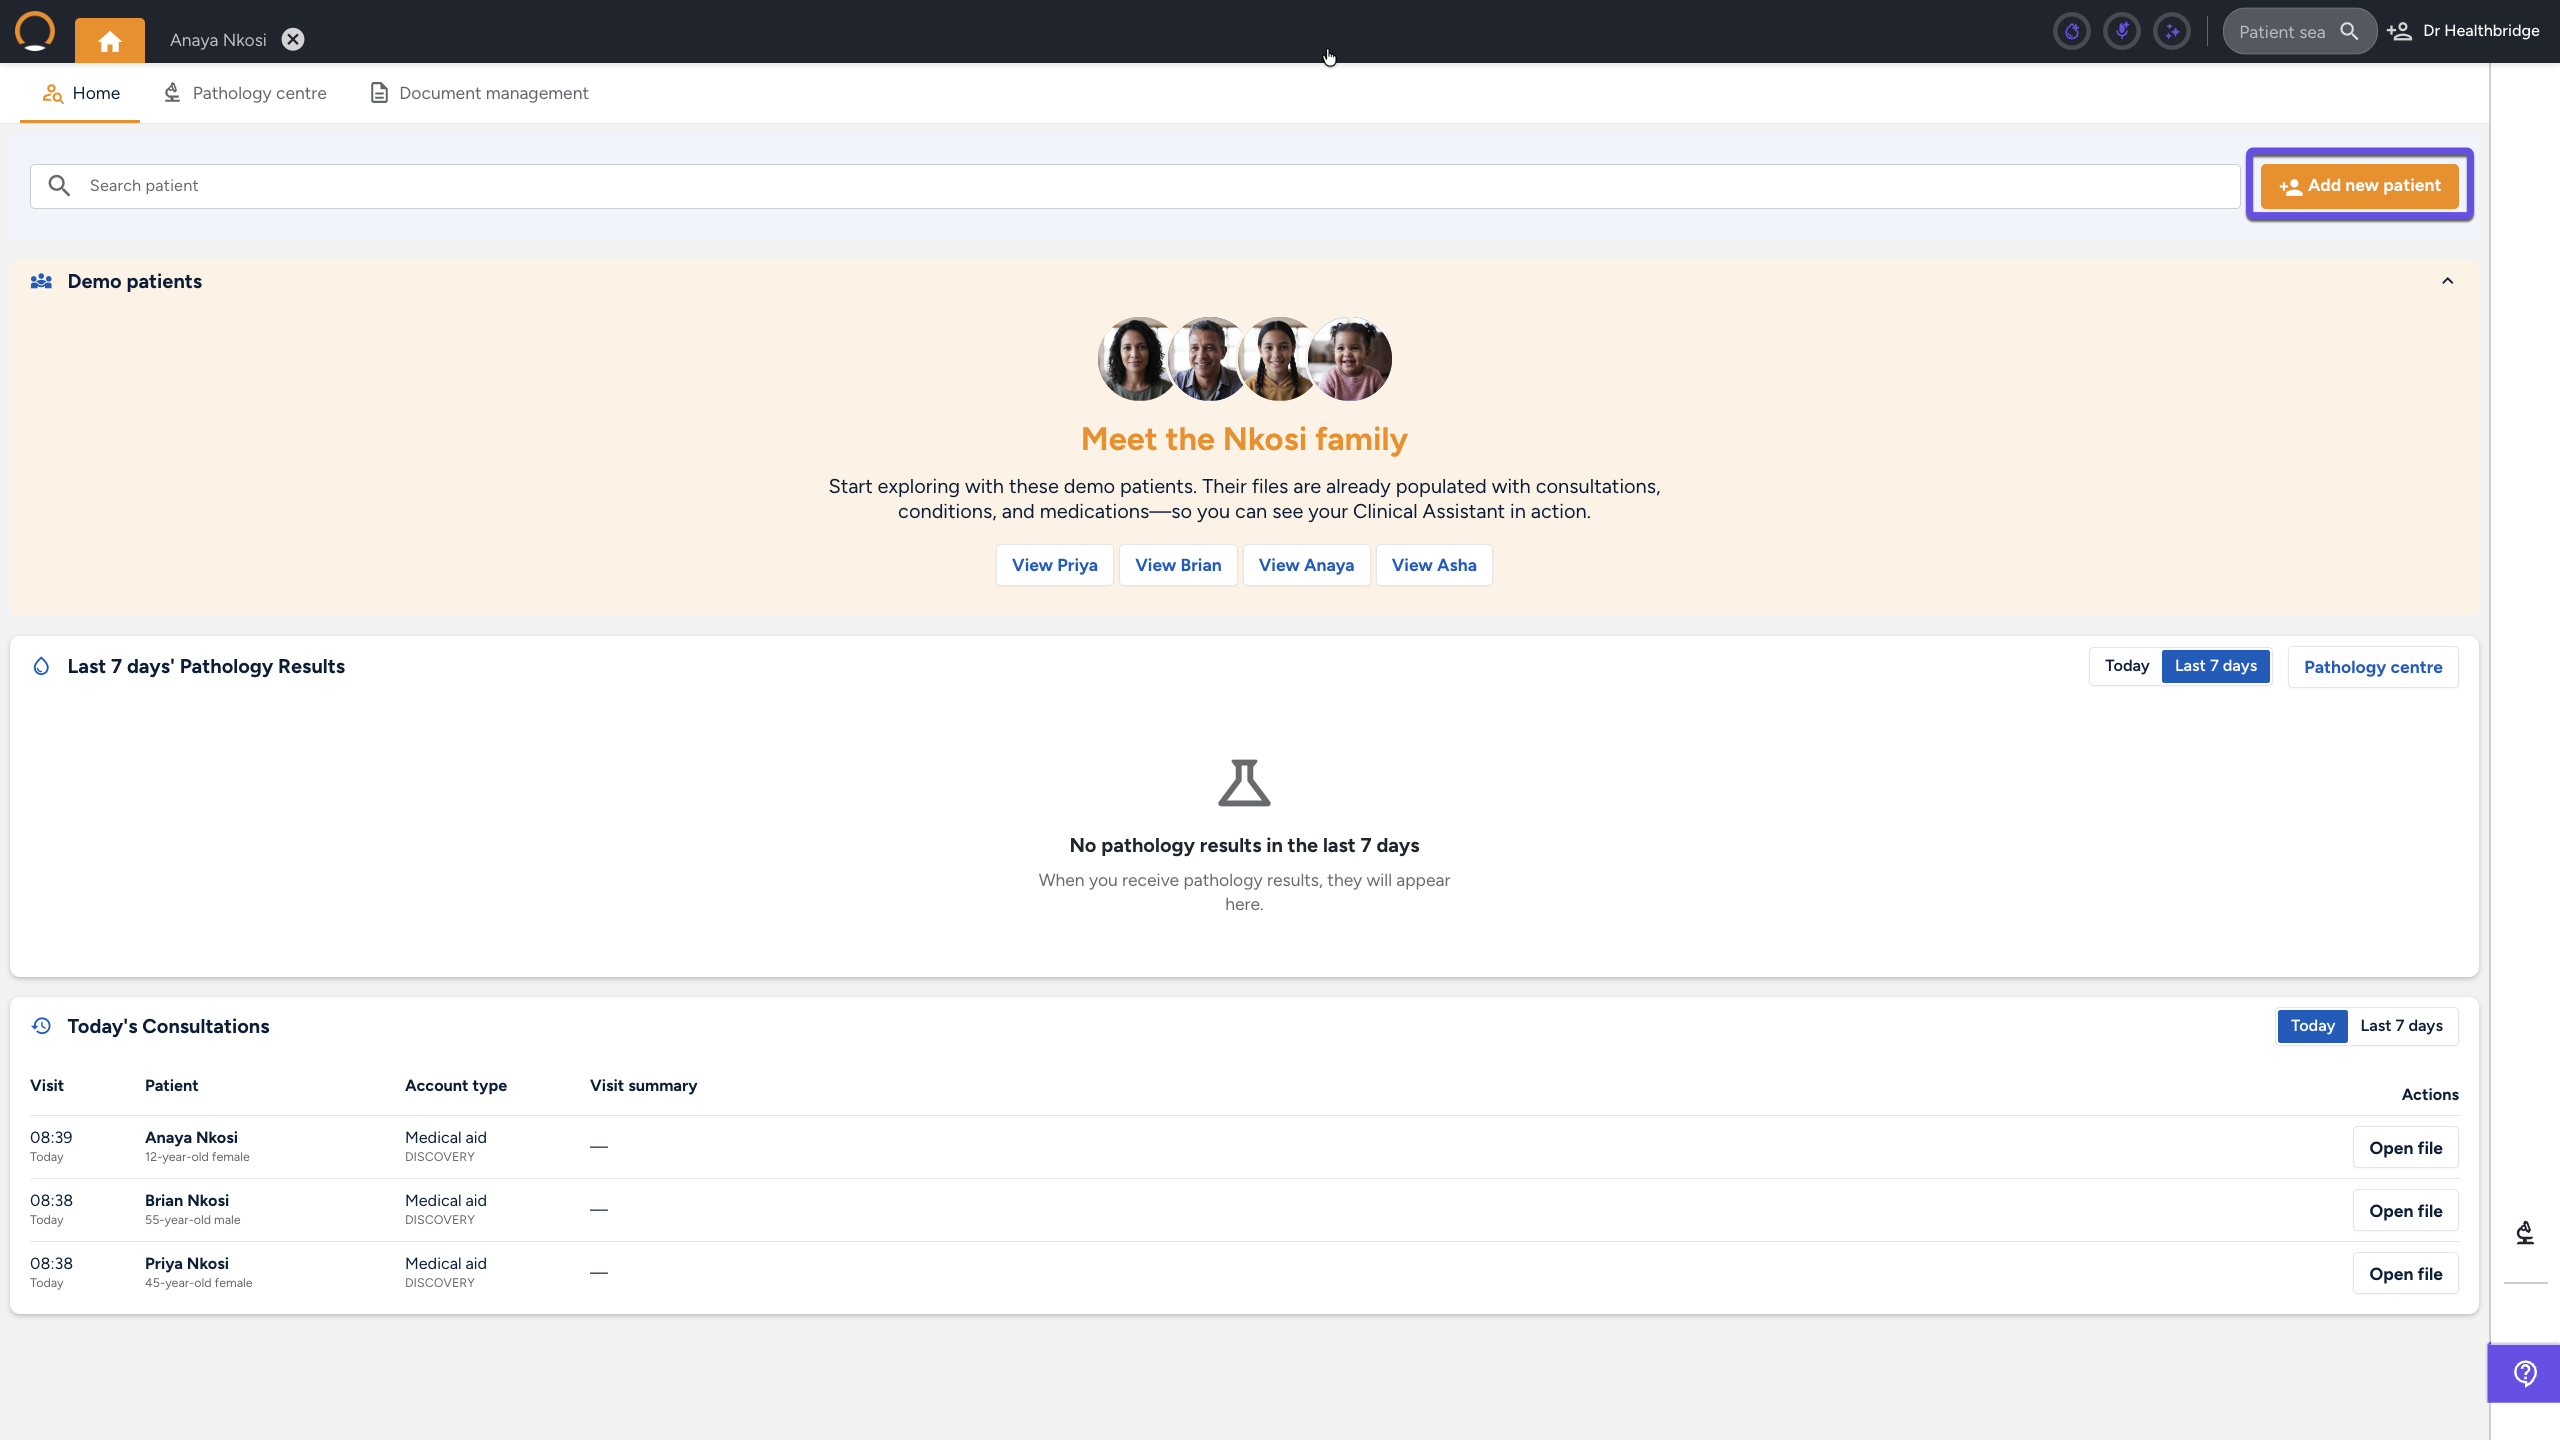
- Alternatively, use the patient search bar at the top of the screen to locate and open an existing patient's file.
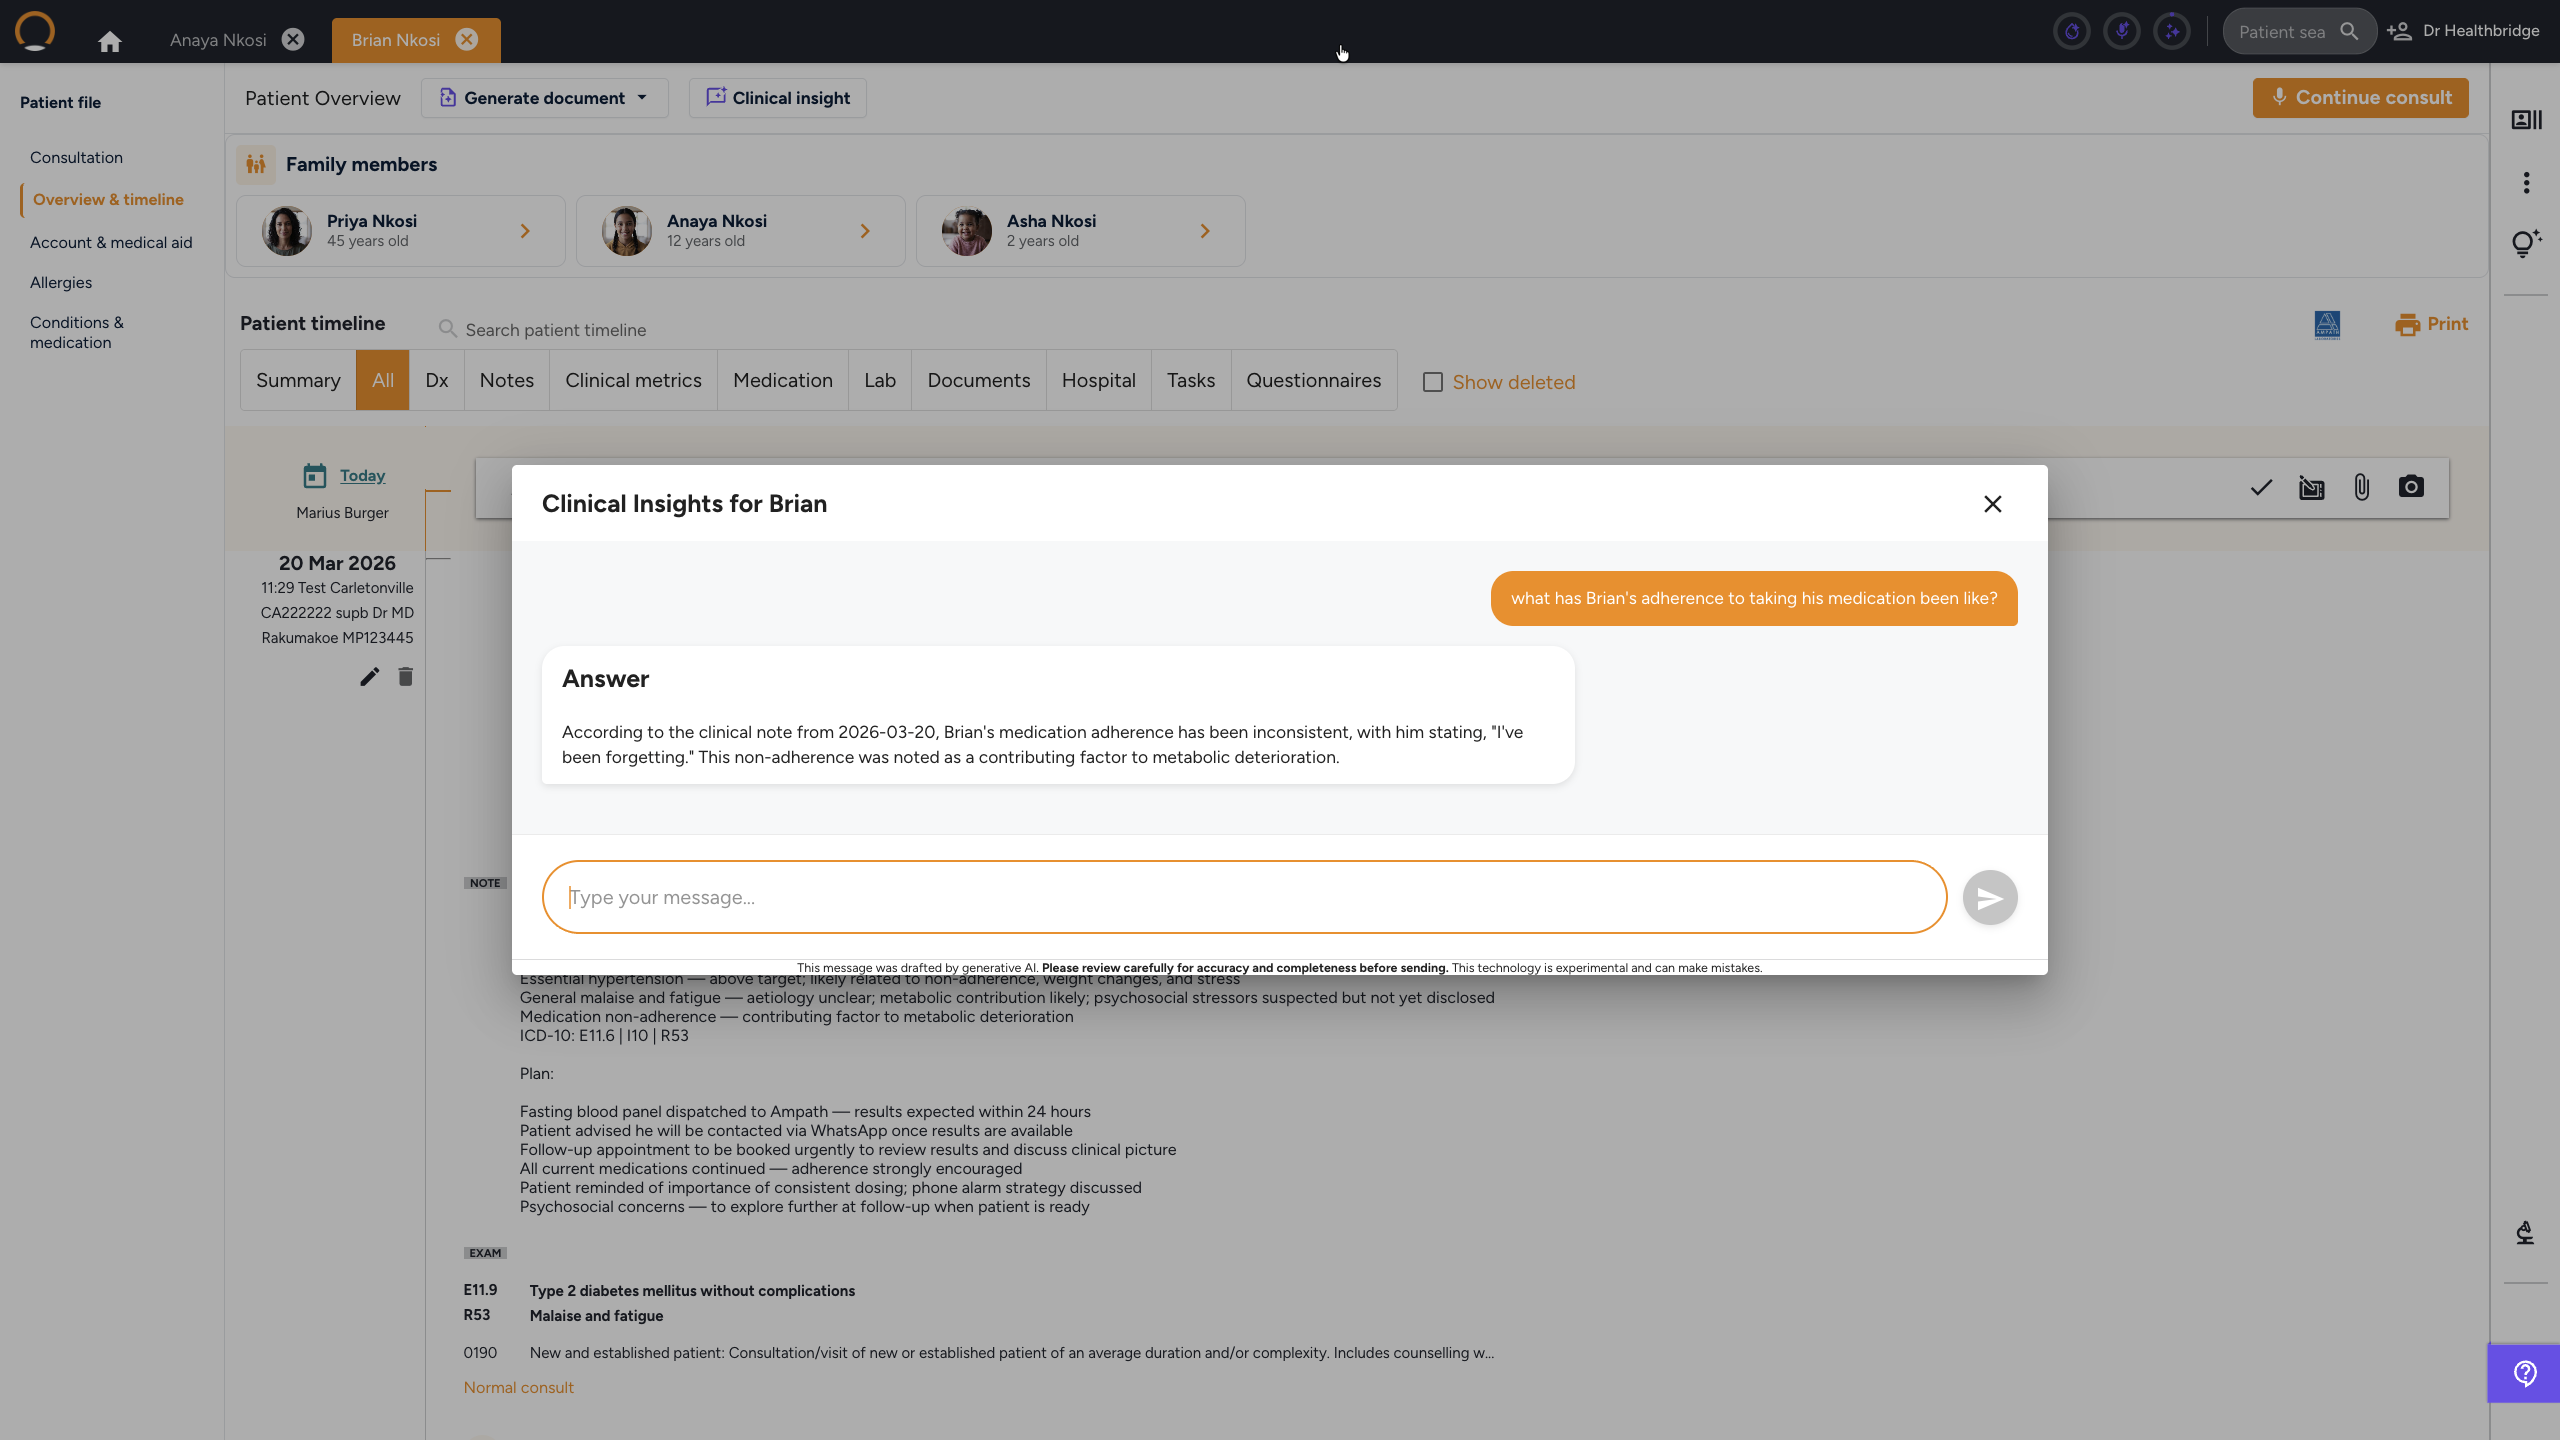
Step 2: Pre-Consultation Review with Clinical Insights
- Once the patient file is open, the Patient Timeline will display their recorded interactions, diagnoses, and lab results.
- To quickly verify specific history, click the Clinical insight button located directly above the timeline, or click the Lightbulb icon in the right-hand panel.
- Type a plain-language question (e.g., "What was the last HbA1c result?") into the conversational input field and click Generate to receive an immediate, evidence-based answer synthesized from the patient's data.
Please note that Clinical Insights can be used during any phase of the consultation.
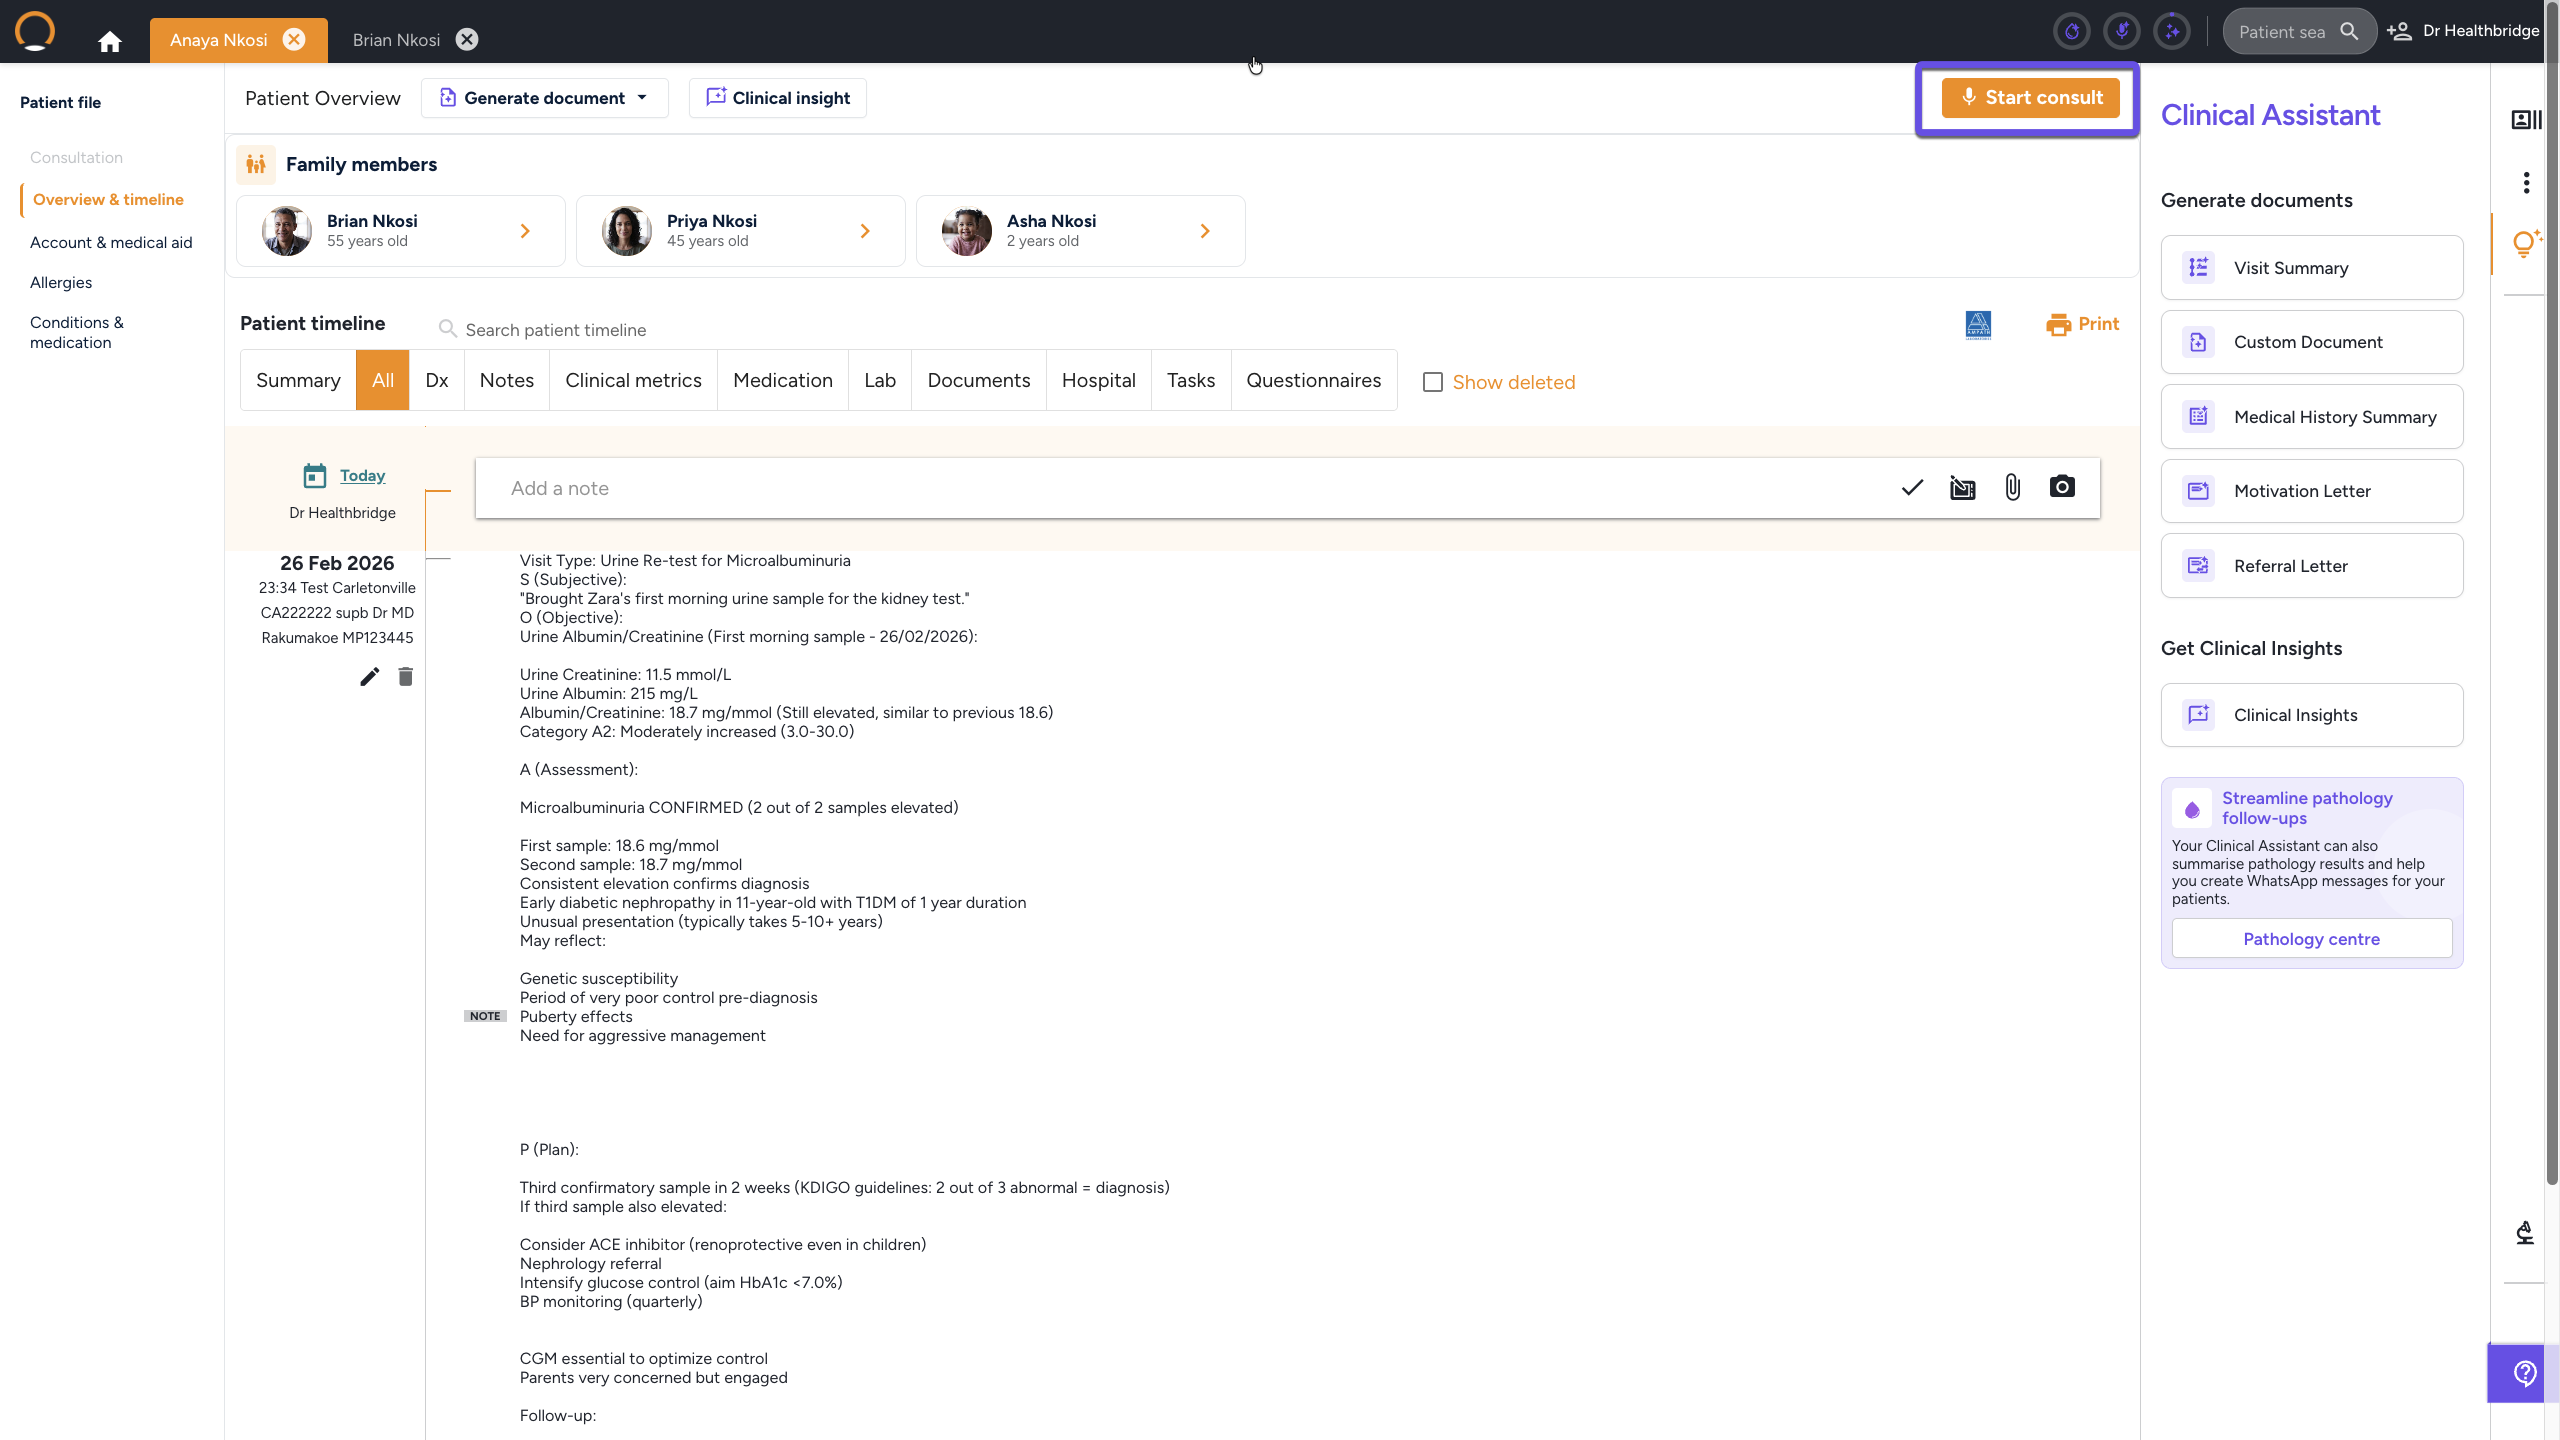
Step 3: Initiate the Consultation & Activate Nora
- Click the orange Start consult button located in the top-right area of the patient file.
- Navigate to the right-hand sidebar and click the Microphone icon to launch the Nora ambient scribe.
- Choose your preferred capture method: Select Consultation Mode to passively record the entire patient conversation, or Dictation Mode to speak a summary after the patient has left.
- Click the start recording button, proceed with the consultation, and click the stop recording button when finished. Nora will automatically process the audio and generate structured clinical notes.
- To complete a consult click on the "End Consult" button to save it to the patient timeline.

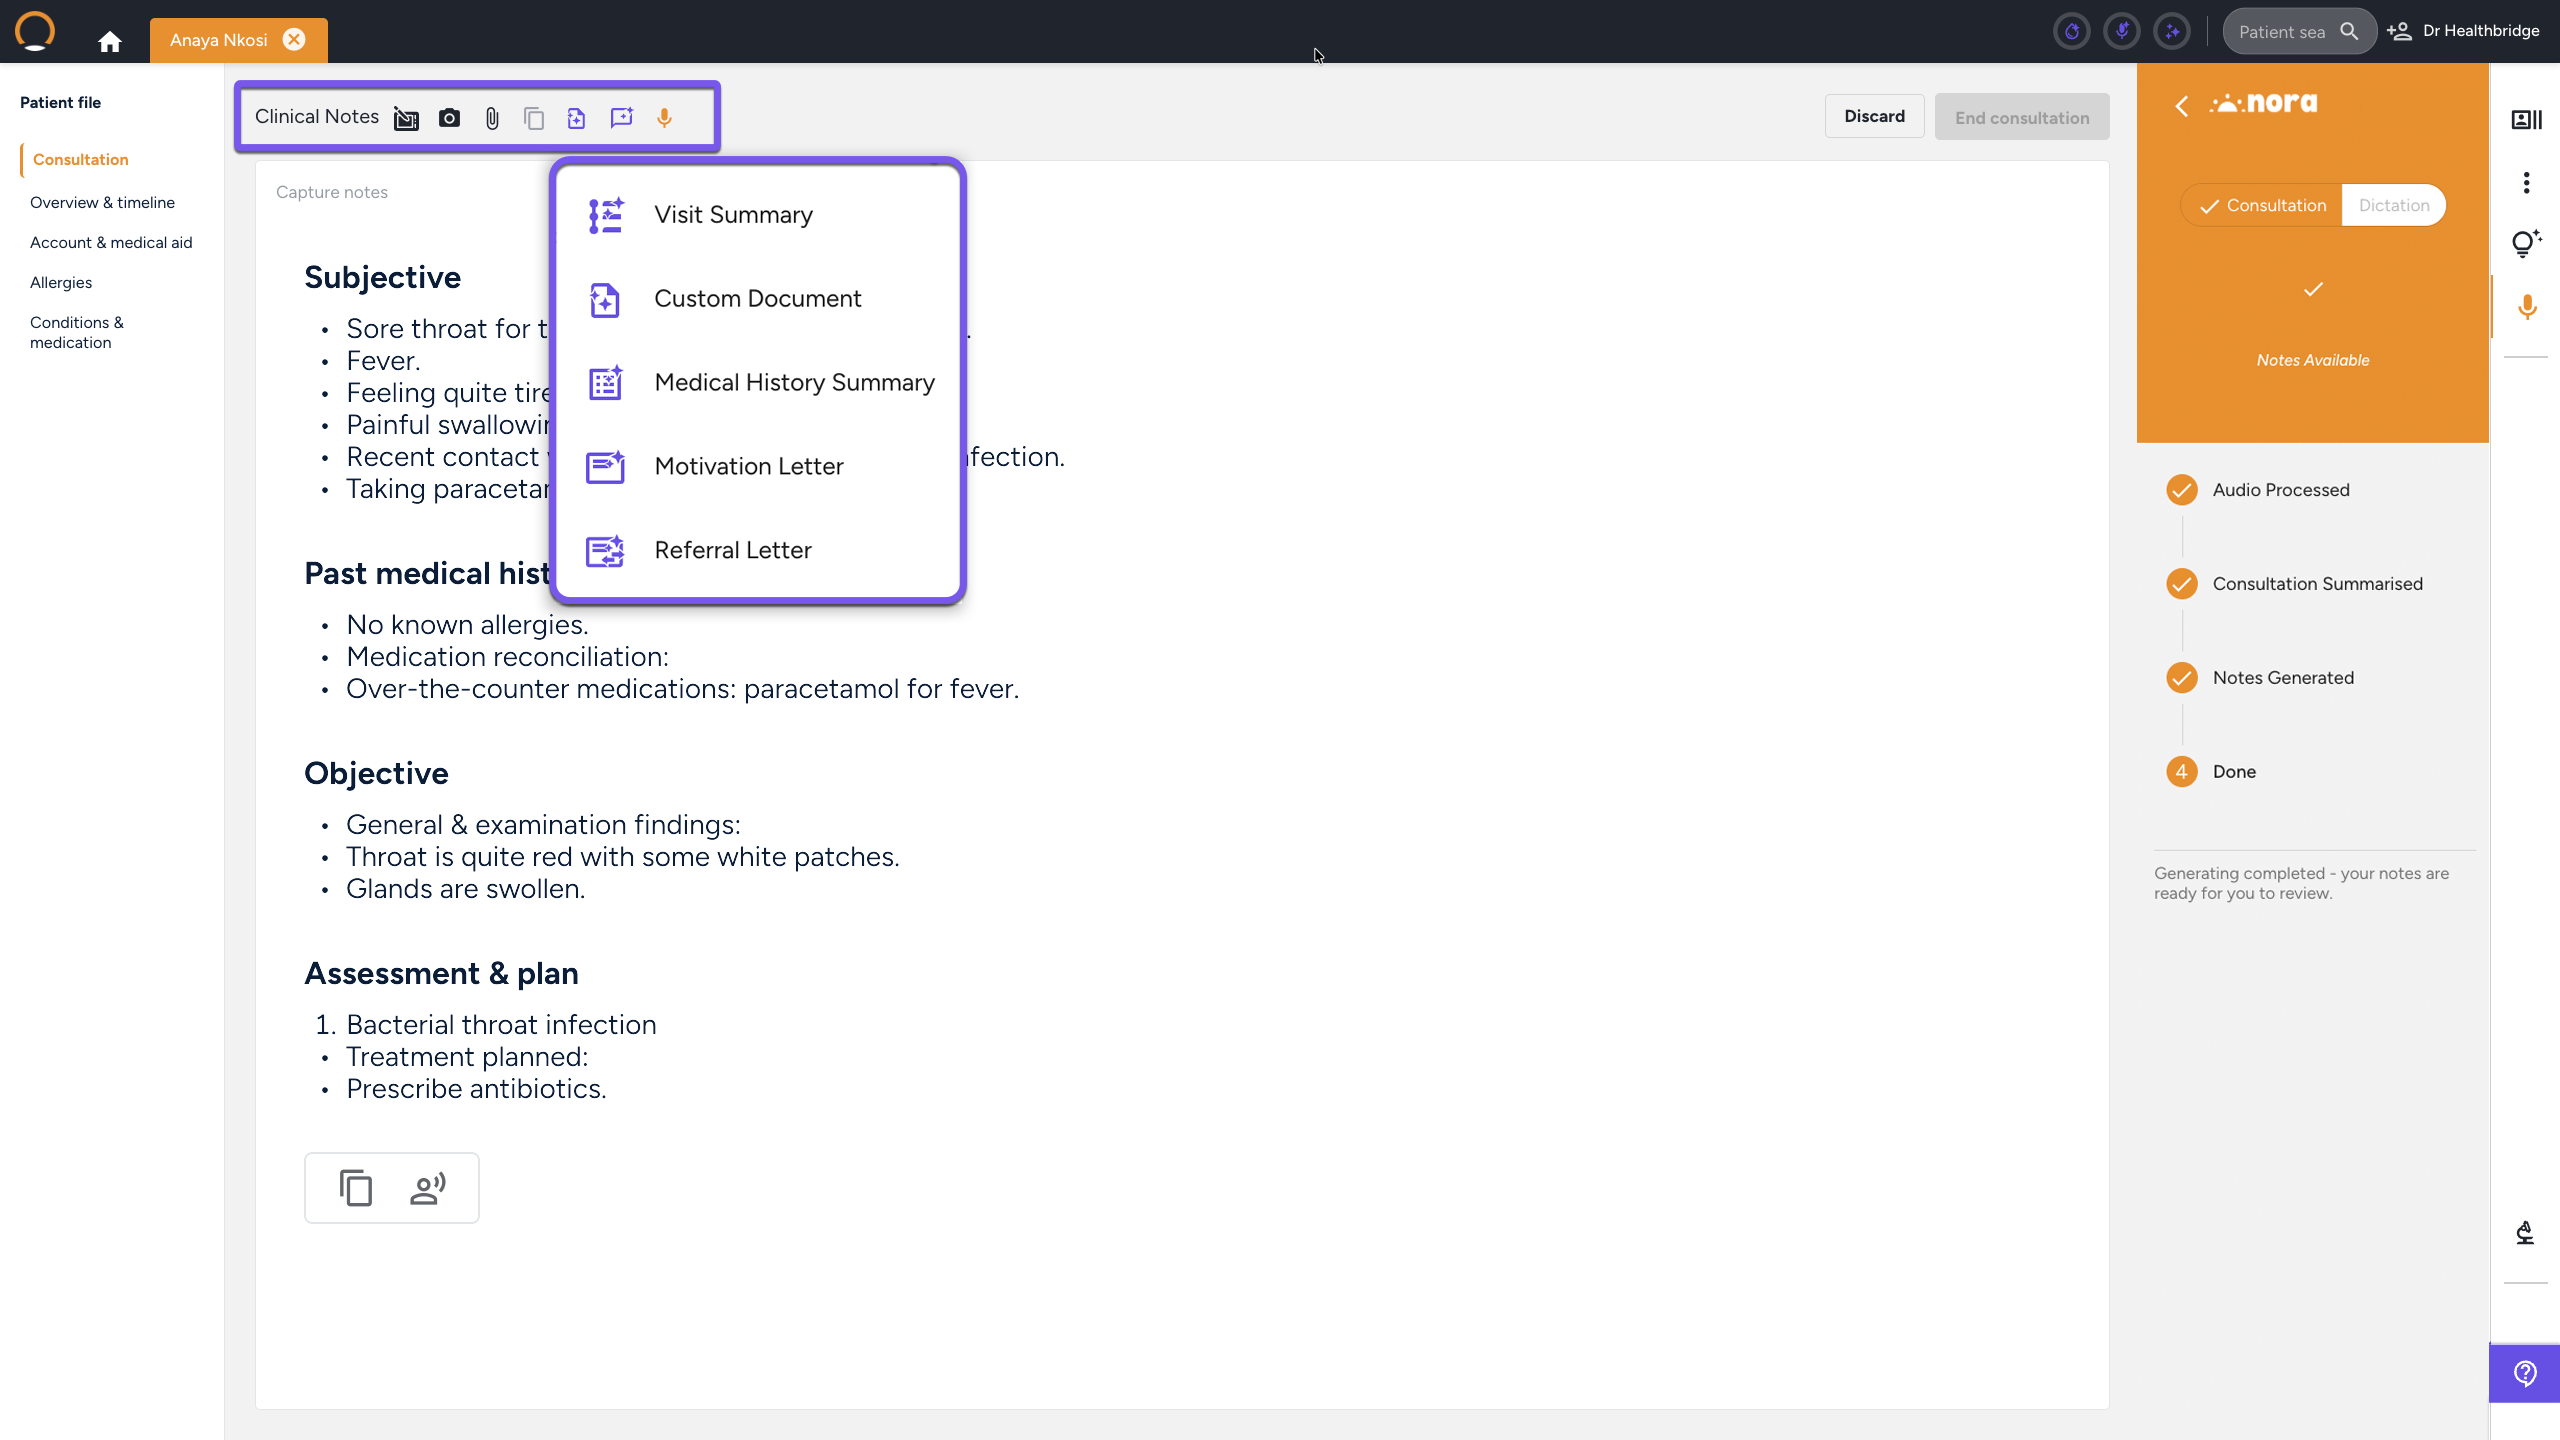
Optional Step: Generate Patient Summaries & Documents
- Click Generate Visit Summary under the "Generate Document" button to automatically draft a clear, patient-friendly guide covering the diagnosis, treatment plan, and follow-up steps.
- You may also click on cards for a Referral Letter, Motivation Letter, or Custom Document to prompt the Clinical Assistant to draft specialized administrative paperwork using the patient's timeline data.
- Review the drafted text and distribute it by clicking Copy to Letterhead, Download, or Send (via WhatsApp).