
How to Upload Documents to a Patient File
1. Launch Healthbridge Clinical
- Open the Healthbridge Clinical application on your device.
2. Locate the patient record using one of the following methods to find the correct patient:
- Search Function – Enter the patient’s name or ID.
- Waiting Room – Select the patient from the checked-in list.
- Calendar – Find the patient based on their scheduled appointment.
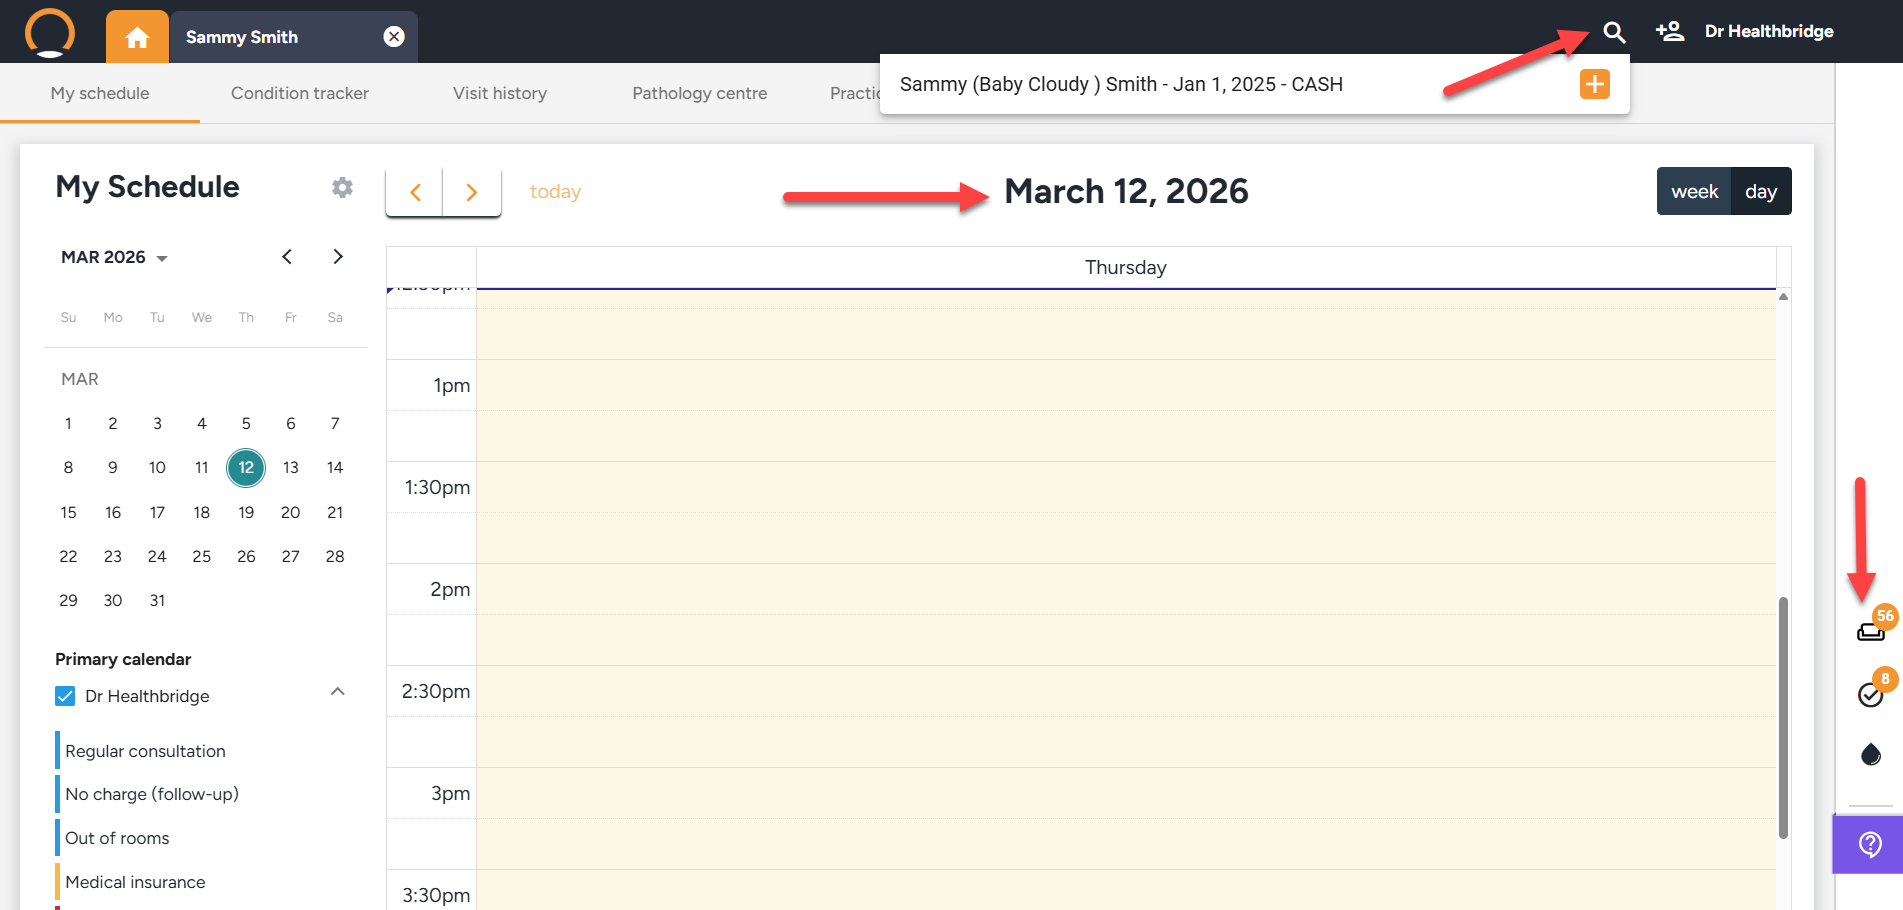
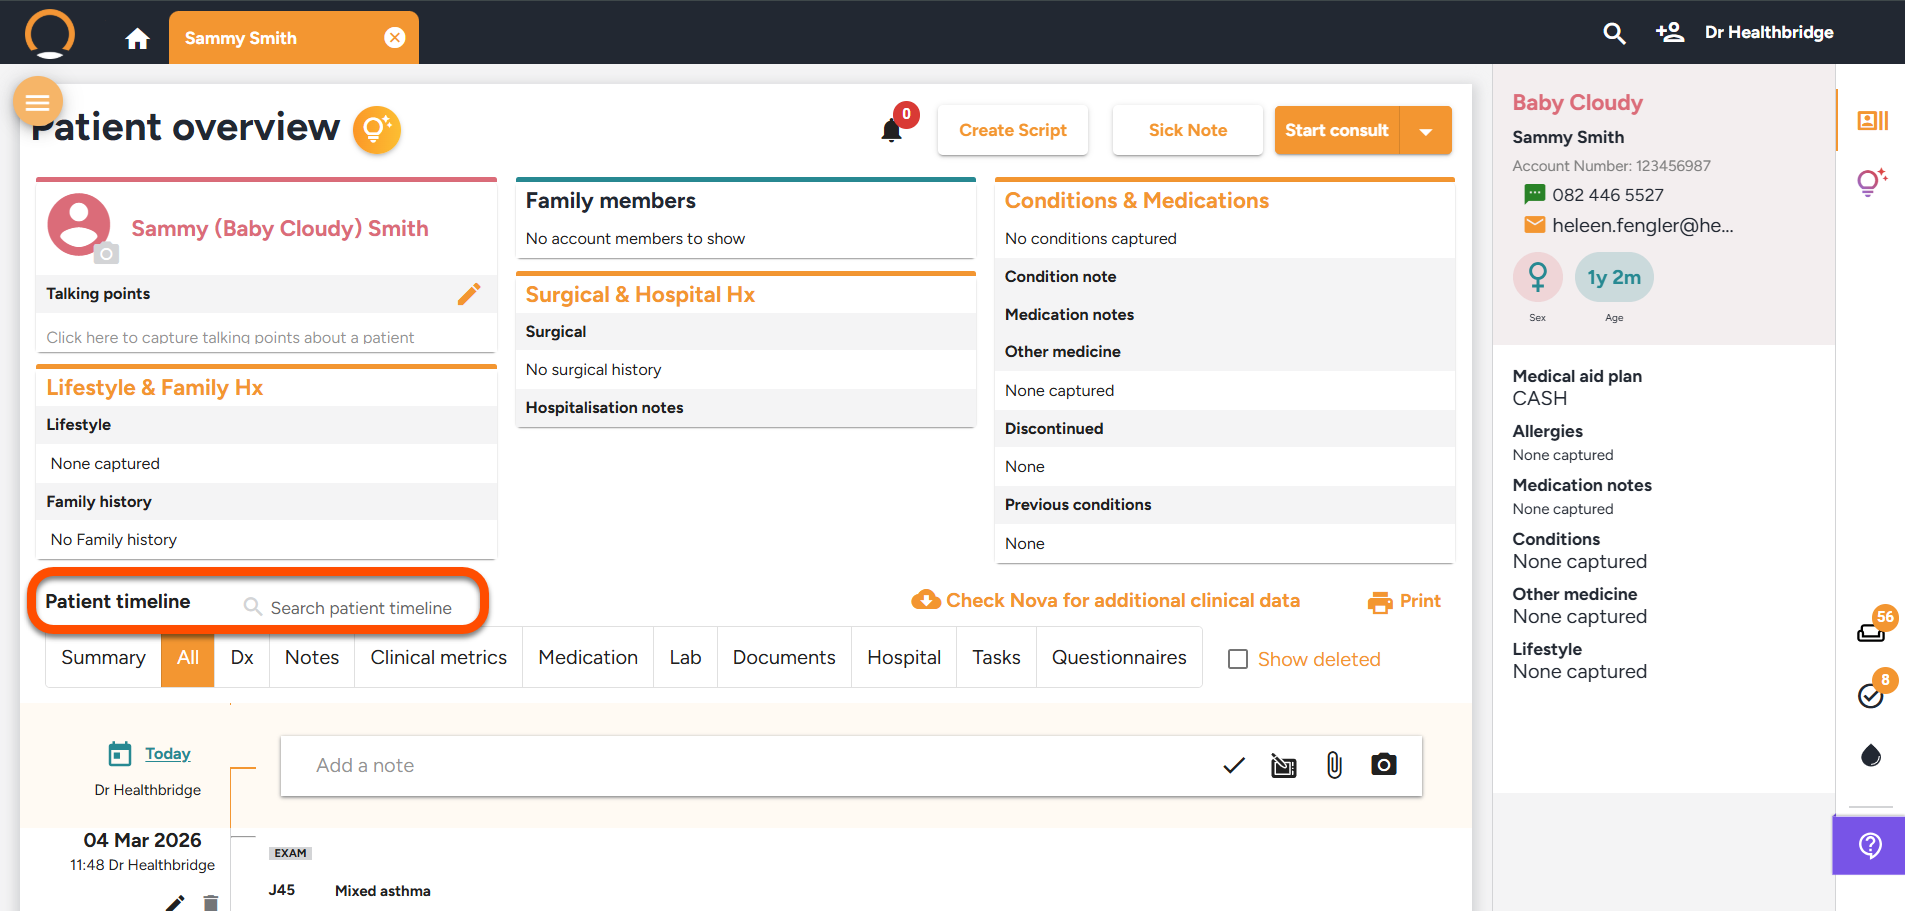
3. Access the Patient Timeline
- Open the patient file; the Patient Timeline will be displayed automatically.
- Scroll through the timeline to locate the relevant section for document upload.
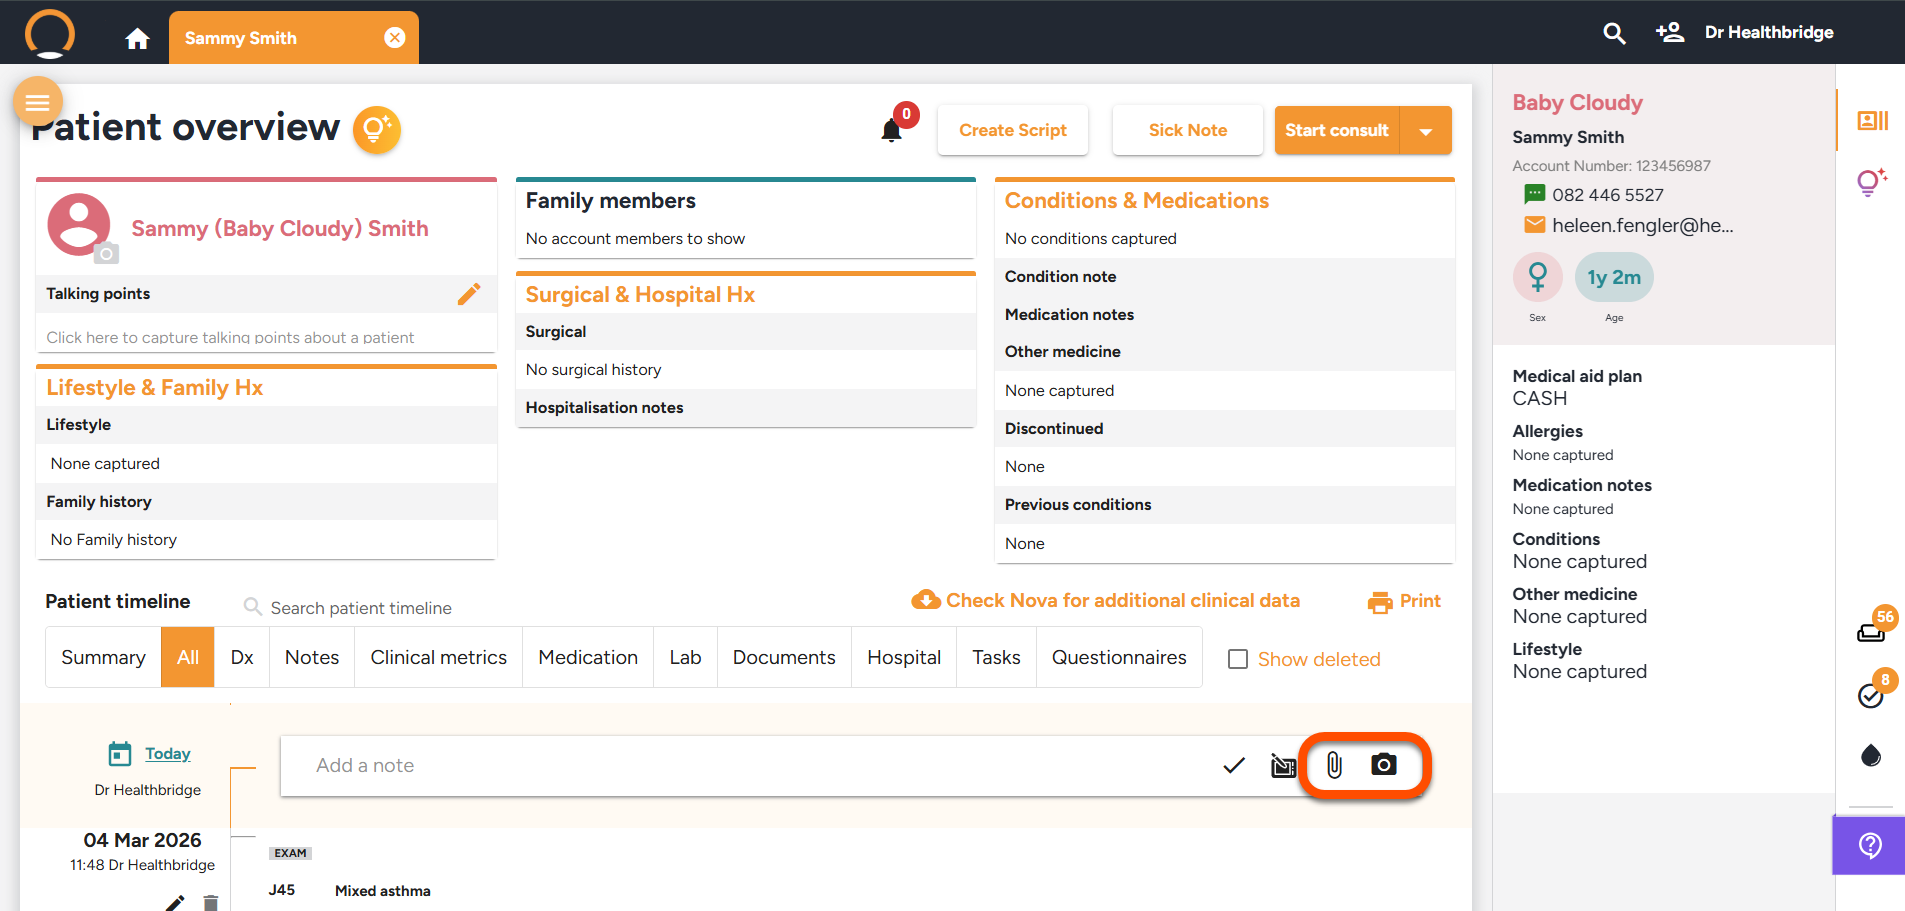
4. Initiate the Upload Process
- Click the "📎 Paper Clip" icon to upload an existing file.
- Click the "📷 Camera" icon to capture and upload a new image.
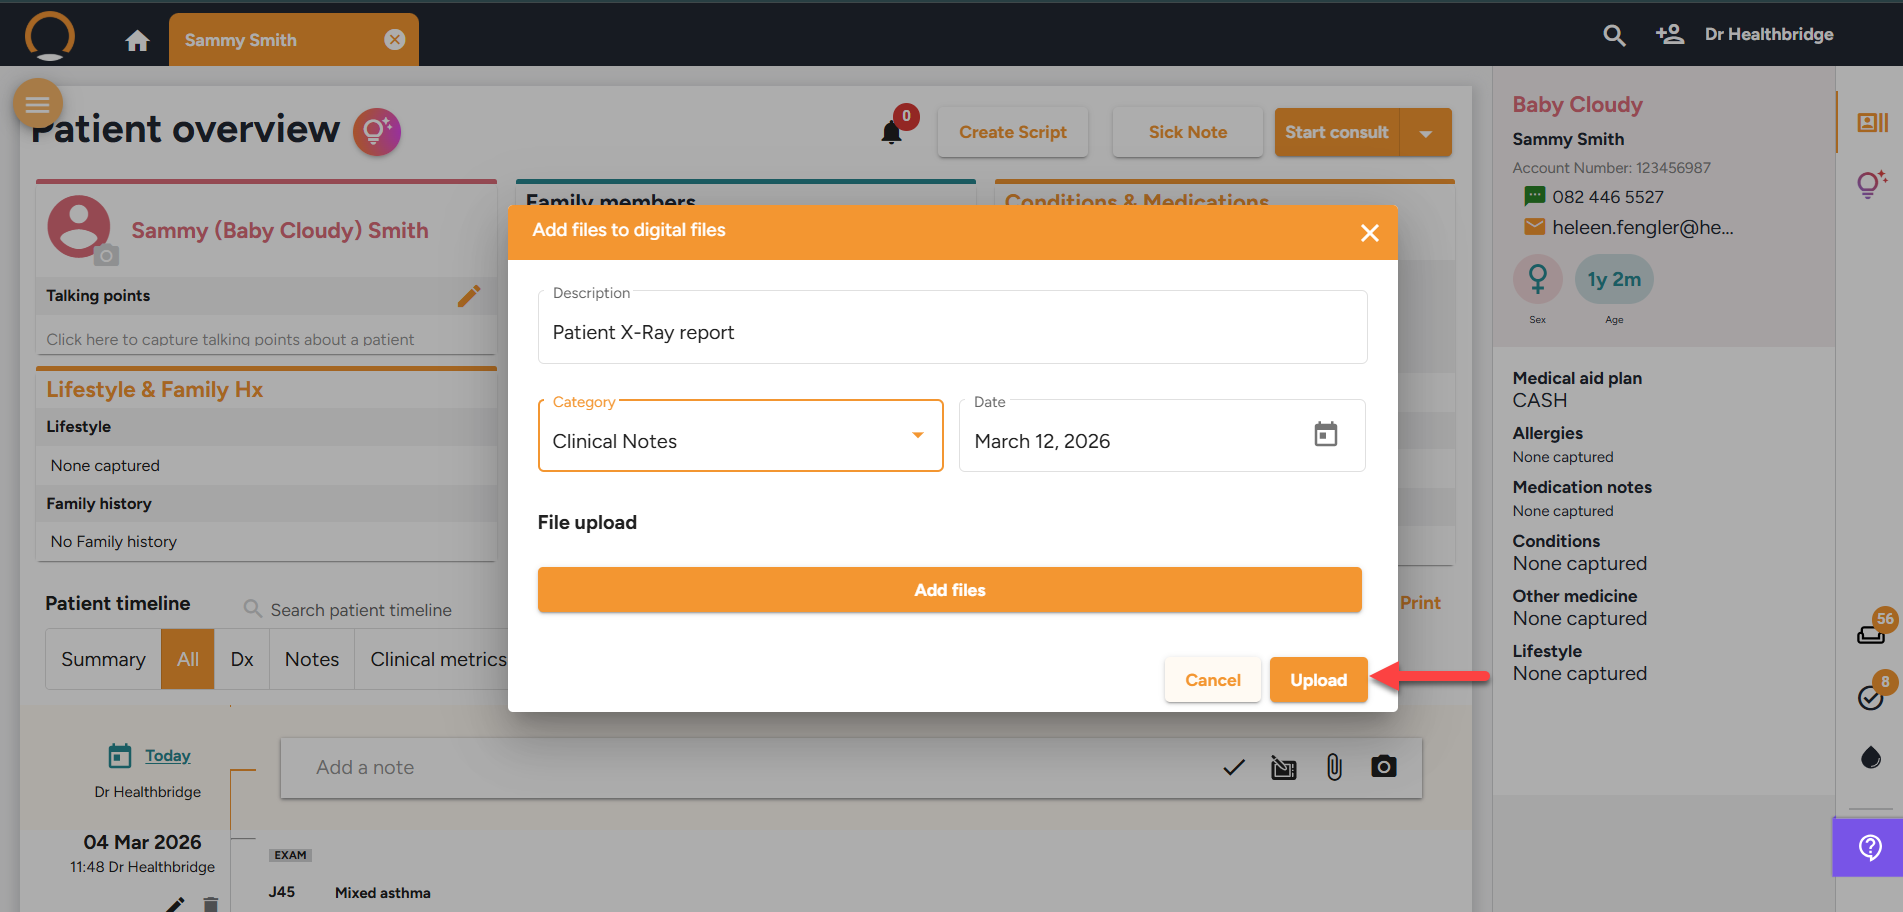
5. Enter Document Details
- Add a Description for the document.
- Select a Category to classify the file for easy retrieval.
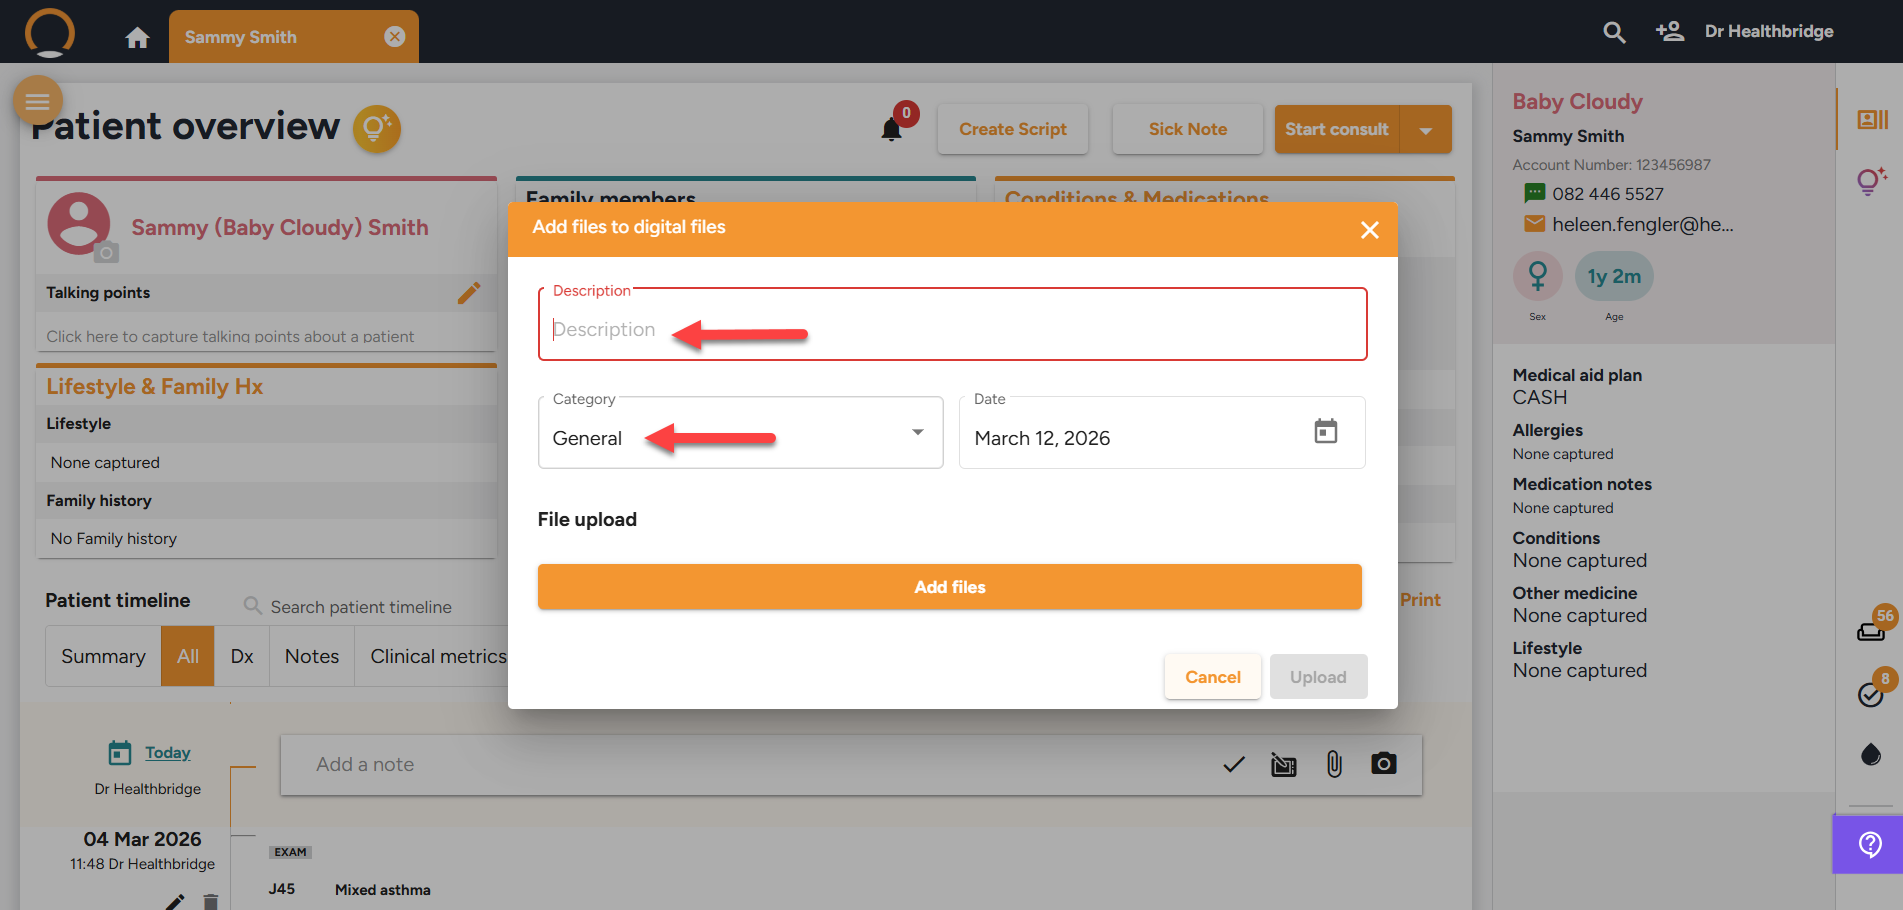
6. Finalize the Upload
- Click "Upload" to save the document to the Patient Timeline.
- The document will now be accessible for future reference.
This feature ensures secure document storage, efficient record-keeping, and easy access to patient files.