
Custom Document
There are two primary ways to generate a Custom Document: from the main Patient Overview screen or directly within a consultation.
Method 1: From the Patient Overview
This method is ideal for creating unique documents outside of an active consultation.
Step 1: Open the Patient Overview
Access the patient's file from the Calendar, Waiting Room, or by using the Search Bar.
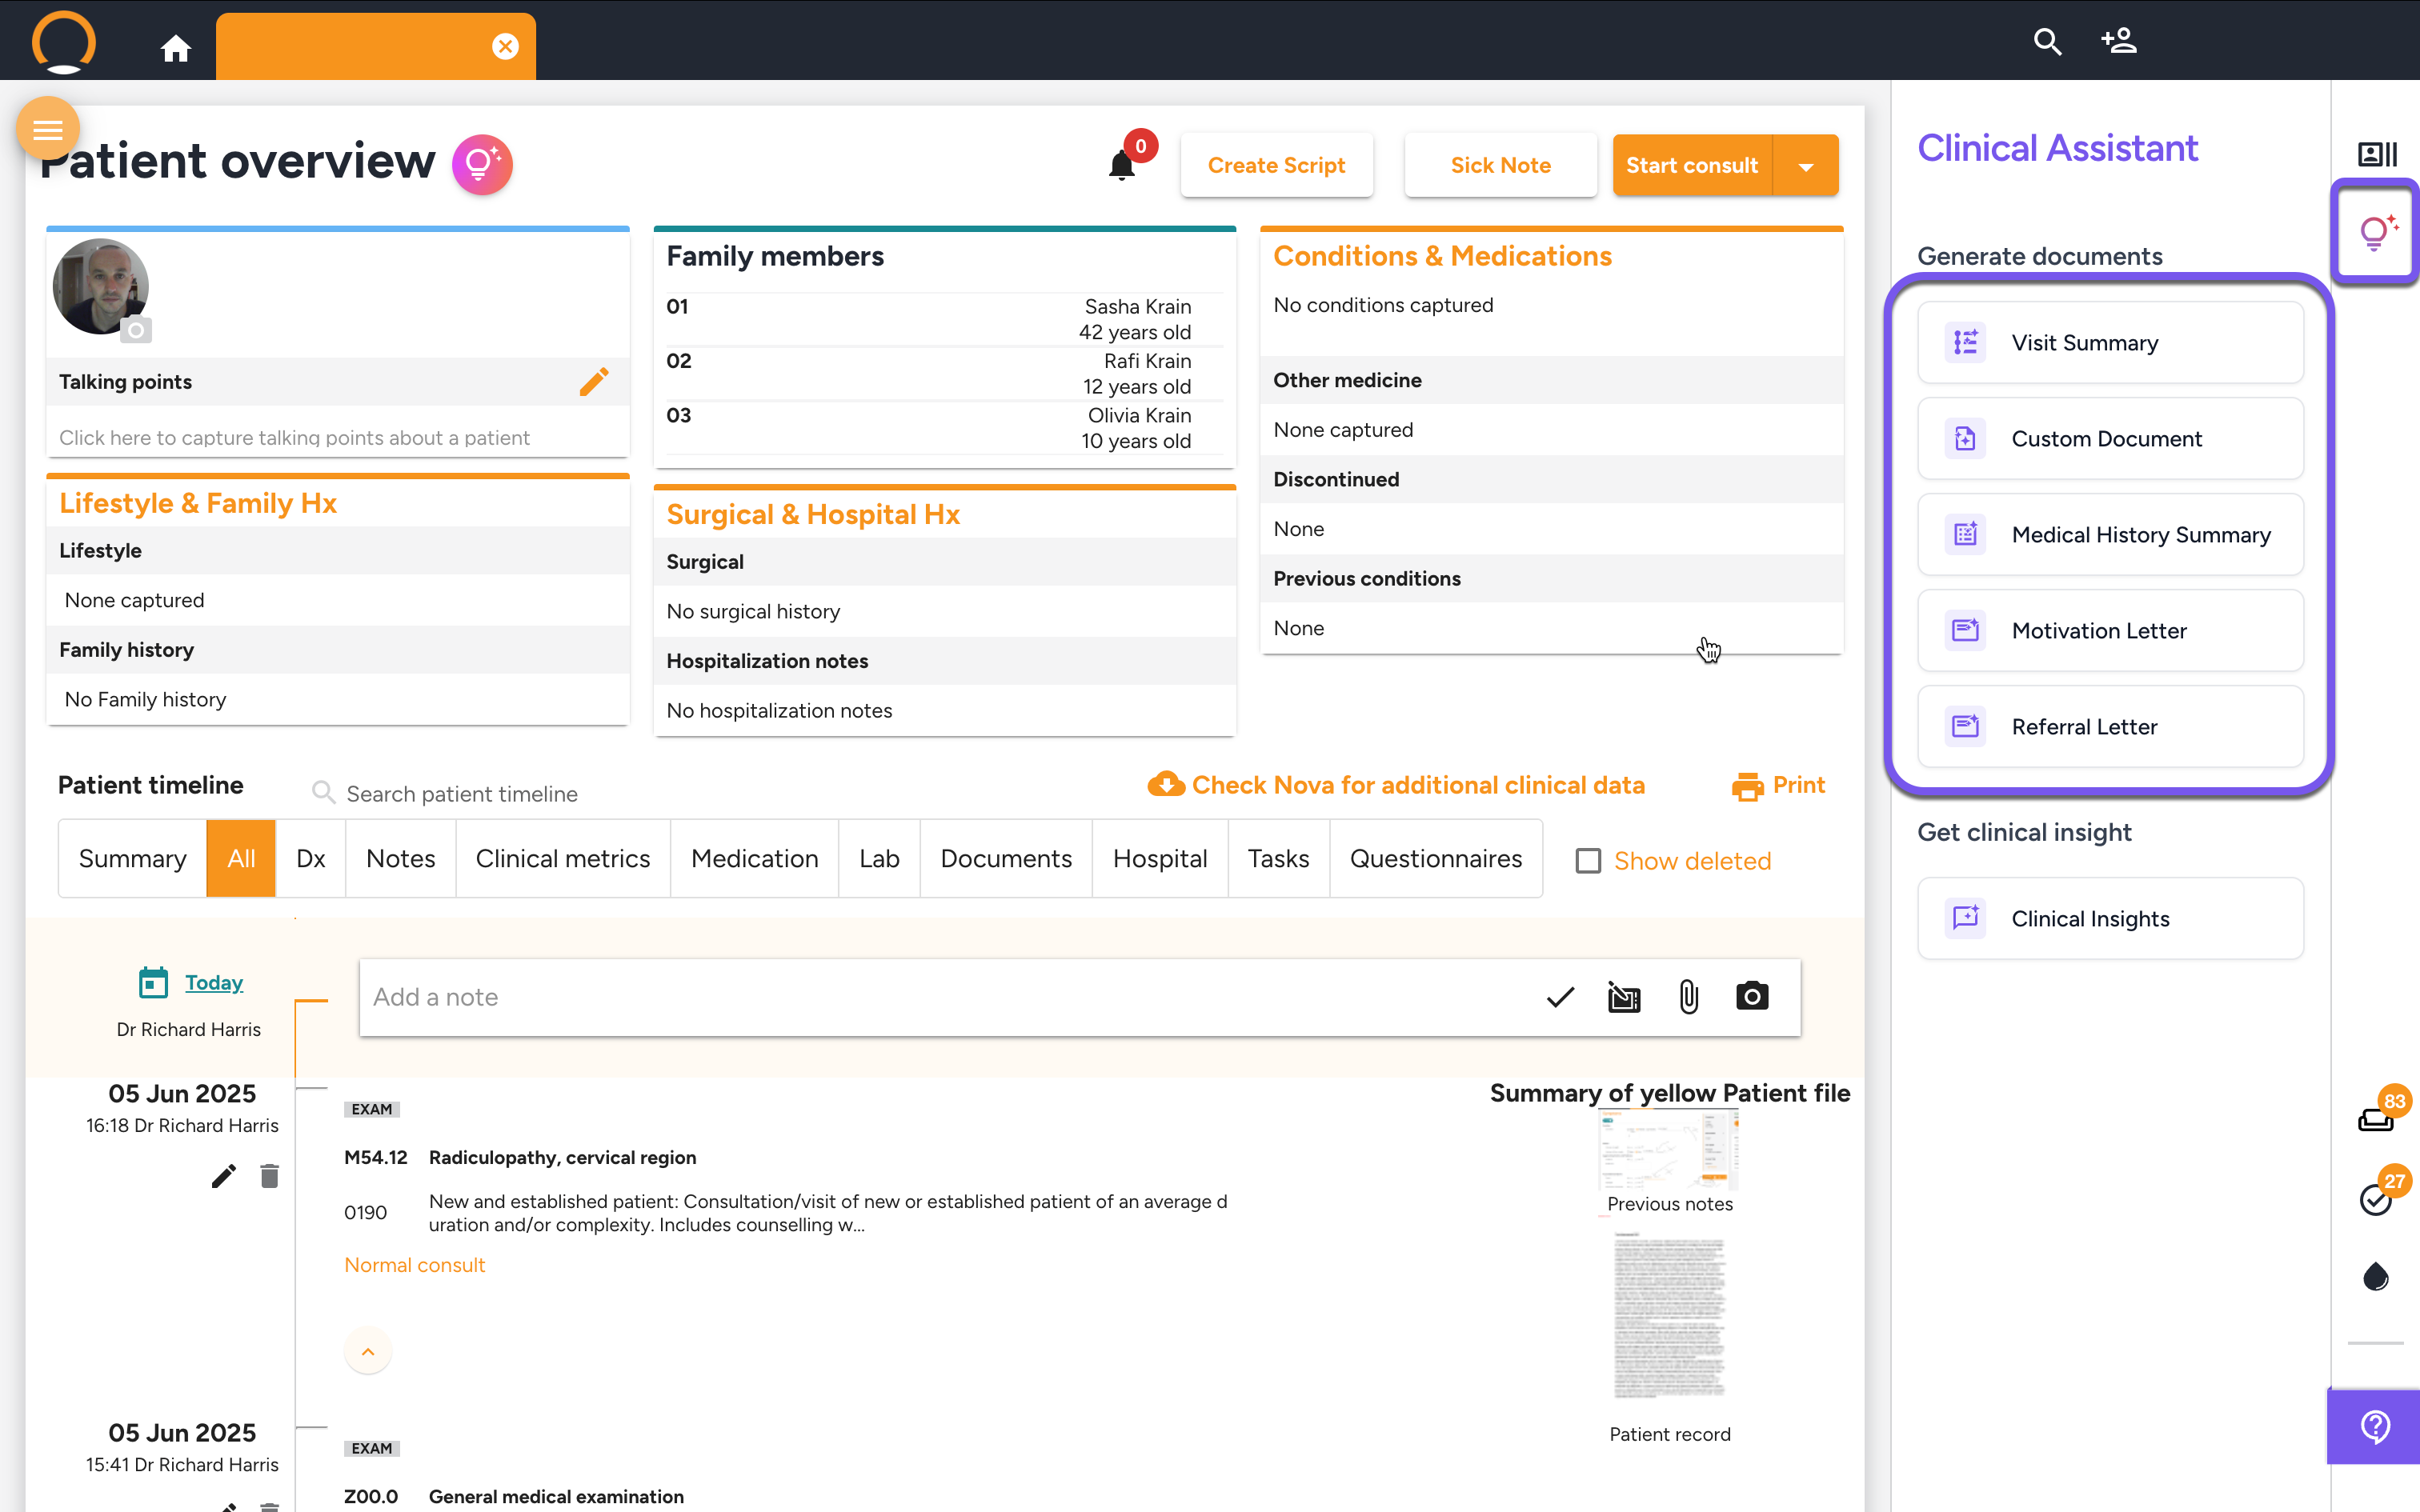
Step 2: Launch the Clinical Assistant
On the right-hand side of the Patient Overview screen, click on the Lightbulb icon (💡) to open the Clinical Assistant, then click on "Custom Document".
Method 2: During a Consultation (In-Consult)
This method allows you to create the document as part of your standard consultation workflow.
Step 1: Start or Continue a Consultation
Begin a new consultation or open a saved one for the patient.
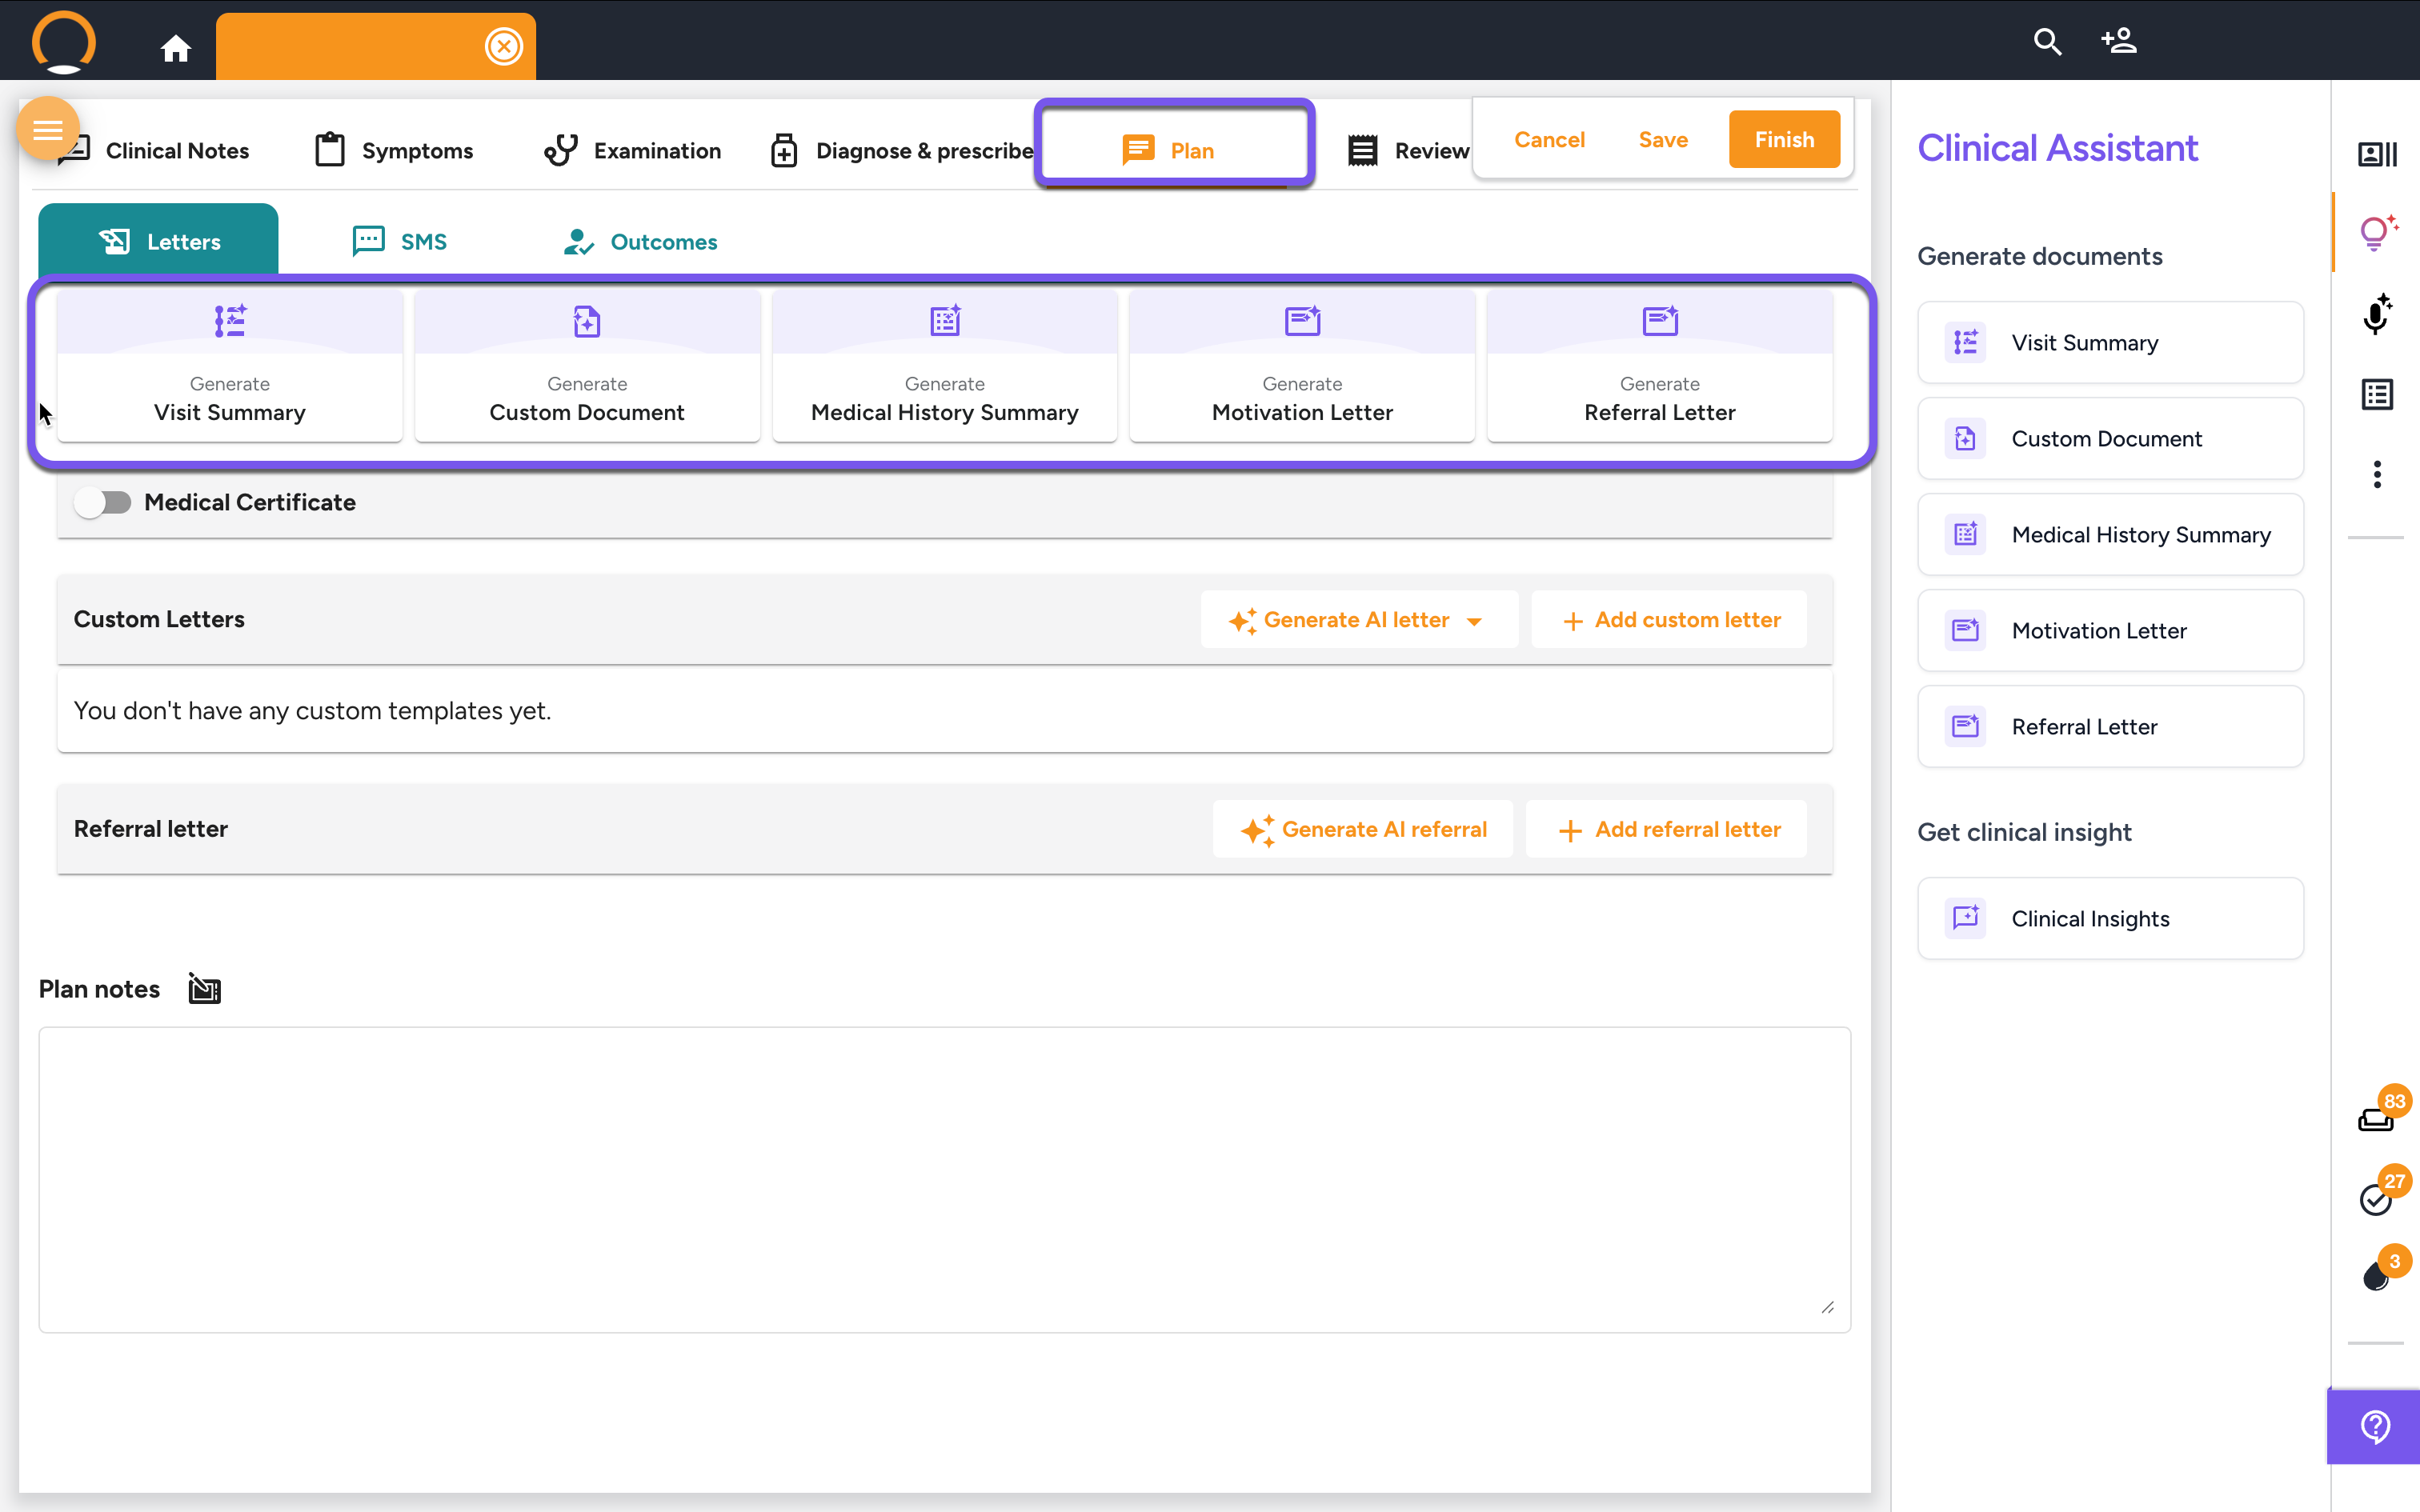
Step 2: Navigate to the Plan Tab
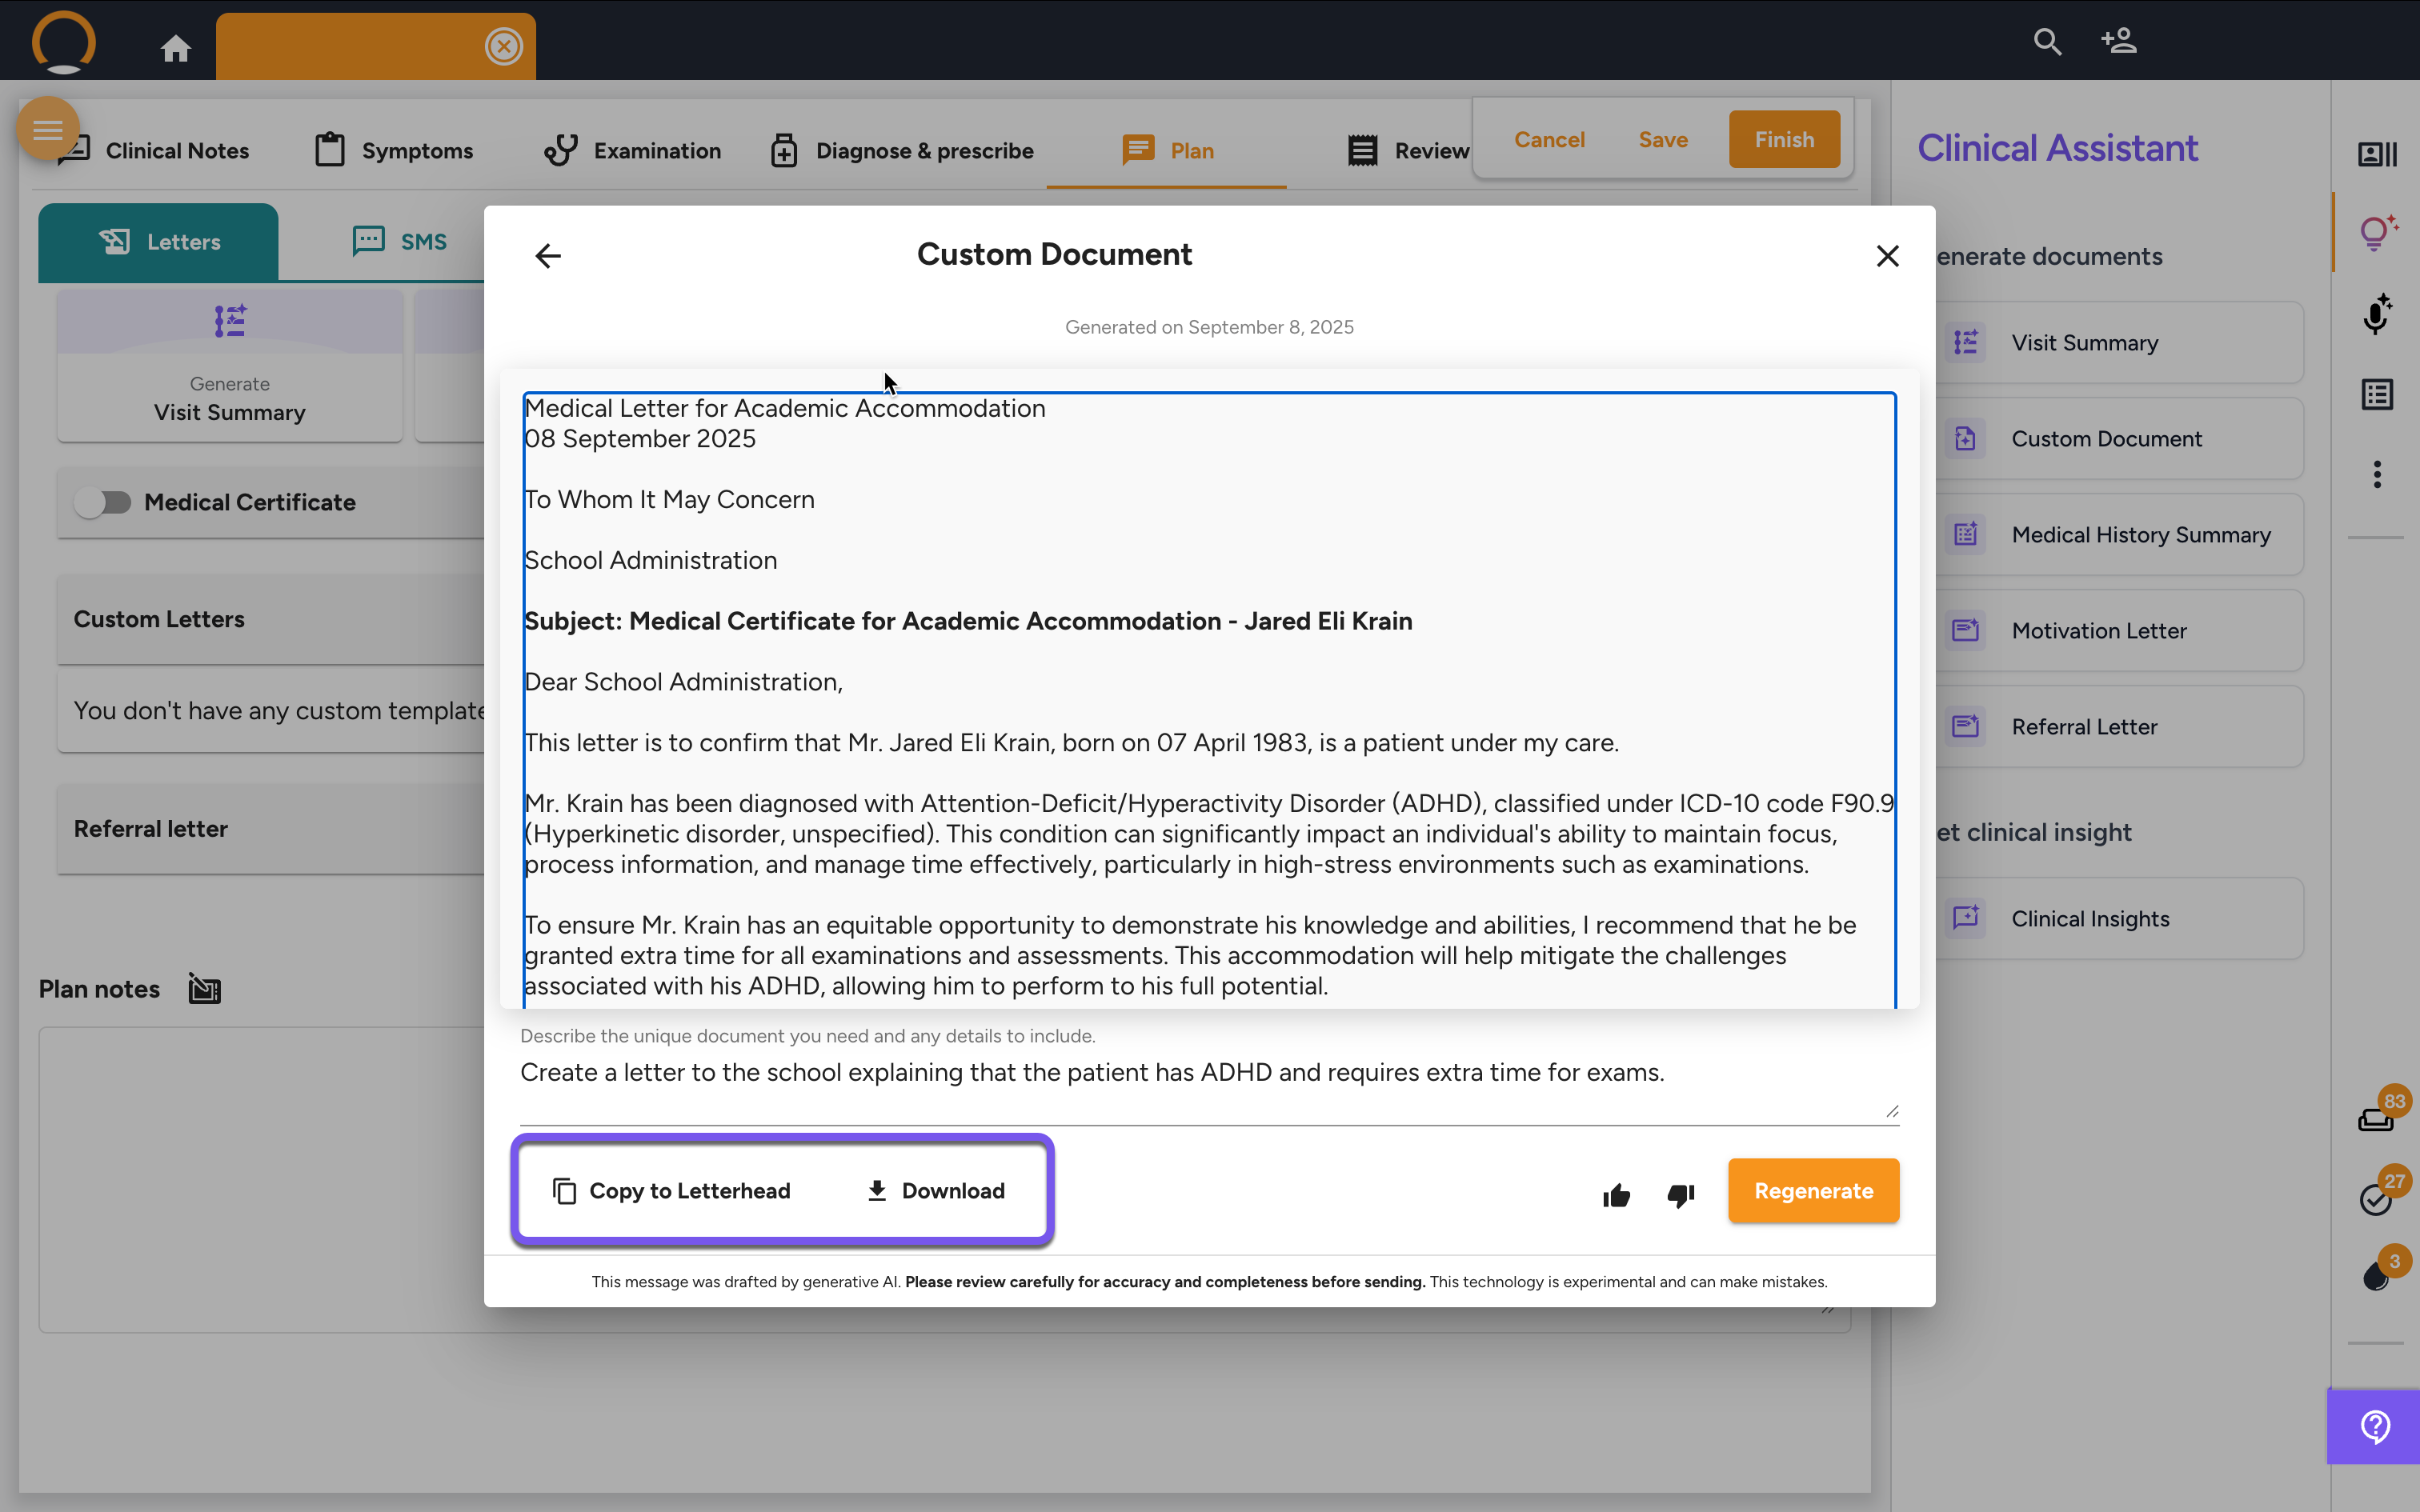
Proceed through the consultation steps until you reach the "Plan" tab. Under the "Letters" section, click on "Generate Custom Document".
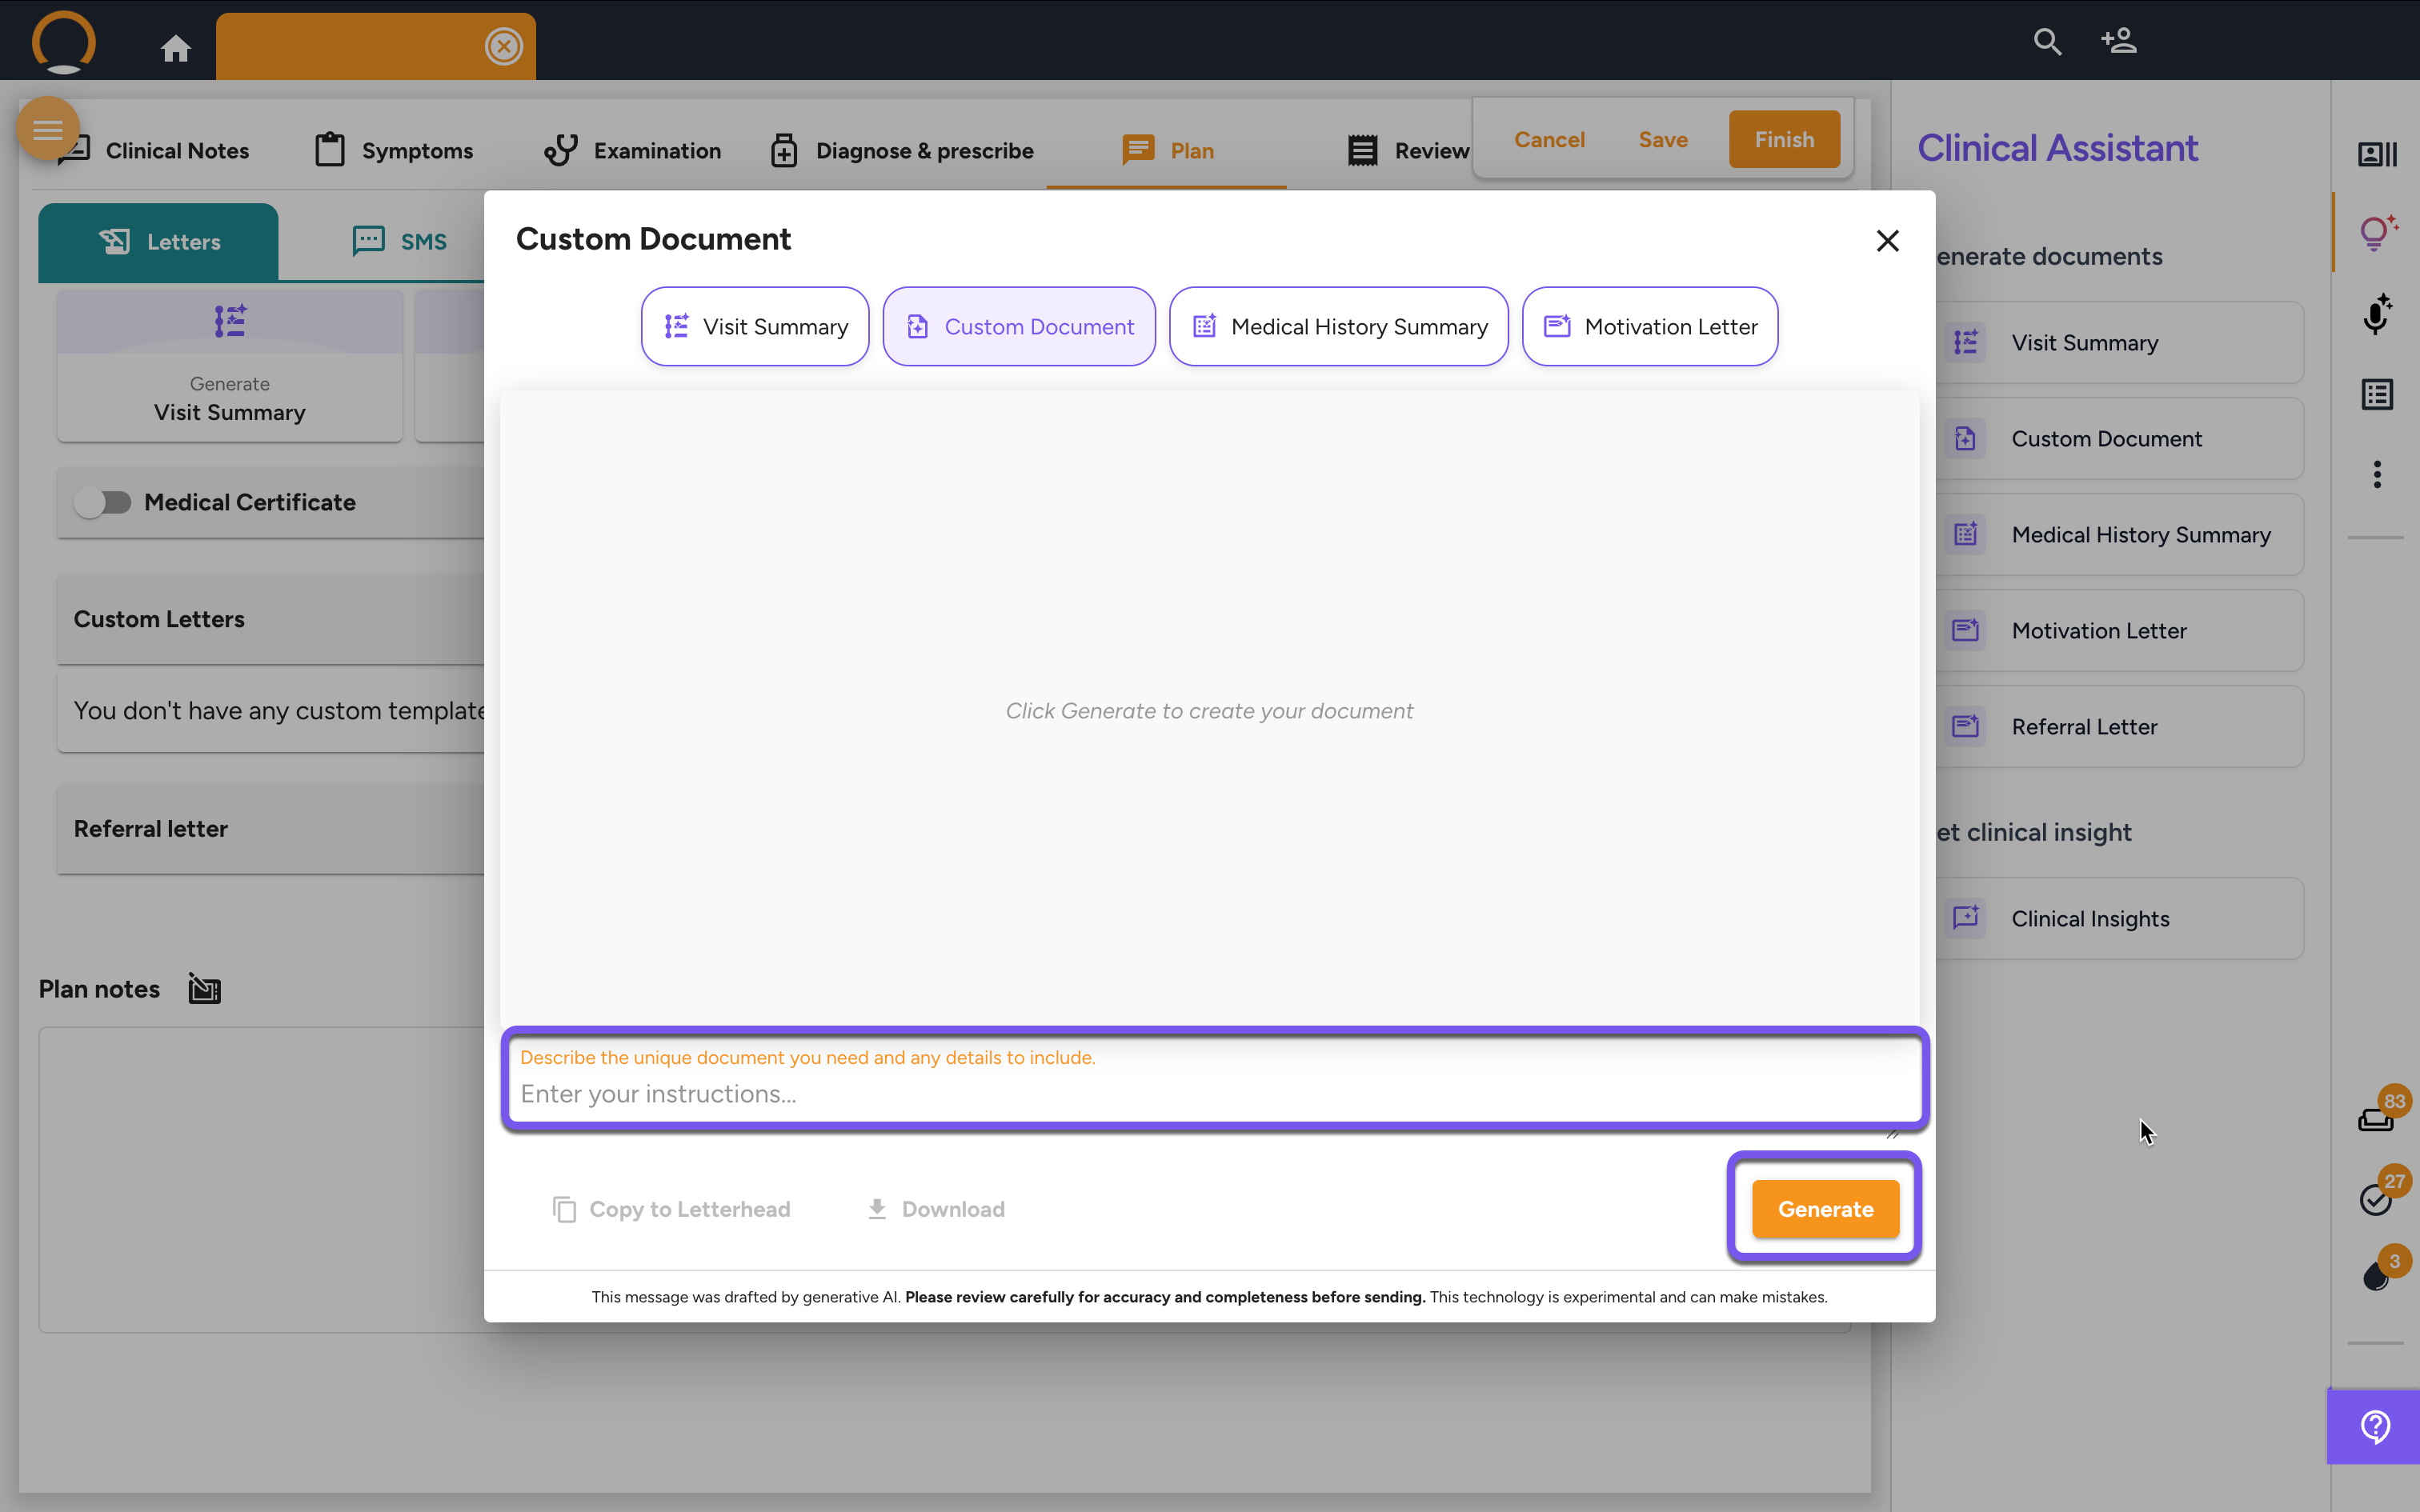
Step 3: Provide Instructions and Generate the Document
After launching the Custom Document generator from either method, a pop-up window will appear. Before clicking "Generate," you must provide clear and descriptive instructions for the document you want the AI to create. The more specific your prompt, the better the result.
In the text box labeled "Enter your instructions...", describe the document. For example:
- "Create a letter to the school explaining that the patient has ADHD and requires extra time for exams."
- "Draft a letter for the airline stating that the patient needs to travel with a portable oxygen concentrator for medical reasons."
- "Generate a summary of the patient's recent mental health consultations for their social worker."
Once you have entered your instructions, click "Generate".
Step 4: Review and Refine the Document
The AI will now generate a draft of the custom document, pulling relevant information from the patient's timeline to support your request.
Review the text for accuracy, tone, and completeness.
Refine (Optional): If the document needs changes, you can add further instructions in the text box at the bottom (e.g., "Make the tone more formal" or "Include the dates of their last three visits") and click "Regenerate".
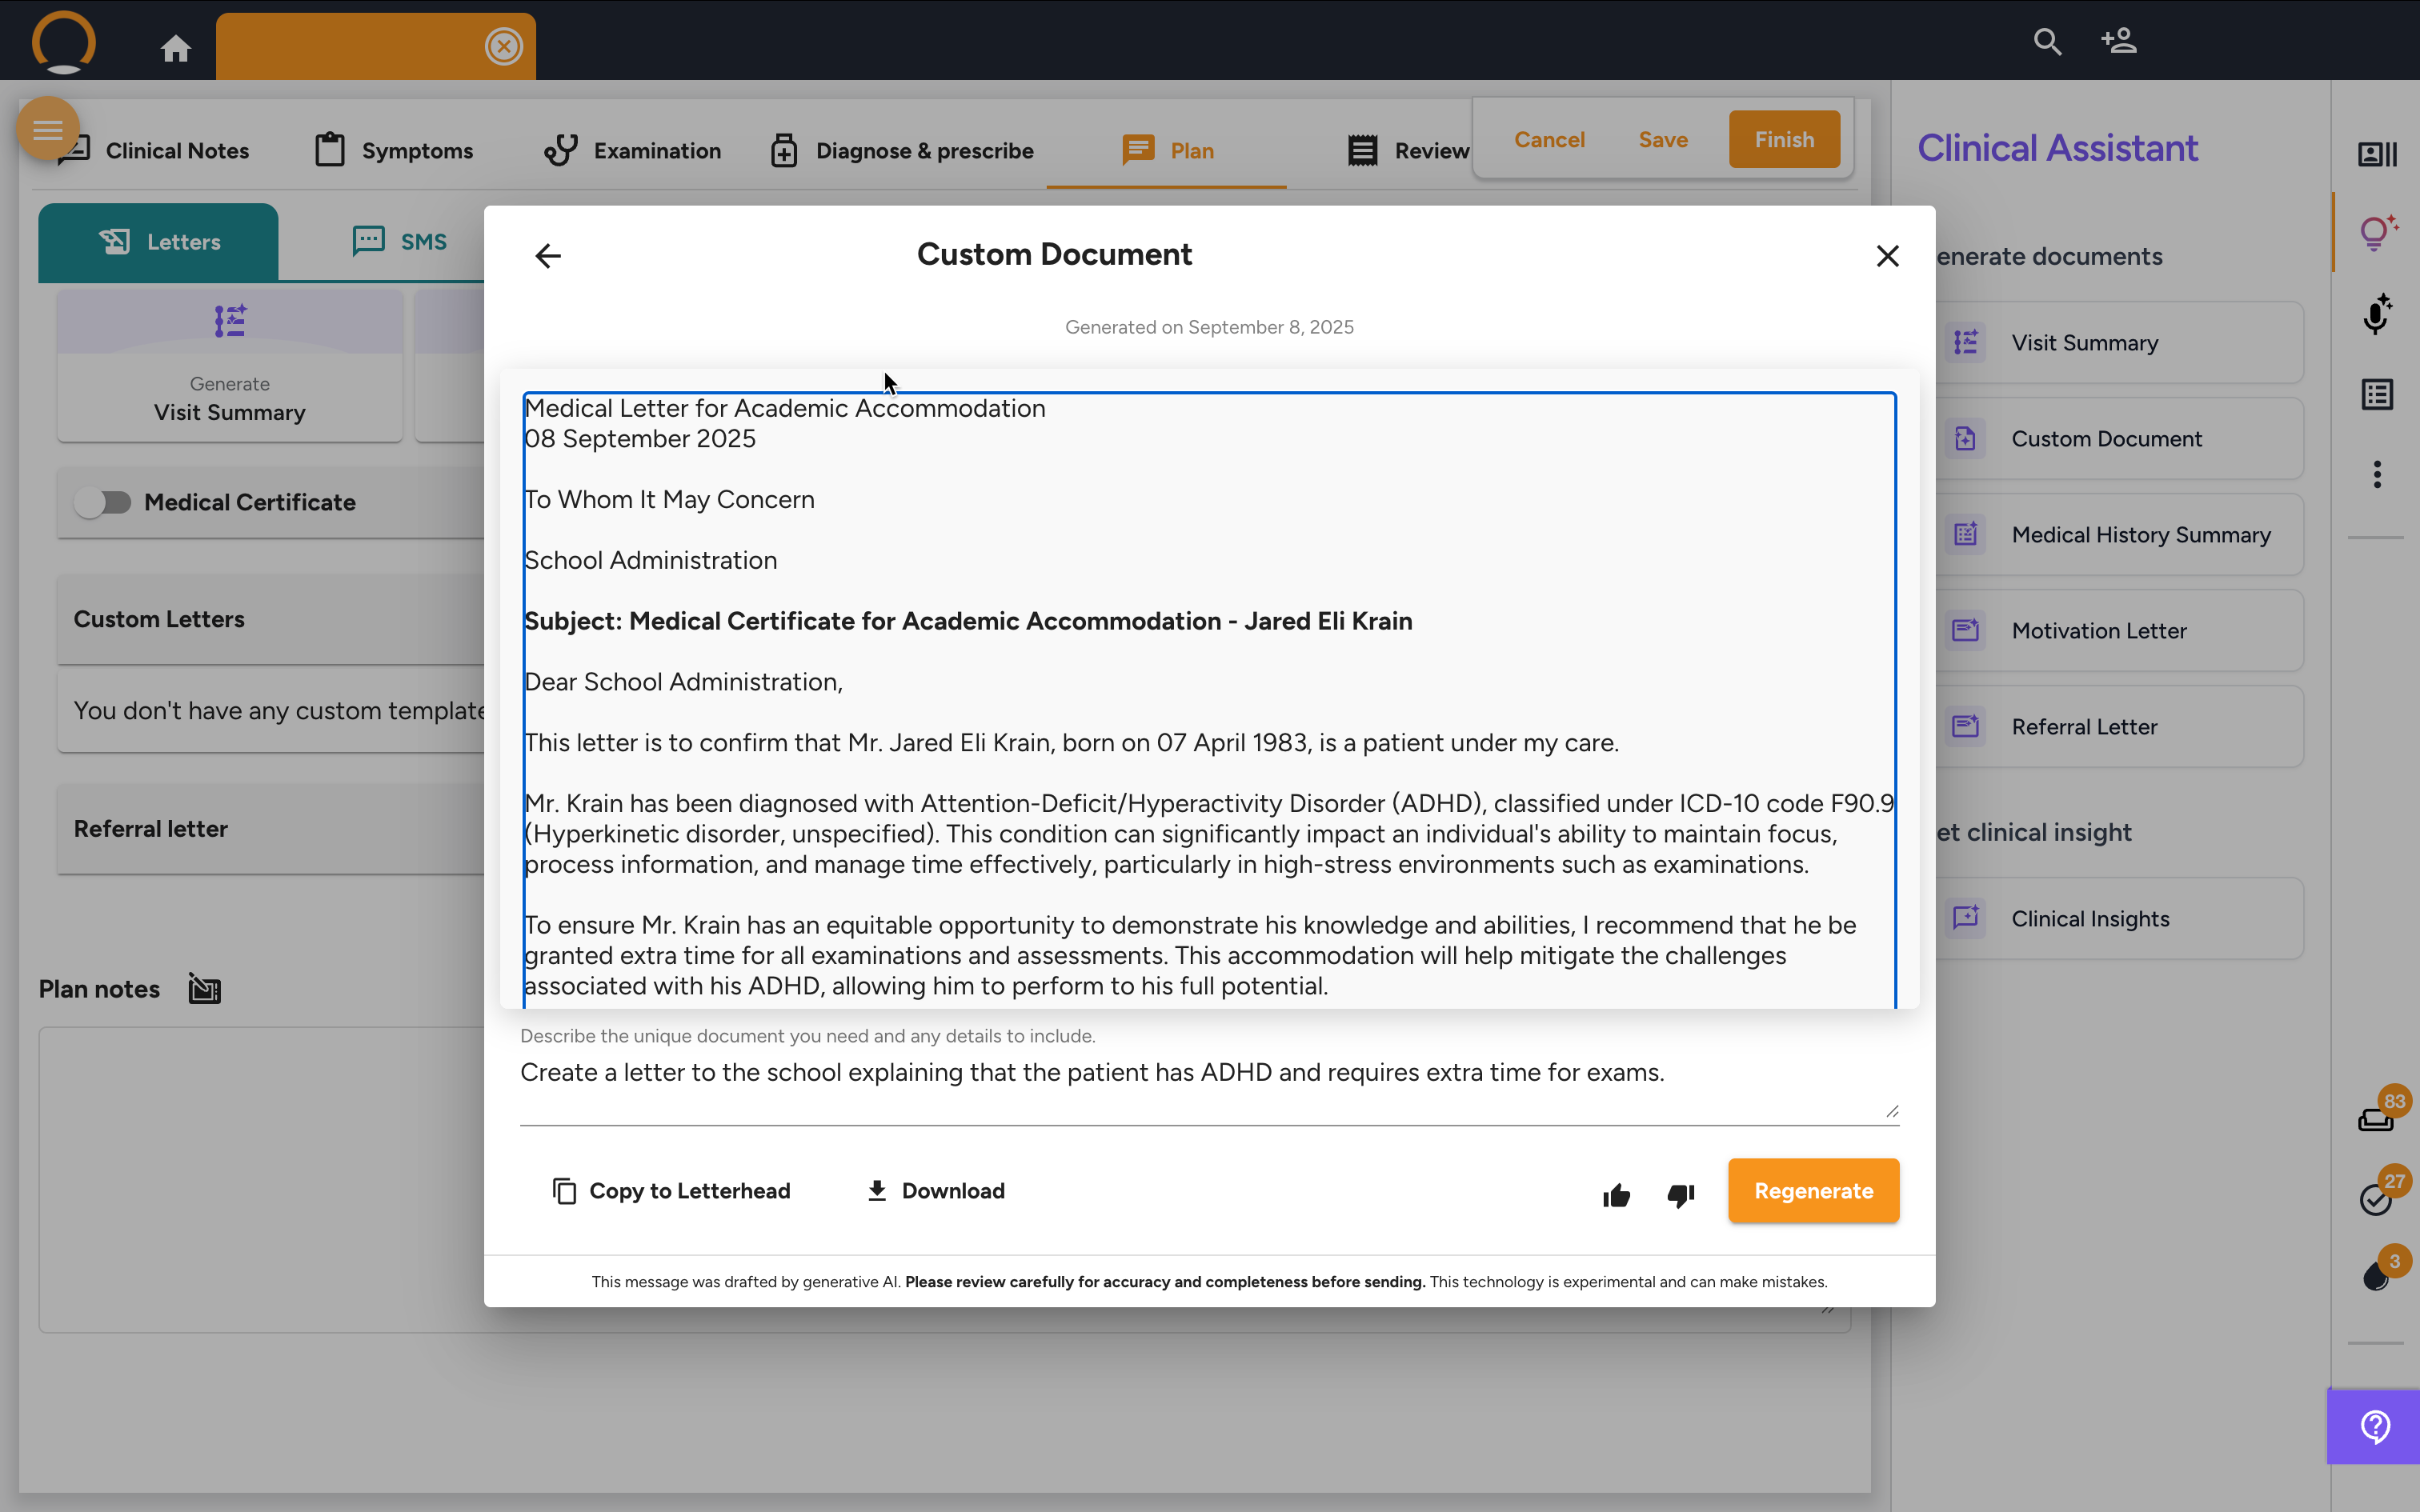
Step 5: Finalize and Share
Once you are satisfied with the document, you have several options:
- Copy to Letterhead: Instantly transfers the text onto your practice's professional letterhead.
- Download: Saves the document to your computer.
Custom Document - FAQ
Q: What is the main purpose of the Custom Document tool? A: This is your flexible "do-anything" tool for situations where standard templates for referrals or summaries don't apply. It's designed for creating unique documents like special school forms, airline letters, or custom reports for other institutions.
Q: How do I get the best results? A: The quality of the output depends directly on the quality of your instruction. Be as clear and specific as possible in the text box about what the document is for and what information it needs to contain. Think of it as giving instructions to a personal assistant who has access to the patient's file.
Q: Can I save a unique document I create to use again later? A: Yes. Once you have generated a custom document that you are happy with, you can save it as a custom template. This is perfect for recurring, non-standard requests, as the template will then be available for quick use in the future.
Q: How is this better than just writing a letter in a separate word processor? A: This tool is directly integrated with the patient's clinical data. It saves you the immense effort of manually searching the timeline, finding relevant details, and copy-pasting them into a blank document. The AI does the data gathering and initial drafting for you based on your simple, plain-language instructions.