
How to send scripts directly to Dis-Chem
Step 1: Create the Prescription
- Begin by starting a consultation with the patient as you normally would.
- Navigate to the ‘Medication’ tab under the ‘Diagnose and Prescribe’ section.
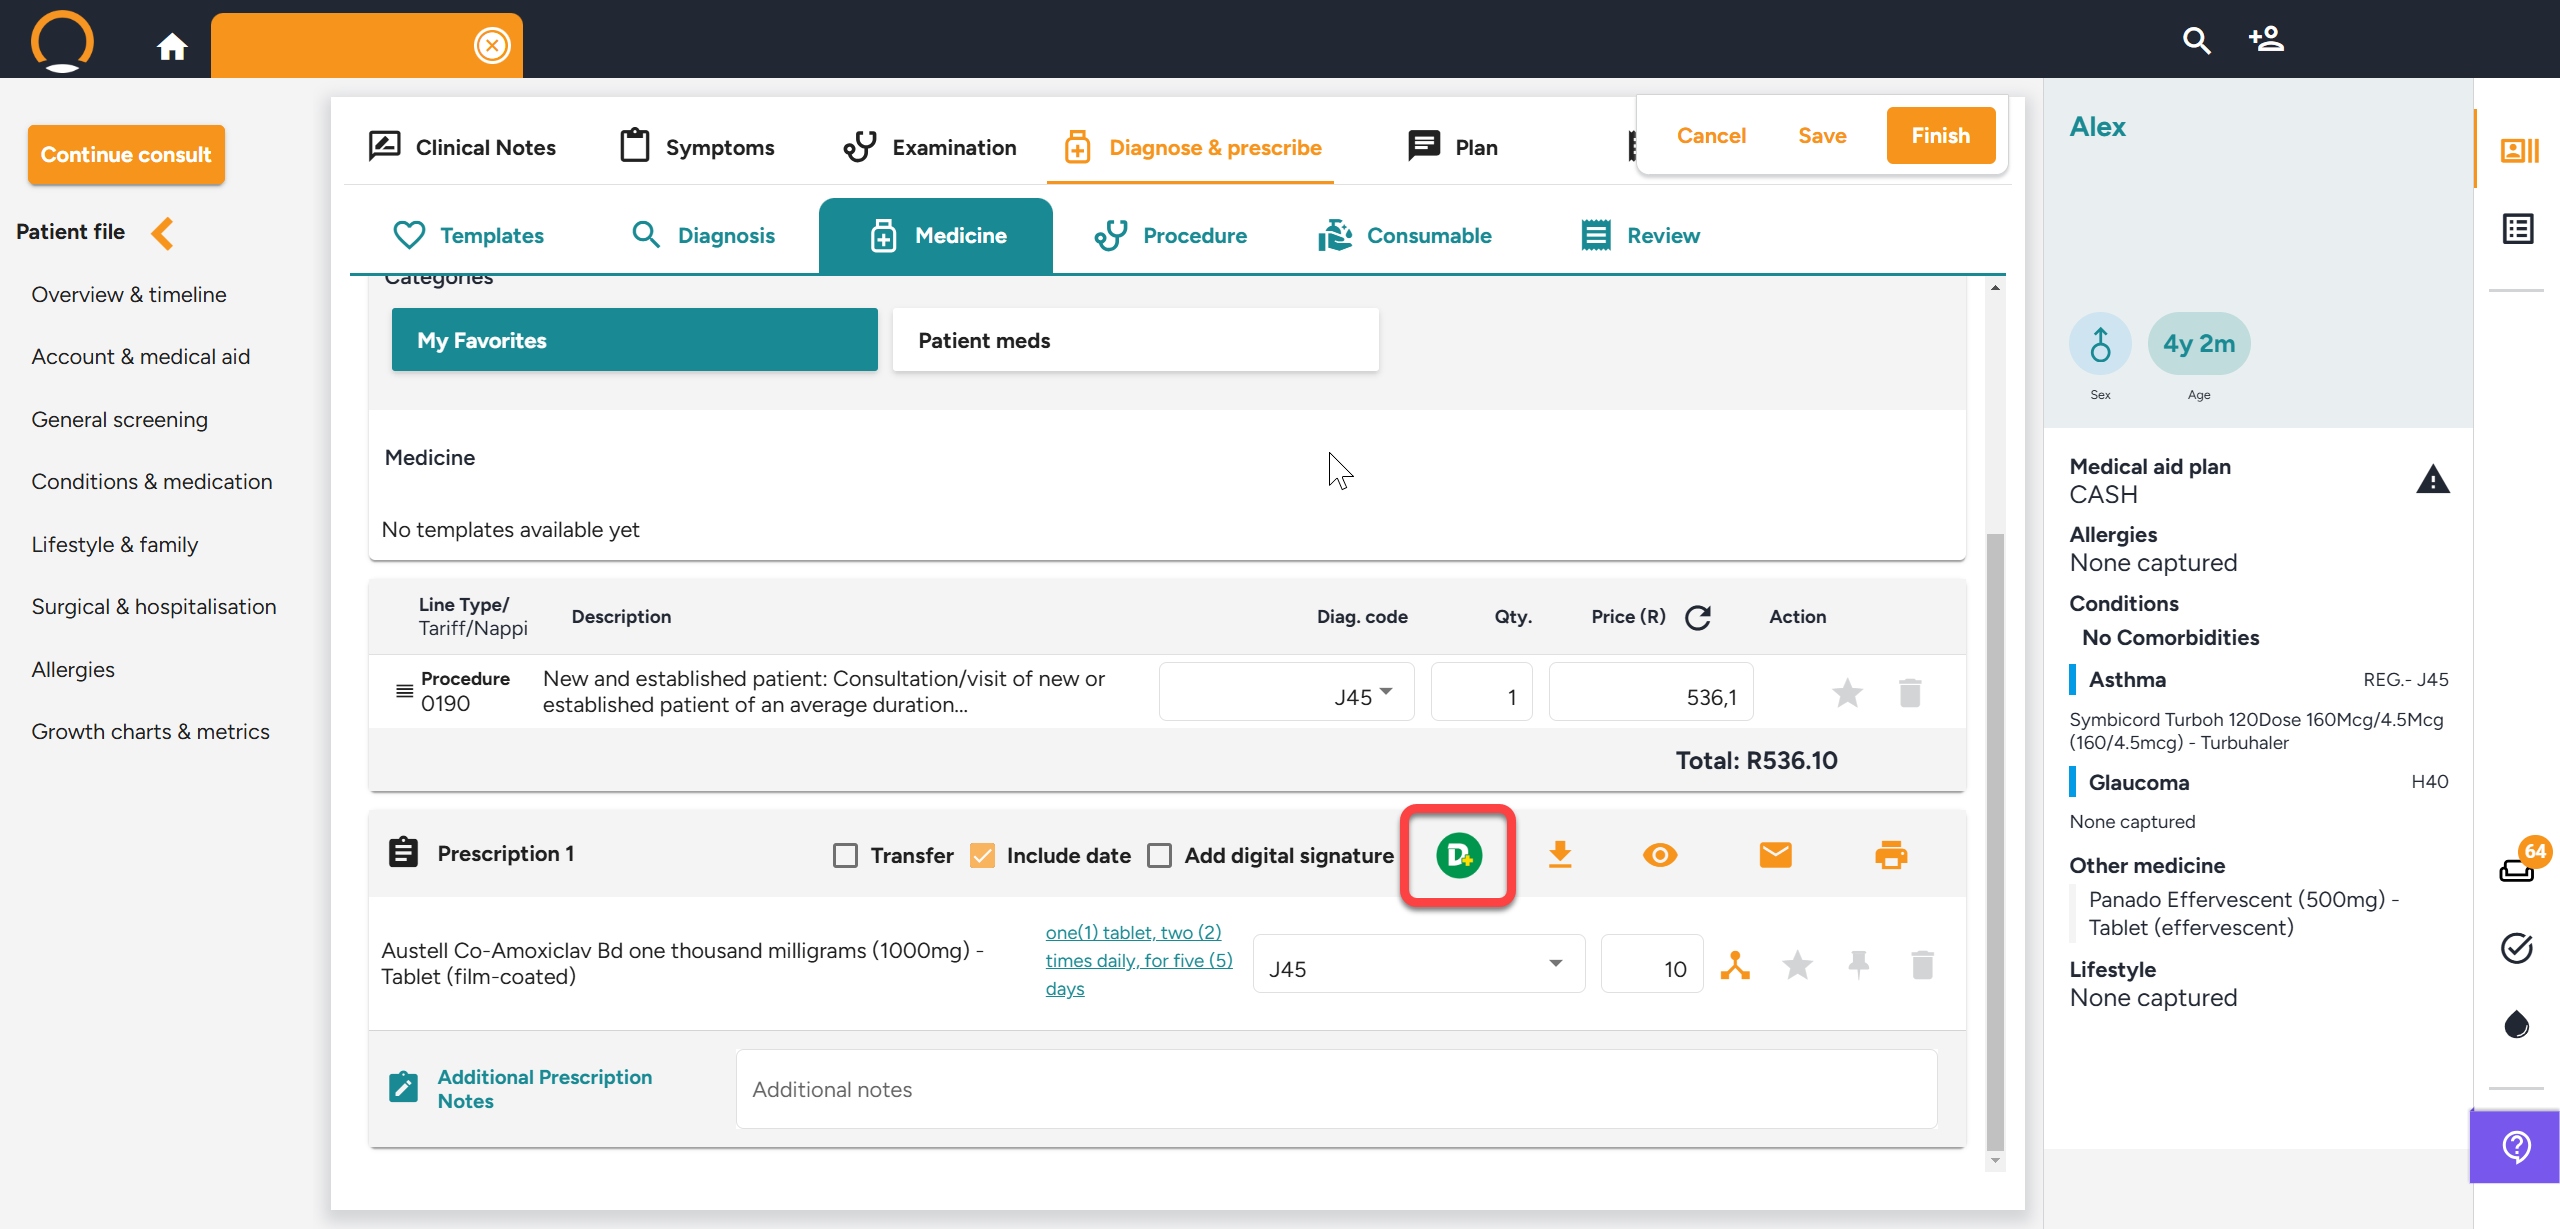
Step 2: Look for the Dischem Icon
- Once the prescription has been created, you will see a Dis-Chem icon displayed next to the script.
- Click on this Dis-Chem icon to initiate the electronic prescription process.
Step 3: Choose a Dis-Chem Store
- A new window will pop up, displaying a list of Dis-Chem pharmacies.
- Use the search field to find the required store quickly.
To save time in future consultations, you can mark the selected store as a favourite—favourites will appear at the top of the list.

Step 4: Confirm Prescription Submission
- After selecting the desired store, the system will electronically transmit the script to that Dis-Chem branch.
- A confirmation message will appear to let you know the script was successfully sent.

Step 5: View the Sent Script in the Patient Timeline
- The prescription and its sent status will automatically be documented in the Patient Timeline, allowing for easy tracking and audit purposes.

Step 6: Cancel an Unprocessed Script (If Needed)
If the script hasn’t been processed by Dis-Chem yet, you can cancel it in one of three ways:
- Within the consult: Go to the Prescription section under Medicines and click on ‘Cancel’ next to the prescription.
- From the Patient Timeline: Locate the script and select ‘Cancel’, then confirm the cancellation.
Confirm when prompted to complete the cancellation process.

Dis-Chem eScript – Frequently Asked Questions
1. What if the patient doesn’t want to use Dis-Chem?
No problem! You can follow the normal process and print or email the script to their preferred pharmacy.
If the script has already been sent to Dis-Chem:
- Cancel it from the Patient Timeline, or
- If you're still in the consult, cancel it in the Prescription section under Medicines.
If Dis-Chem has already started processing the script, the doctor or patient will need to contact Dis-Chem directly to cancel it
2. What happens if Dis-Chem doesn’t have stock?
Dis-Chem will call the patient to let them know. They will:
- Recommend another nearby Dis-Chem store with stock, or
- Cancel the script if needed.
3. What if the patient doesn’t collect their medication?
Dis-Chem will try to contact the patient to remind them or follow up.
4. Can the patient get a copy of the script once it’s sent to Dis-Chem?
No. Once a script is sent to Dis-Chem, it becomes locked to prevent printing or emailing.
Only the doctor can view it. This protects against fraud and duplicate dispensing.
5. Why can’t I print or email the script after sending it to Dis-Chem?
To prevent duplication or misuse of prescriptions.
Only the electronic copy sent directly to Dis-Chem is considered valid.
6. What if I need to add more medication after sending the script?
You can add the new items, and the system will create a new prescription, which you can send to Dis-Chem separately.
7. What if the patient goes to Dis-Chem and they can’t find the script?
Ask the patient to contact the practice.
The doctor can look up the order number in the patient’s file and share it with the patient.
Dischem can use that number to trace the script.
8. If I split a script in Healthbridge Clinical, do both parts have to go to Dis-Chem?
No. You can choose:
- To send just one part to Dis-Chem, or
- Send both separately.
- Each script is handled on its own, you decide how to manage it.